Author Topic: a new flame eater, just to be different  (Read 18606 times)

Offline madjackghengis

  • Hero Member
  • *****
  • Posts: 717
  • big engine
a new flame eater, just to be different
« on: March 28, 2011, 12:19:10 PM »
Hi all, after seeing the success of so many "poppins", and playing around with ideas, I thought I'd build another to try out some new intersections of different engines.  This is basically a "poppin", but scaled up a bit, with a three quarter inch bore, an inch and a quarter stroke, cast iron piston in a cast iron cylinder, with a cast iron head.
I started with a stick of cast iron, about an inch and a quarter diameter, turning the cooling fins first so I could use the tailstock for support.


starting the cooling fins


fins completed, time to drill before boring.


After step drilling and then boring just undersized, I reamed it out with a .750 reamer


I want this to have good compression, so I'm going to lap it using a piece of delrin plastic to hold the compound, and have cut it to just barely fit in the bore as reamed.


after smearing the lap with some fine valve grinding compound, it is rolled on a steel table with a piece of steel to embed the compound in the plastic, and this spreads the compound evenly as well


the lap is put in the lathe, the cylinder held in hand, and it is lapped until the feel of the whole of the cylinder is the same, and there are no tight spots.


a piston has to be turned up, so I put a pipe cap on a piece of pipe, and turned the o.d. to just barely fit the bore.


I wrapped the piston with a piece of notebook paper to protect its finish, and bored out the threads, bored to get about a forty thousandths wall, and to get a flat surface parallel to the front face, on the inside


once the piston is ready, I used some polishing compound as a carrier, and will be using jewler's rouge to lap the piston to the cylinder


with the piston screwed to the end of an old throttle shaft of brass out of a carburetor, I've rubbed in the rouge and clamped the shaft in a vise to hold the piston steady


the cylinder is carefully rotated and moved back and forth as it eases into the bore, the compound opening it up just a bit as it goes


a look at the piston with compound blackened by the lapping, ready for fresh compound.


the final lapping is done with both piston and cylinder in hand, for the feel and to be certain any tight spots are found and worked out


with the lapping completed, the cylinder is set up in the milling vise for mounting holes to be center drilled


after which the bolt holes are drilled and tapped


here I'm squaring up the top side of the frame of the engine


flipping it over, getting ready to flycut the bottom side


and flycutting it, using soluable oil for coolant


at this point, it is time to square up the face where the cylinder will mount


flycutting the front face


the final cut, finishing the end


touching off with the end mill, using a cigarette paper to get a dead zero


milling the slot which will set up the thickness of the front face where the cylinder mounts


touching off the back side, again with a cigarette paper for zero clearance on the cutter


touching off the front side, getting ready to mill the slot for the crank assembly


starting the slot, lots of chips and fluid


lots more chips, removing a couple cubic inches of volume


finishing up the slot for the crankshaft, taking light cuts the full depth, and getting the two pillars even in thickness
this about does it for today, more to come soon.  Mad Jack


Offline saw

  • Hero Member
  • *****
  • Posts: 1003
  • Country: se
  • lucky amateur
    • Svenssons AckordsWerkstad
Re: a new flame eater, just to be different
« Reply #1 on: March 28, 2011, 12:44:15 PM »
This will be very intressting to follow  :thumbup: :thumbup:
_________________________
Greetings / Benni
http://myprojecty.wordpress.com/category/steam-engine/

Offline madjackghengis

  • Hero Member
  • *****
  • Posts: 717
  • big engine
Re: a new flame eater, just to be different
« Reply #2 on: March 29, 2011, 11:35:57 AM »
Thanks Saw, well, to start on the crank, I put a piece of free machining inch and three quarters in the lathe, center drilled it, drilled and reamed out a three sixteenths hole, about an inch deep, as the mainshaft holes.  I will be parting off two crank cheeks, after I put the stock in the milling vise and drill and ream the crank pin hole, this ensures the two cheeks will hold the shafts and pin parallel to each other.


with the center hole drilled and reamed, the stock is set up square in the milling vise, and the crank pin hole drilled and reamed


the finished hole will give an inch and an eighth stroke


now it needs to be cut off, and the two crank cheeks faced off parallel to each other


ready to go back in the lathe


two slices a bit over a quarter in thick, enough to face off clean


facing the other side off


setting up the cheeks for balancing holes to be drilled


center drilling, and drilling a pilot hole for each balance hole


opening up the holes to a size which looks good


cleaning up the crank cheeks for locktite to hold the shafts and pin in place


pressing in the crankpin, using a roller bearing in the main shaft holes for alignment


using a piece of tube, a bar, setting up to press in the mainshafts


pressing a shaft home


the assembled crank laying in the slots of the frame


another view of the crank laying in place, that's it for now, more to come soon, Mad Jack

Offline cfellows

  • In Memoriam
  • Sr. Member
  • *****
  • Posts: 303
Re: a new flame eater, just to be different
« Reply #3 on: March 31, 2011, 10:53:16 AM »
Nice looking engine.  Will be interesting to see how she runs!

Chuck

Offline saw

  • Hero Member
  • *****
  • Posts: 1003
  • Country: se
  • lucky amateur
    • Svenssons AckordsWerkstad
Re: a new flame eater, just to be different
« Reply #4 on: March 31, 2011, 11:18:21 AM »
madjackghengis I have to ask you some questions about the flycut (I'll got min this morning but I have never run it). How fast shell the drill run during flycuting?
How deep can it take? I suppose it deppend on the mill, I'll got an china-mill, a small one..  ::)

Your progress on youre engine is fantastic.  :bow:
_________________________
Greetings / Benni
http://myprojecty.wordpress.com/category/steam-engine/

Offline BiggerHammer

  • Full Member
  • ***
  • Posts: 130
  • Country: us
Re: a new flame eater, just to be different
« Reply #5 on: March 31, 2011, 08:41:05 PM »
Thank you for showing how you lap your cylinder and piston. Looks much more effective than my method.

Offline Bogstandard

  • Bogs Group
  • Hero Member
  • *****
  • Posts: 1107
Re: a new flame eater, just to be different
« Reply #6 on: March 31, 2011, 08:51:28 PM »
Lookin' good Jack.

You seem to be gettin' a bit of a fetish for them thar lickers.

Be careful, they can take over your life.


John


If you don't try it, you will never know if you can do it.

Location - Crewe, Cheshire

Skype - bandit175

Offline sbwhart

  • Global Moderator
  • Hero Member
  • *****
  • Posts: 3530
  • Country: gb
  • Smile, Be Happy, Have Fun and Rock Until you Drop
Re: a new flame eater, just to be different
« Reply #7 on: April 01, 2011, 02:01:16 AM »
Great job Jack,  :thumbup:  :clap: :clap: :clap:

All the clutter on your benches is very interesting too, trying to work out what all the bits and pieces are for.

  :wack: Yes I know I'm a nosey bugger.

 :headbang: :headbang: :headbang: :headbang:

Cheers

Stew
A little bit of clearance never got in the road
 :wave:

Location:- Crewe Cheshire

Offline madjackghengis

  • Hero Member
  • *****
  • Posts: 717
  • big engine
Re: a new flame eater, just to be different
« Reply #8 on: April 01, 2011, 12:00:15 PM »
Thanks all for the interest, Saw, run your flycutter as fast as you can on aluminum, with as fine an edge as you can hone on it with a stone, and use coolant, try to have the cutter overhang either side by just a little bit, and make sure you're head is trammed (perpendicular to the table) and you'll get a nice finish.  John, it's one of those things that bites you, and then you have this disease :lol:, I get too many ideas looking at everyone else's projects, and keep wanting to try them out.  Stew, don't worry about nosey, I can't help but look at all my mate's clutter as well, with interest and wonder, suffice to say some are parts that didn't work but might work on something else, some are potential parts, and some are just clutter, there for confusion's sake.  Mr. Hammer, I learned to lap for fuel pumps for diesels, and for aircraft hydraulics, I can't help it, when I have fine grained cast iron, it demands a finish worthy of its structure and capacity, as it's so easy to work with and get a gorgeous finish.
    I've been busy writing this morning, but I've got more to post, so I will have substantially more posted tomorrow, and maybe a video if I'm lucky.  John, every time I see a flame eater, it's got a different valve arrangement, or some other substantial part is interesting, and I can't seem to not build it into "just one more before I get back to my main post".  Then I also get the comments of those who come into my shop and that just takes me over the top and I've got to grab another piece of cast or billet or something, and get on with the idea.  This engine is your fault, with that crazy valve arrangement :poke: :lol: :beer:  Cheers, Jack

Offline Bogstandard

  • Bogs Group
  • Hero Member
  • *****
  • Posts: 1107
Re: a new flame eater, just to be different
« Reply #9 on: April 01, 2011, 12:41:37 PM »
Jack,

I know exactly where you are coming from.

I got enthralled with Chuck's poppet valve engines a while back, and just had to make one, but got carried away experimenting with different cams. It is half way thru a bling exercise, one of the many engines I have to finish off after the proving run. My flame licker takes priority though, that is being finished off first.

This is what I ended up with when I tried to make an engine like Chuck's.


John
If you don't try it, you will never know if you can do it.

Location - Crewe, Cheshire

Skype - bandit175

Offline madjackghengis

  • Hero Member
  • *****
  • Posts: 717
  • big engine
Re: a new flame eater, just to be different
« Reply #10 on: April 02, 2011, 12:03:21 PM »
So John, you just come back with a challenge of another engine to have to look at and consider making a copy, well, if that's your answer, here's mine :lol:


cutting off the end of the con rod shaft stock (the bent end, because this is not an elbow engine)


with the shaft in a spindex, milling the end of the rod flat to go in the gudeon block of the piston


having milled both sides, drilling the gudeon pin hole, a sixteenth of an inch diameter


the big end of the rod will be a two piece design, as in the plans for the poppin', cutting off a piece of bronze for the big end


laying it out for cutting in two


some jobs are just too small for machine work


the two pieces, ready for some machining


both pieces were set up in the vise with a square, I used a three sixteenths end mill to slot the first piece, forgot to take a picture


setting up to machine the second piece to fit the first


starting machining, this will end up a "tongue" to fit in the slot of the other


finishing cut on the first side


finding the second side with a cigarette paper, this side is critical as the fit has to be snug without the solder


second side found, ready to mill


making chips out of bronze


more chips


after measuring, making the final cut


the two pieces slip together just like they were made for each other, then soft soldered, forgot to take a picture oops :headbang:


clamped in the vise, finding the center line


first, one side


then the other, and center up using the DRO


changing to a pointy wiggler end, to find the end of the "tongue"


found, mill zeroed here for the crank pin


center drilled, ready for drilling for reaming


just under reamer size


the reamer set in place


reaming the crank pin hole


and done, now the clamp hole


centering side to side


center drilling


tap drilling for #4-40 bolt


clearance drilling


tapping for the bolt


reducing the width of the block


and the other side


setting up to reduce the length a bit


first cut, vise not quite tight enough, no problem though


taking off the first corner


and taking off the other


sanding off the burrs


chucking in the four jaw, for the rod hole to be drilled and tapped


after drilling, tapping for the rod


ready for the finishing work


filing the corners for radii


and the second corner, too


cleaned up, burrs removed, ready for un-soldering


solder removed, time to clean it up


another view of the parts


the gudeon block for the piston


milling the end, the other is already tapped for the screw to hold it to the piston


milling the other flat


touching off with the slitting saw


slitting for the connecting rod small end, a sixteenth slot

done and ready to install in the piston.  That's about it for today, more to come tomorrow.  Thanks for watching, cheers, Jack :beer: :poke:


Offline saw

  • Hero Member
  • *****
  • Posts: 1003
  • Country: se
  • lucky amateur
    • Svenssons AckordsWerkstad
Re: a new flame eater, just to be different
« Reply #11 on: April 02, 2011, 12:13:31 PM »
It's always so intressting to follow your'e work. I lifting my hat for the master.  :bow: :bow: :bow:
_________________________
Greetings / Benni
http://myprojecty.wordpress.com/category/steam-engine/

Offline Stilldrillin

  • Global Moderator
  • Hero Member
  • *****
  • Posts: 4972
  • Country: gb
  • Staveley, Derbyshire. England.
Re: a new flame eater, just to be different
« Reply #12 on: April 02, 2011, 12:31:40 PM »
By 'ek Jack!  :bugeye:

I knew you were starting another 'licker. But, you've galloped off without me! Where have I been?  :scratch:

It's all looking really good.....   :clap: :clap:

Love the big end assembly..... Couldn't work out what you were doing. Until you showed it separated!   :thumbup:

Keep on, keeping on.....  :D

David D
David.

Still drilling holes... Sometimes, in the right place!

Still modifying bits of metal... Occasionally, making an improvement!

Offline dbvandy

  • Full Member
  • ***
  • Posts: 170
Re: a new flame eater, just to be different
« Reply #13 on: April 02, 2011, 01:25:14 PM »
watts dis fancy ma-sheene you doin all theis cuttin on?  Looks x-pen-sive....

 :poke:

Doug
"if you can pay someone to do it, then you can do it... just might cost more and take longer."  ~Grandpa Vanderbilt

Offline madjackghengis

  • Hero Member
  • *****
  • Posts: 717
  • big engine
Re: a new flame eater, just to be different
« Reply #14 on: April 03, 2011, 11:40:10 AM »
Hi Doug, do you mean my Taiwanese mill?  It's only expensive if you consider money as an object, I just consider it a means to increasing my tooling.  It's only taken forty years to build my shop, I figure by the time I reach middle age, I should have a pretty nice set up.  Once I saw the form of big end in the "poppin", I had to make one, and I'm very happy with how it turned out, tight enough to be good bearing, but loose enough to turn freely, and it makes removal of the rod easy, even with the engine fully assembled.  The original rod was a piece of eighth inch rod which I flatted on end in the mill, and drilled a wrist pin hole in, and turned down the other end to about .095 and threaded 4-40, but it was a mite bit long, and when I tried to turn off the extra eighth inch, I broke the threads clean off, so I had to start again on the rod.


I didn't have another piece of eighth inch that was straight, but I found a piece of eighth in key stock, and decided I could mill both sides on one end, in the vise and put a gudeon pin hole in it, and then turn down the other end and thread it at the right length.


using an indicator, I centered it in a four jaw, then stoned the tool, as I always do before a new cut.


I grind the cutter, then lap it on a diamond lap, then I stone it between pieces until it needs grinding again, the tangential holder lets it hold a good edge for a lot of work, and is easy to stone off.


this is my tailstock die holder set up, bought from the son of a machinist who has long since passed, a piece of inch hex stock reamed half in through, with one end bored for five eighths dies, and the other for three quarter inch dies, and four grub screws on each end to hold the dies in.


having turned about three eighths of an in down to .095, I threaded it for 4-40, for the right overall length


and here's the finished rod next to the broken one


a little bit of hand work, putting a radius on the little end with a file


and the other side as well, making it look good, even if it can't be seen


and finished, radii and all


having already put the small end in the gudeon block and screwed it into the piston, it takes a bit of finagling to get the pieces of the rod end around the crankpin without dropping them, and they need to stay oriented right.  I put a small rubber o-ring on each side of the main shaft, for the ball bearings to butt up against, and centered the crank assembly between the pillars before adding the rod and piston assembly.  The rod is locked into the big end with a lock nut, setting minimal clearance on the head end


a bit of a side view of the engine with the rod assembly in place, the square rod being rather easy to align the gudeon pin with the crank pin, and easy to hold while tightening up the lock nut.


I wasn't sure what I was doing with the head when I made it, so it is thick, and needs to be a lot thinner, so the flycutter, at slightly slower speed is used to cut it down to size.


I'd already drilled the head bolt holes, but they don't interfere with reducing the thickness


with the head down to size, its time to counterbore the holes so the bolts are below the surface


finishing up the counter boring


and the finished head, next to the engine.

I've decided what to do for valving, and will be posting that next probably, and then maybe a test run.  Cheers,  :beer: :nrocks: Jack


Offline NickG

  • Madmodder Committee
  • Hero Member
  • *****
  • Posts: 1890
Re: a new flame eater, just to be different
« Reply #15 on: April 04, 2011, 01:06:34 PM »
Brilliant work there Jack, just found this. I love your tweaks on the design and the angles used.  :bow:

Watching avidly.

Nick
Location: County Durham (North East England)

Offline cfellows

  • In Memoriam
  • Sr. Member
  • *****
  • Posts: 303
Re: a new flame eater, just to be different
« Reply #16 on: April 06, 2011, 10:20:10 AM »
Really like the aesthetics of this engine.  It's a very pleasing design.  By the way, do you stone the tangential cutter on the top, flat part or on the sides and leading corner?

Chuck

Offline madjackghengis

  • Hero Member
  • *****
  • Posts: 717
  • big engine
Re: a new flame eater, just to be different
« Reply #17 on: April 06, 2011, 12:40:48 PM »
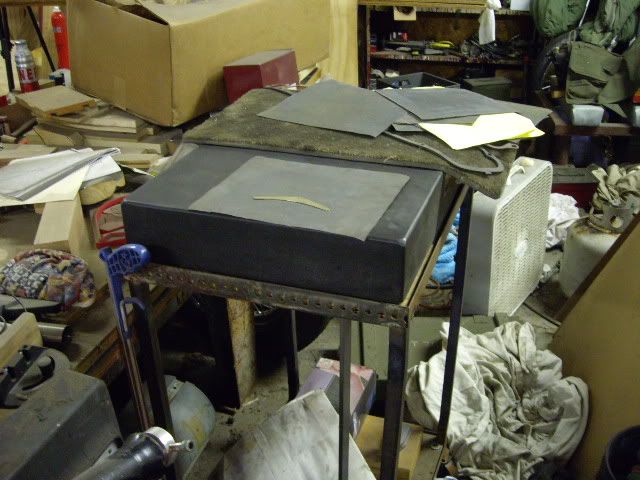
Thanks Nick, this has been a learning experience all the way along.  Hi all, getting close to a finished engine, so here's today's installment.


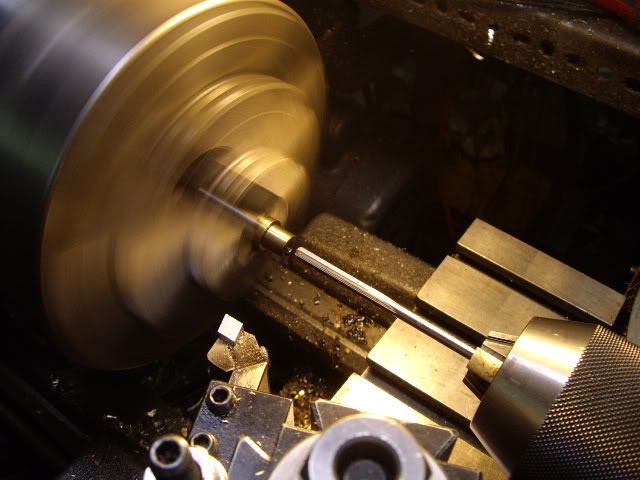
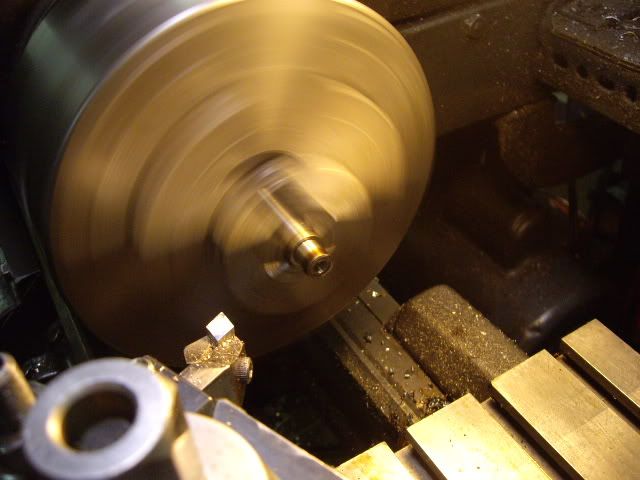
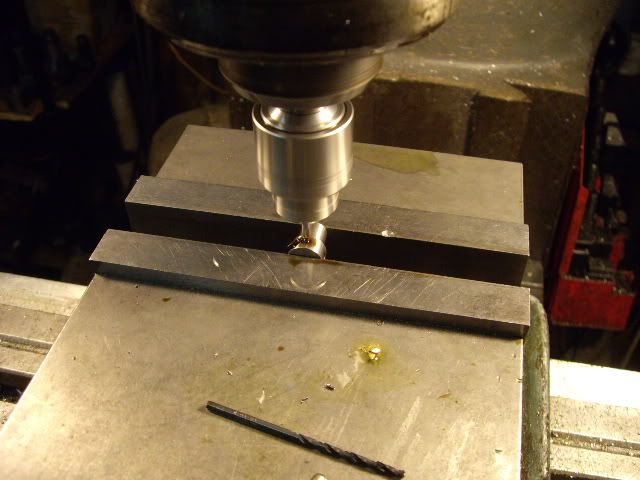
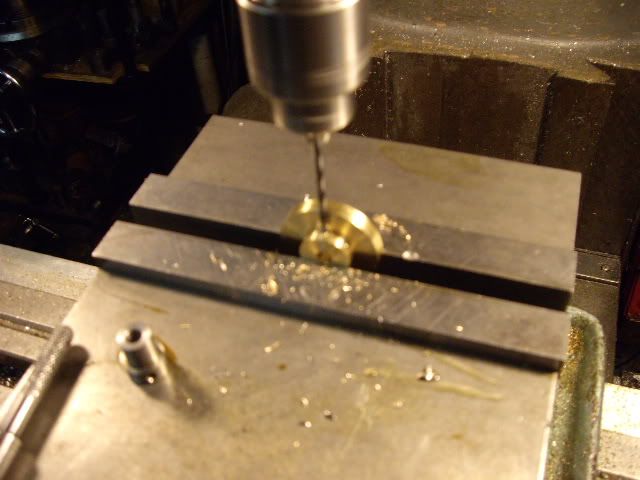
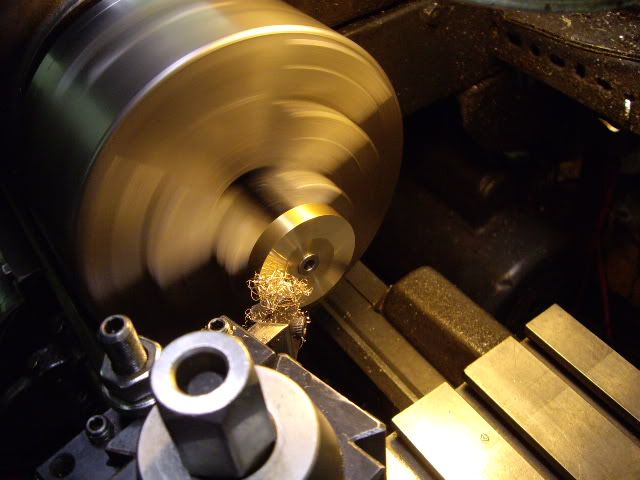
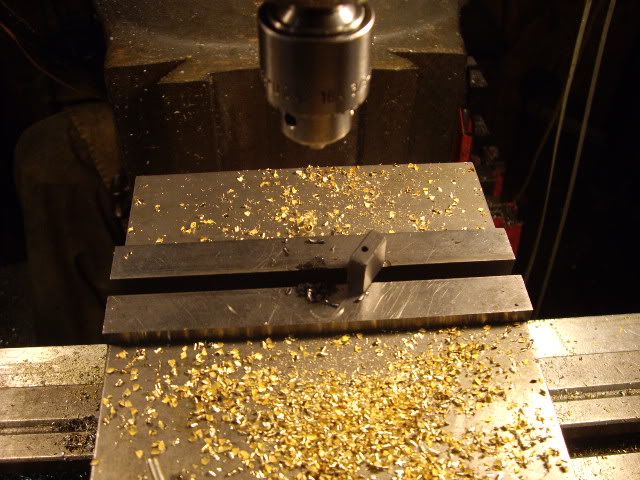
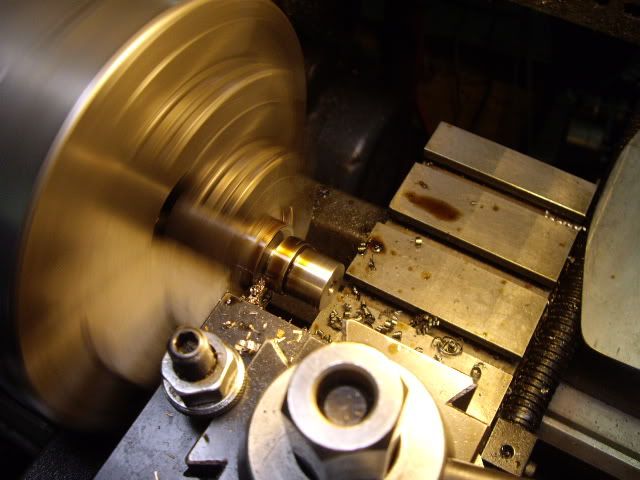
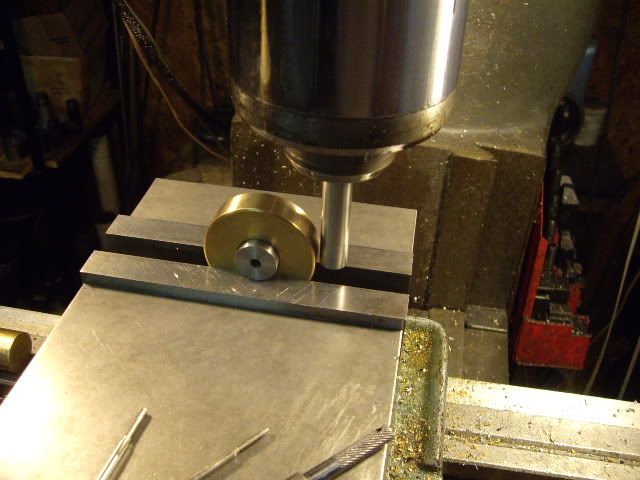
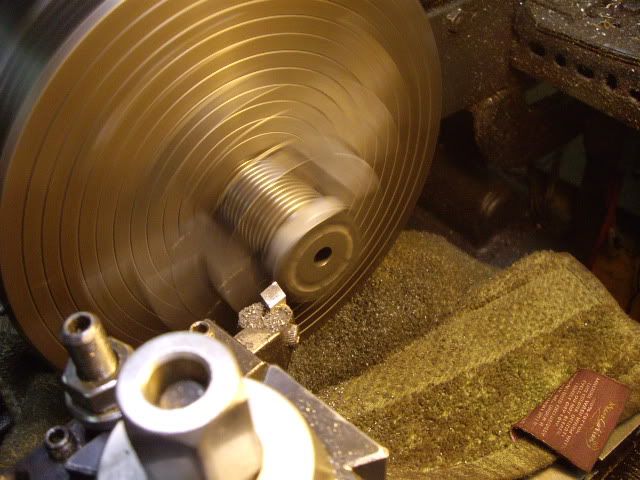
a piece of brass round has been bored out for a flywheel, so I've turned a piece of steel for the hub, and I'm center drilling it in preparation for drilling and reaming to fit the main shaft


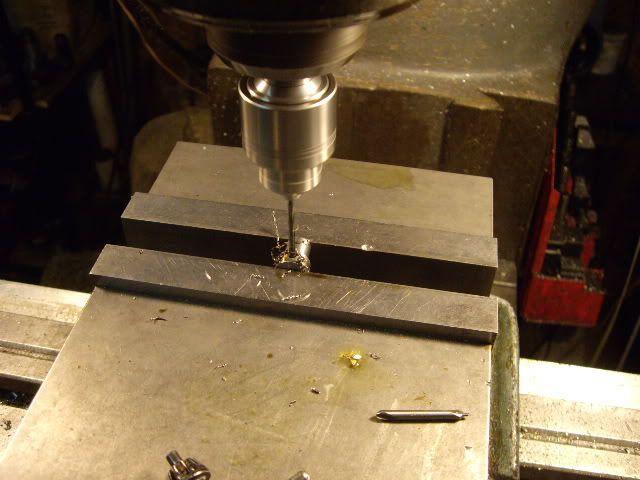
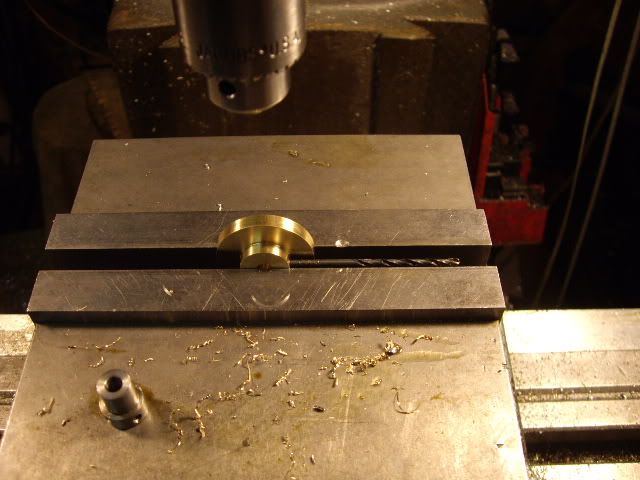
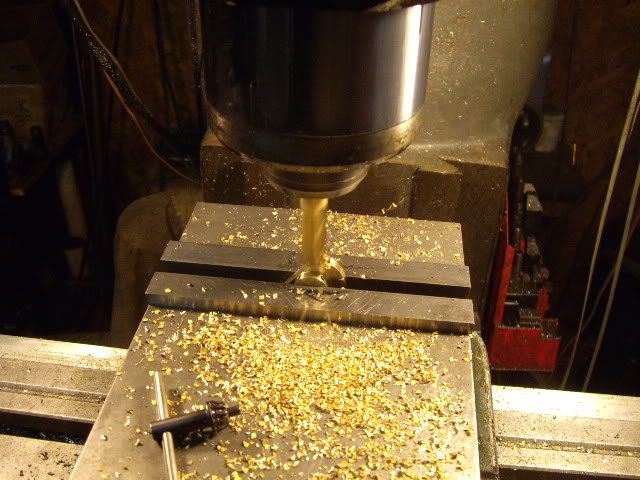
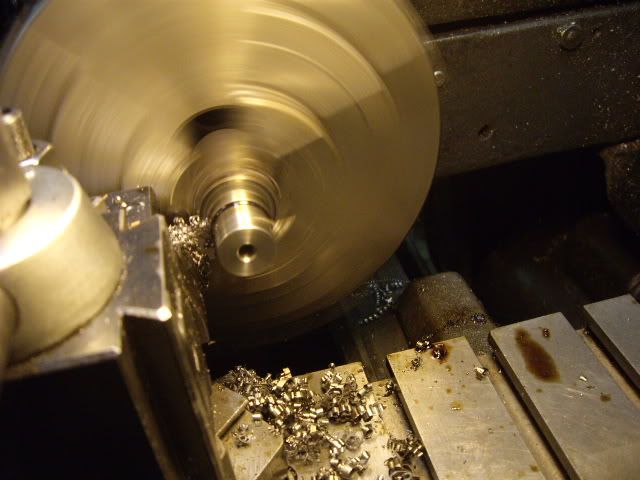
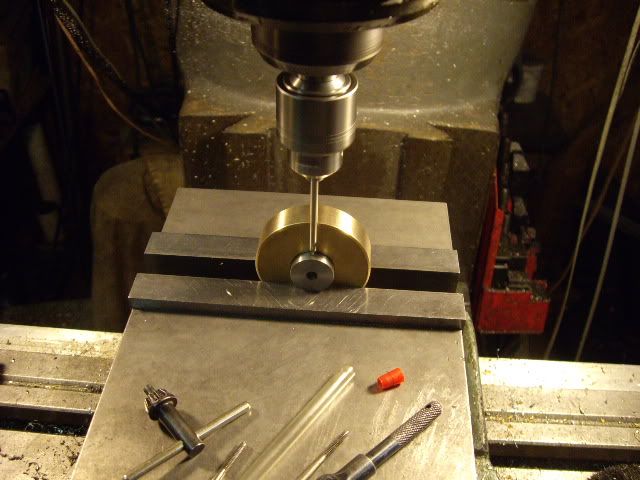
I missed a picture of drilling, but here's reaming it out to three sixteenths


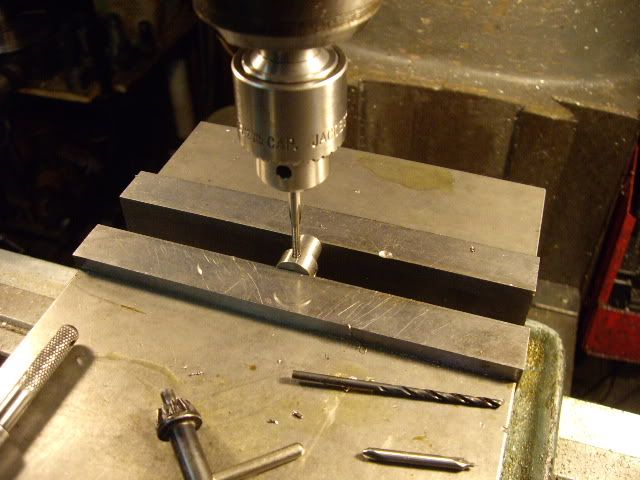
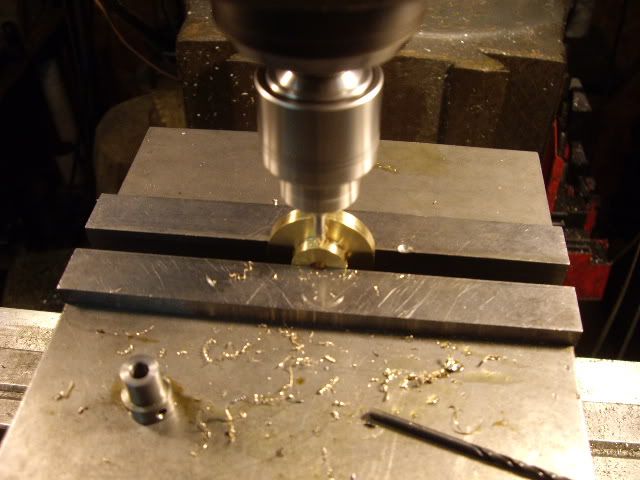
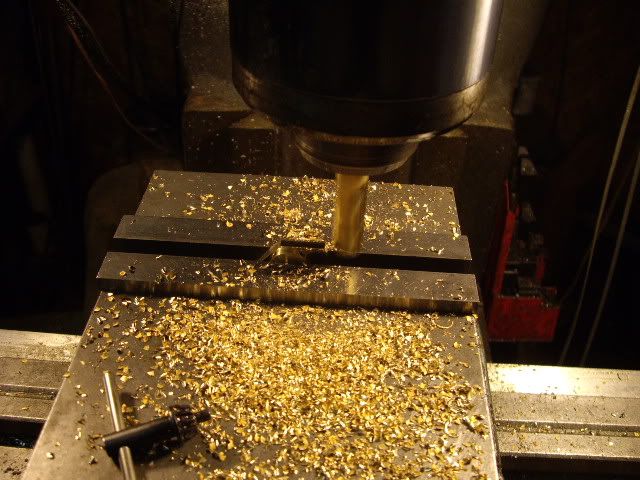
facing off the end of the hub and ensuring the shoulder is square with the bore


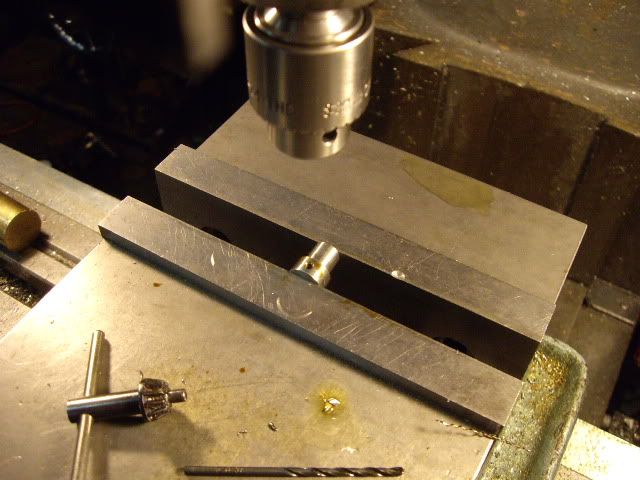
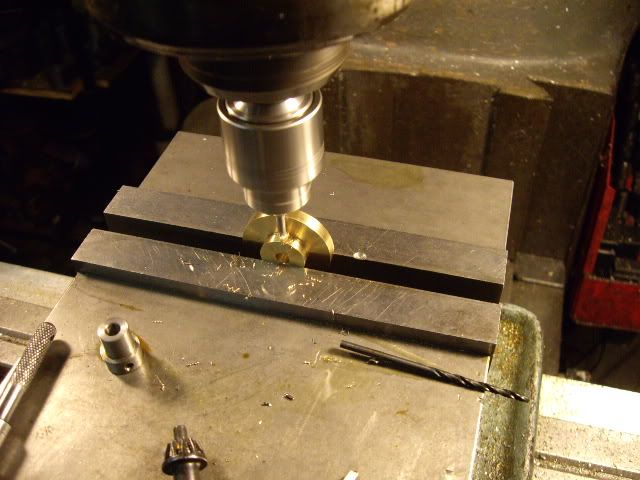
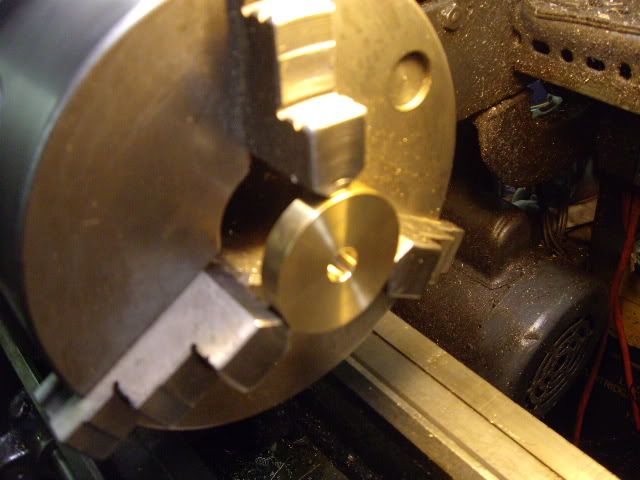
setting the hub up for grub screws, I like to put two at least, and at 90 degrees for security


centering the spindle over the hub


center drilling the first grub screw hole


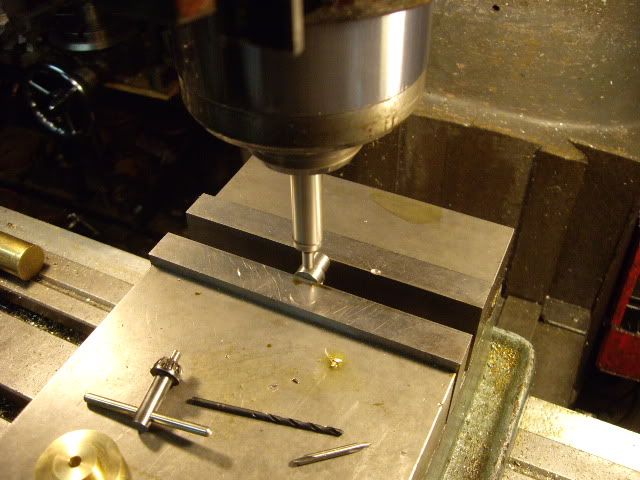
tap drilling the first hole


tapping the first hole, the second hole is treated the same, using the tap drill in the tapped hole as a guide to getting the second hole at 90 degrees from the first


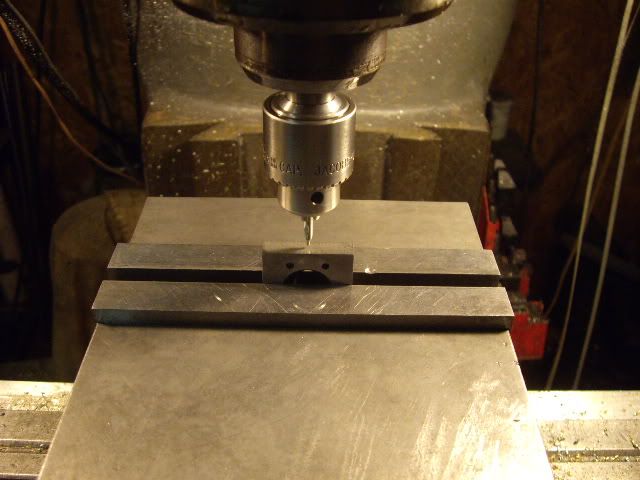
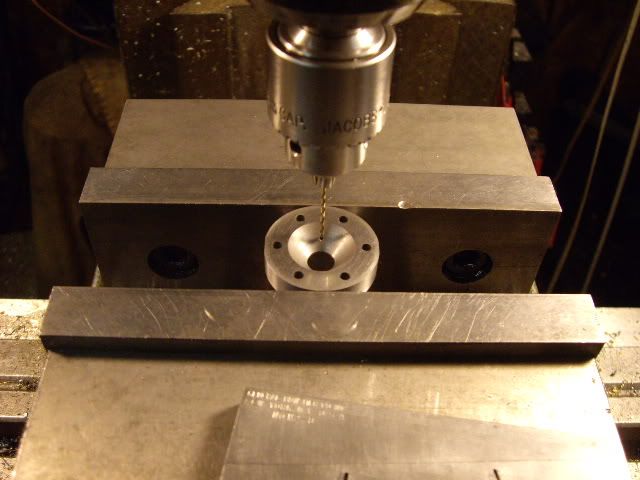
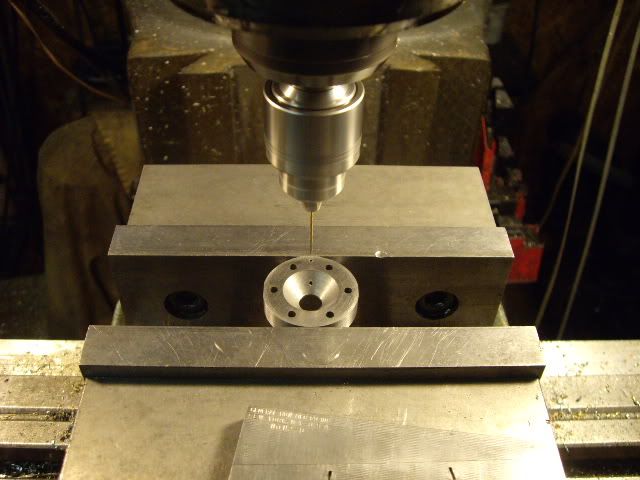
having centered up the cam blank, drilling the center hole for the first grub screw


tap drilling the cam blank


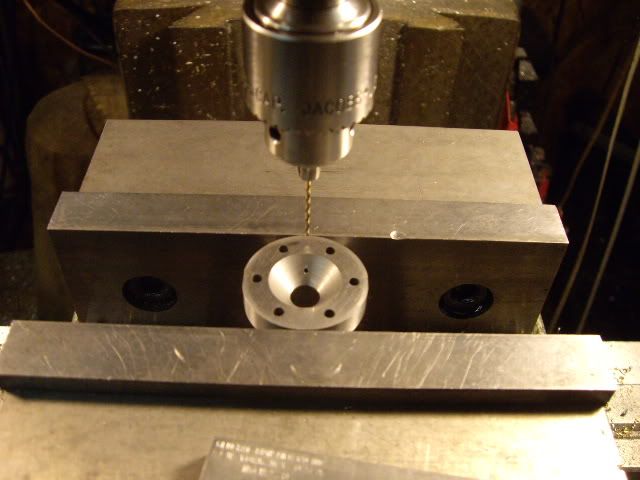
tapping the grub screw hole, 4-40


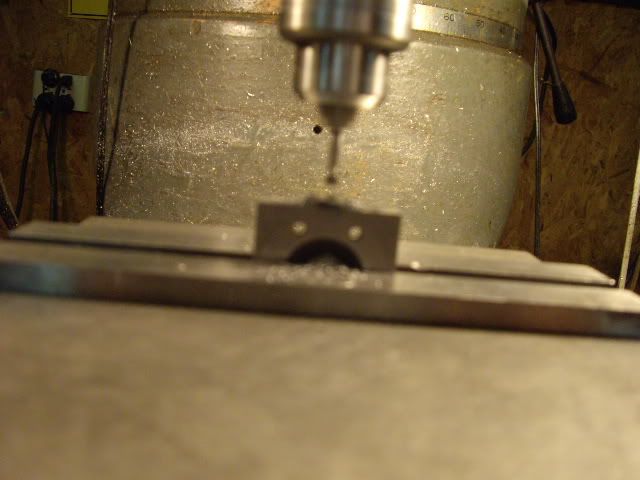
setting up for the second grub screw hole, note the tap drill sticking out to the right


center drilling again


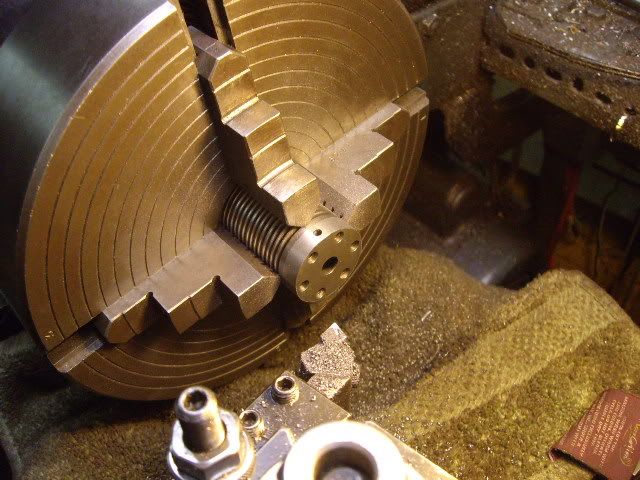
flywheel bored and faced for the hub


hub pressed in, facing off the other side holding the hub


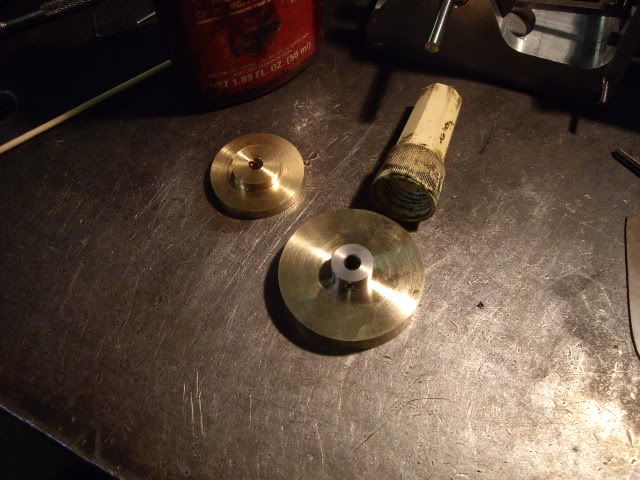
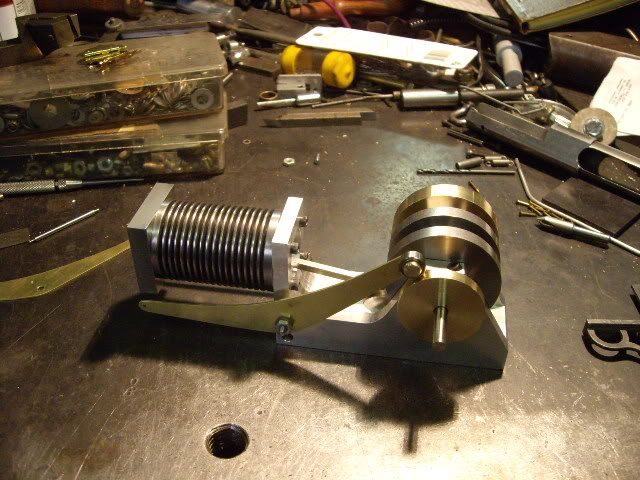
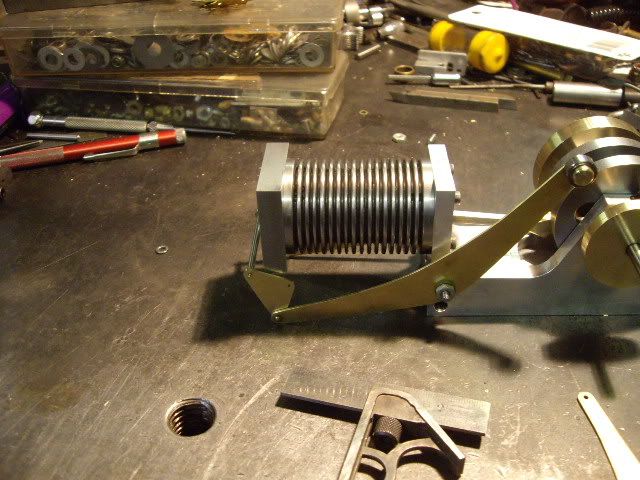
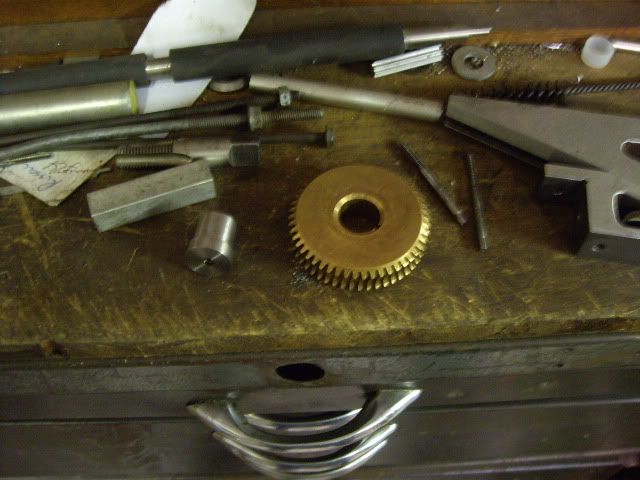
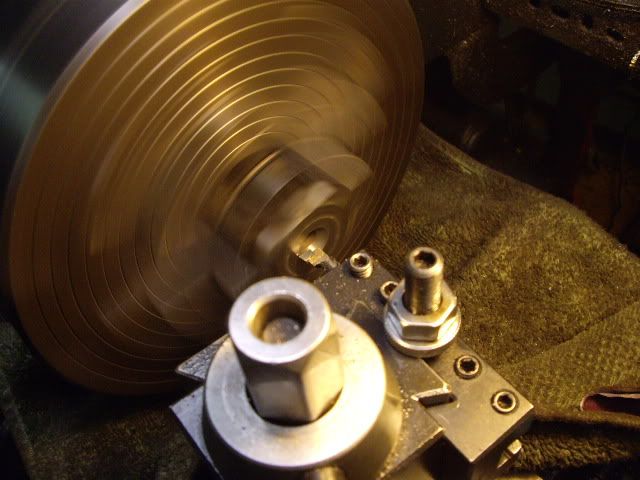
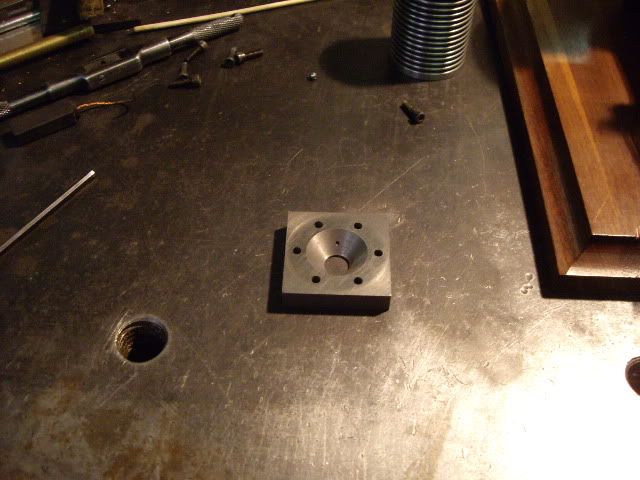
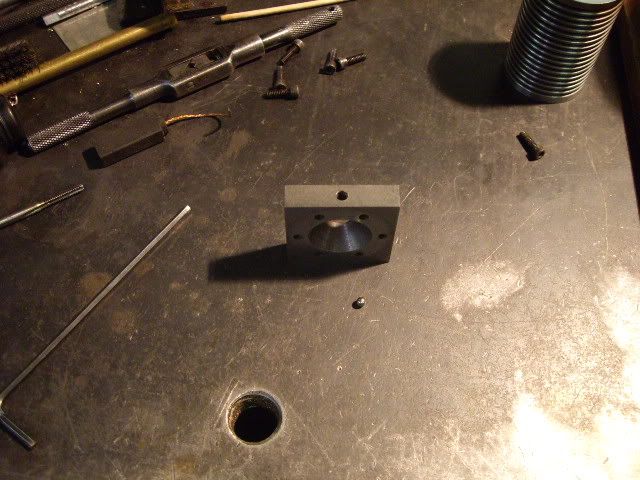
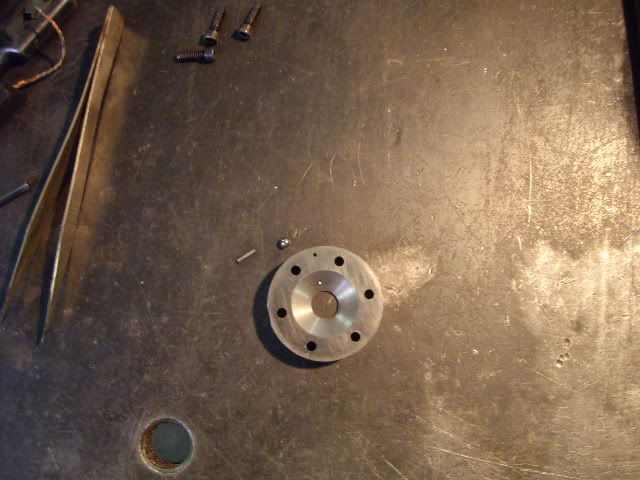
flywheel and cam, ready for mounting on the main shafts


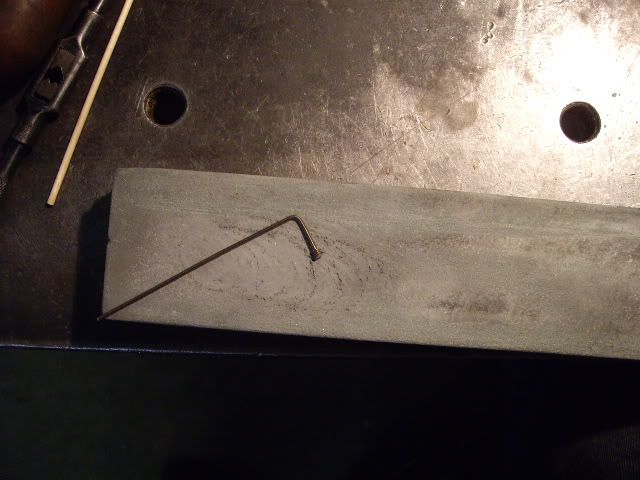
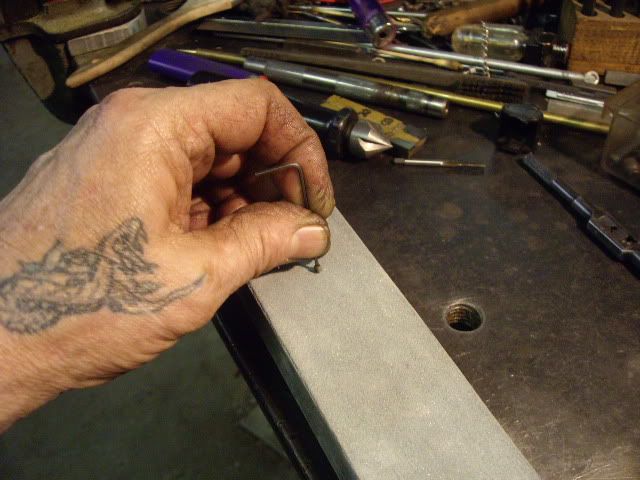
with a grub screw on the end of the allen wrench, the cup is stoned flat to keep from scoring the shaft  I will have to adjust the cam some, and don't want the shaft all buggered up


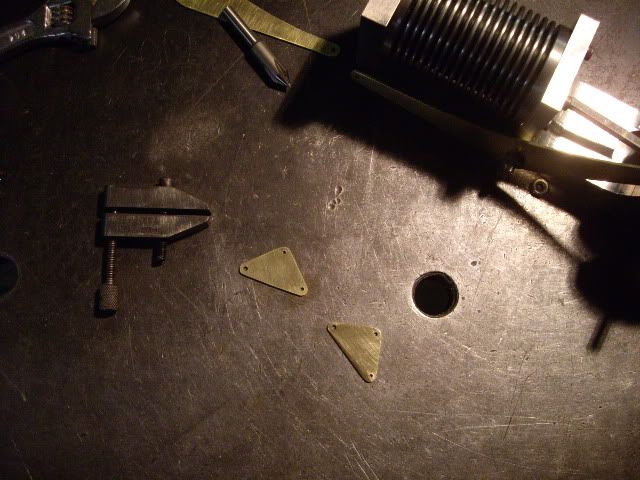
valve lever blanks, ready for hole drilling


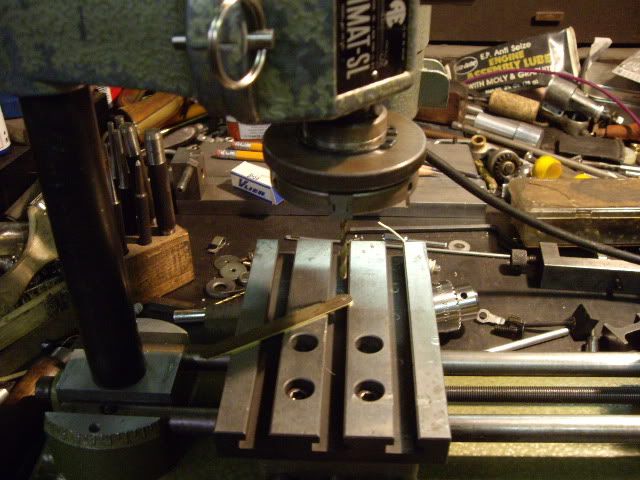
drilling the first of many holes


filing the first of many radii on valve train gear


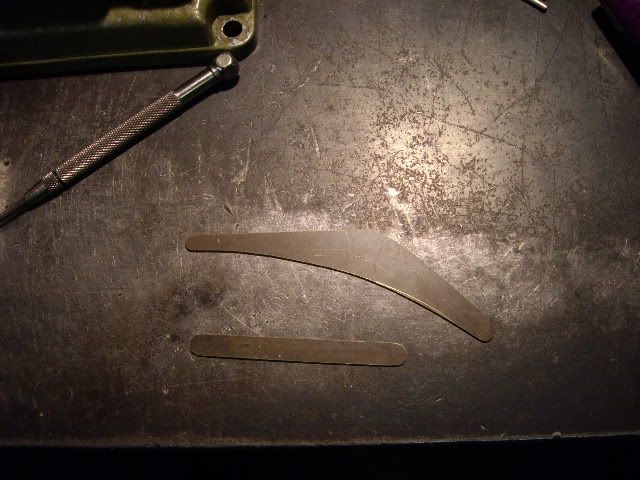
the main valve actuating arm with its follower bearing riveted in place


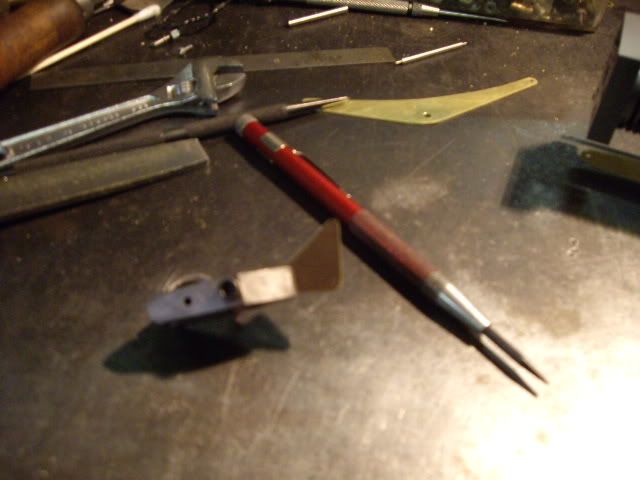
two connecting link plates, clamped for drilling holes


holes drilled for the arm, the valve pin, and for the pivot rivet to hold them to the valve levers


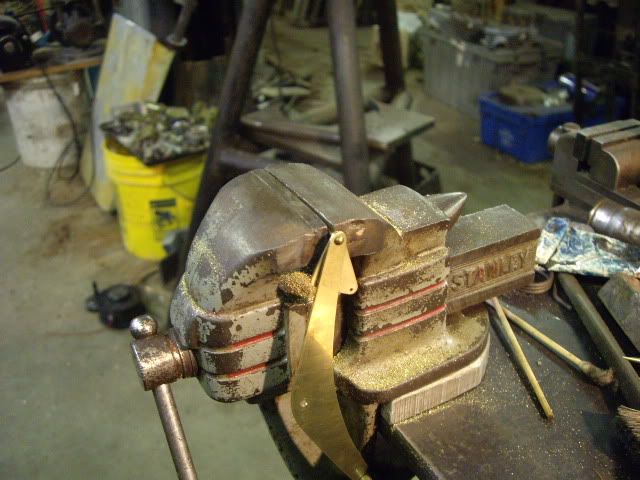
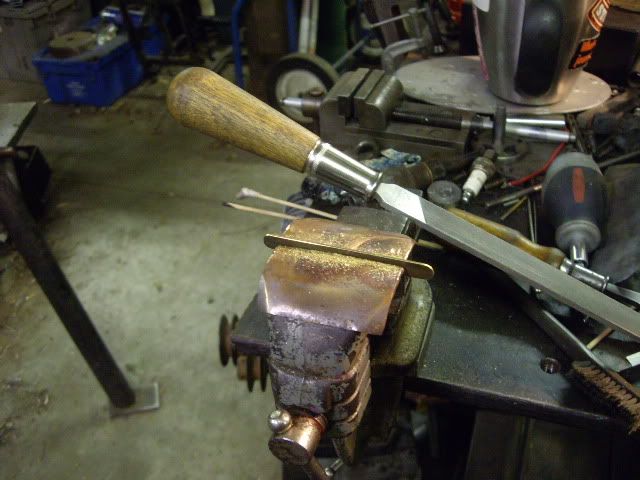
setting up to cut off the rivet, a brass brad from a box of picture hangers


cutting off the rivet, draw sawing for control


the main lever in place with the valve link riveted in place


the cam back off the engine, getting a flat milled so I can set the valve at its open point


getting the flat down to the hub diameter, minus a hair for filing


with the valve lever in place, some idea of location established with the flat, drilling the generator brush for the valve pin which will carry it.  The pin is about .093 diameter, with .040 pins machined on each end, it came like this out of a CD player or something, and happened to be the right width for the head, and already have pins machined


having set up the valve, the cam is removed again, to get its second flat milled, to make it proper timing


several passes later, the cam is on its final cut


the cam, ready for some filing to remove the sharp corners, and make for smooth valve opening and closing


not quite done, but ready for a trial run.  You have to test things like cam timing and how things like the linkage work.


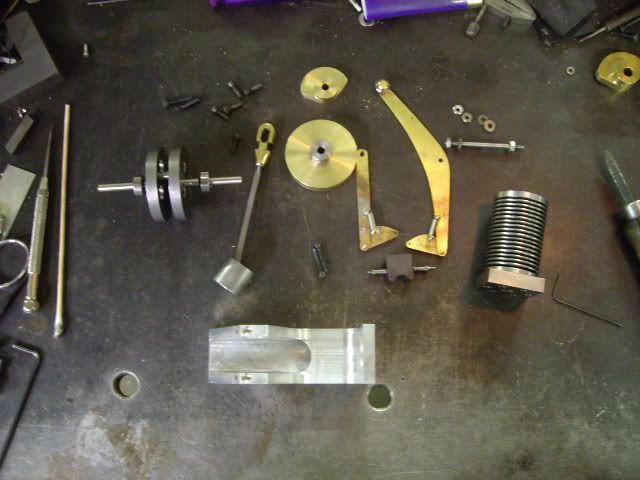
engine disassembled for drilling mounting holes, all the parts spread out


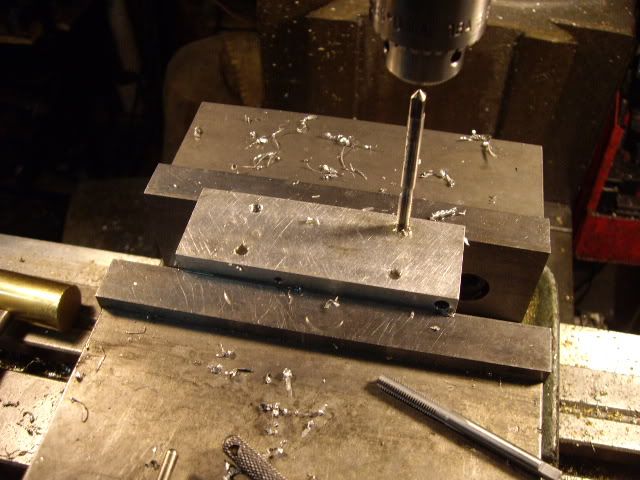
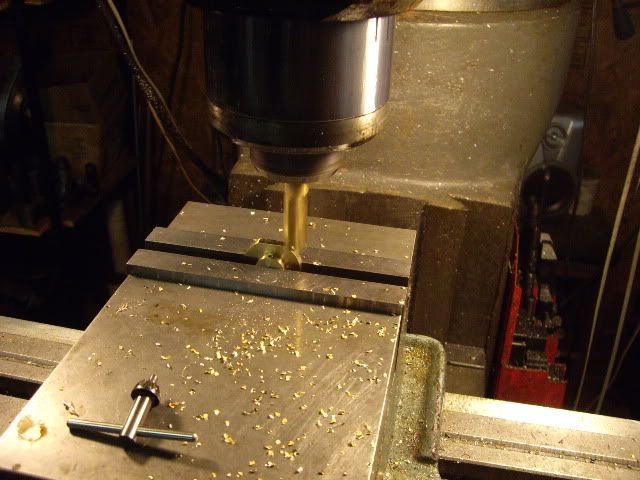
drilling the mounting holes for mounting on some brown stuff


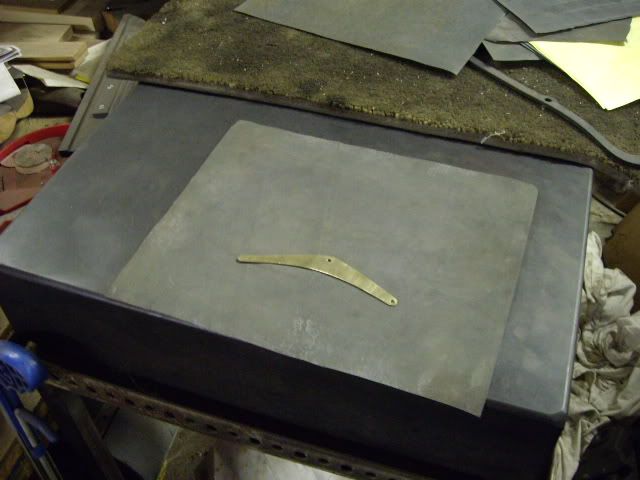
after the first run, I found the levers of the valve gear wrong, and remade them a quarter of an inch longer so the valve would stay flat against the head, something it quit doing in the first run.  I didn't take pictures of cutting out new brass levers, but do show how I finish the flat pieces for a good finish.


another view of the surface plate, 18 by 24 by 4 inches


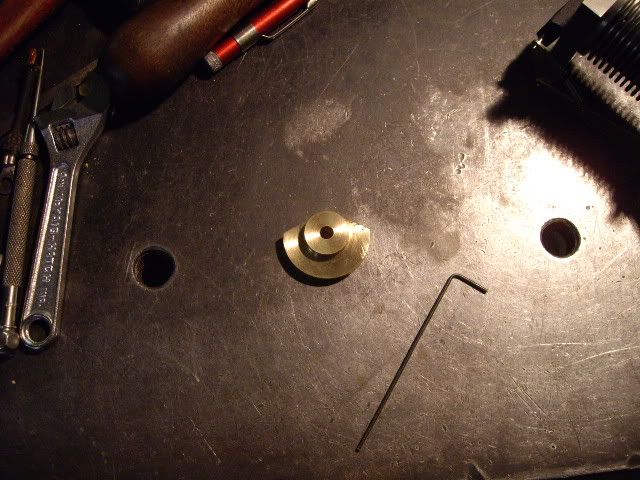
I decided I needed more flywheel, so I took a piece of steel shaft, a bronze gear with its teeth eaten away, and made a hub, then pressed on the old gear, and turned the o.d. smooth


cutting off the hub


the hub and old gear ready to be mated


centering for drilling grub screws


using a long center drill, center drilling the hub


after tap drilling, tapping the hub


setting up for the second grub screw, same as the first


again, stoning off the cup of the screw


with the head at .300 in thick, I found I needed to bore a taper as the straight port seemed to "quench" the flame as it went in, the angle is such that the diameter of the conical port is bore diameter at the head surface, and has about .020 in thickness on the face end


having seen several such engines with pressure relief valves of sorts, I decided one might help the running of this engine, so I used a #1 center drill, and drilled in the top center of the head till the tip of the center drill just pierced the port.  I'd found a ball bearing which measures .112, which dropped nicely into the .125 hole the body of the center drill left.


another view of the head and the center drill.  I also drilled a .140 hole deep enough to leave about an .100 in of the center drill hole, the full taper seat of the center drill for the ball to seat on, but with plenty of room for excess air to escape


here you can see the tapered port, and the pressure relief hole just entering it


another view of the head, relief hole and check ball


I had left the head square for surface area for the valve, but found no need, so turned it round to reduce the mass of the head


I bolted the head on the cylinder, centered it up, and turned it down, here it is done, with the relief port on top


I almost lost the ball testing to see if it worked, and put the head in the mill vise to drill a hole for a pin to retain the ball.  The pin hole goes through from the cylinder surface, through the relief hole, and just starts in the front surface of the head, it is .042 as I have some .041 spring wire to use for the pin.


drilling from the cylinder side


drilled, ready to clean all the swarf out of tiny holes


head, check ball, and retaining pin


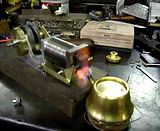
this is the first run after fixing the valve gear, but before the check valve was added, this run was the reason for the check ball.


And here is the last run of the engine, with the check ball, and everything completed except its own burner, which will probably be modelled after John's butane burner from his flame eater, as I like the clean burning and the ability to adjust the flame and thus the speed.  I hope you all enjoyed this as much as I have.  :nrocks: :ddb: :beer:  Cheers, Jack


Offline madjackghengis

  • Hero Member
  • *****
  • Posts: 717
  • big engine
Re: a new flame eater, just to be different
« Reply #18 on: April 06, 2011, 12:47:43 PM »
Hi Chuck, the beauty of the tangential tool is the ease of grinding, just straight in, at an angle to form a diamond shape, and then I lap the end on a diamond hone, just until there is enough for two edges, and touch up the two sides, and the intersecting corner which is a small radius after numerous lappings.  I just stone the top face when changing metals, or when I see some build up in the edge.  Any dullness showing up means hitting the grinder and lapping the top again.  It's one of my favorite tool holders.  Jack

Offline Bogstandard

  • Bogs Group
  • Hero Member
  • *****
  • Posts: 1107
Re: a new flame eater, just to be different
« Reply #19 on: April 06, 2011, 12:55:44 PM »
That is a real stunner Jack, very well done indeed.  :clap: :clap: :clap:

I am wondering why my one wasn't fed under the block rather than from the top, it would have saved a lot of hassle.

You seem to be able to get them done a lot quicker than me, I am only half way thru the flywheel bling, weeks still to go yet.


John
If you don't try it, you will never know if you can do it.

Location - Crewe, Cheshire

Skype - bandit175

Offline saw

  • Hero Member
  • *****
  • Posts: 1003
  • Country: se
  • lucky amateur
    • Svenssons AckordsWerkstad
Re: a new flame eater, just to be different
« Reply #20 on: April 06, 2011, 01:10:31 PM »
Just beutifull.  :bugeye: :bugeye: :thumbup:
_________________________
Greetings / Benni
http://myprojecty.wordpress.com/category/steam-engine/

Offline Stilldrillin

  • Global Moderator
  • Hero Member
  • *****
  • Posts: 4972
  • Country: gb
  • Staveley, Derbyshire. England.
Re: a new flame eater, just to be different
« Reply #21 on: April 06, 2011, 03:35:21 PM »
Great to see it running Jack.  :clap: :clap:

So quickly too!  :thumbup:

Well done......  :bow: :bow:

David D
David.

Still drilling holes... Sometimes, in the right place!

Still modifying bits of metal... Occasionally, making an improvement!

Offline spuddevans

  • Global Moderator
  • Hero Member
  • *****
  • Posts: 1618
  • Country: 00
  • Portadown, Northern Ireland
    • My Photo website
Re: a new flame eater, just to be different
« Reply #22 on: April 06, 2011, 03:58:44 PM »
That's a real nice runner there Jack :clap: :clap: :thumbup: :thumbup:

Tim
Measure with a micrometer, mark with chalk, cut with an axe  -  MI0TME

Offline madjackghengis

  • Hero Member
  • *****
  • Posts: 717
  • big engine
Re: a new flame eater, just to be different
« Reply #23 on: April 06, 2011, 08:50:04 PM »
Thanks very much for watching and the comments.  The posting is a bit deceptive, I've been working on it for some time, I've just not have time post, as I've had some weeks of drs. appts. and the like, taking up all my mornings and "extra" time.  I've been working with a friend getting his custom bike fired up and broke in, thirty years collecting, three years building, and about three weeks doing the initial fixes and alterations, jetting, making things never together before, play nicely.  A lot of time supervising, with constant interuptions to do something I have to do as it's ticklish.  It's almost easier to do the "shake-down and break in" hours and miles myself.
    By the way John, it was in watching the video of your engine which inspired me to flip the valve levers, and have the valve slide up.  And Nick, you mentioned having the cam close the valve, and let the spring open the valve when the pressure rises, so I used the same concept with the slide valve as well as on the oddball.  The check ball was the reason for a thick head and it makes the engine run very smoothly and rather quietly and makes the engine warm up very quickly.  It runs at a steady 550 rpm after about a minute of running.  I rinse the cylinder with WD-40 before starting, drying the outside, and spinning the liquid out of the cylinder, then set it down, light the burner and spin it over.  I believe I can reduce the cleaning if I run it off butane instead of the alki.  I just need to scale down your burner to fit the port.  You've all been an inspiration to my experimenting and provide lots of food for thought. :nrocks: :beer:  Cheers, Jack

Offline sbwhart

  • Global Moderator
  • Hero Member
  • *****
  • Posts: 3530
  • Country: gb
  • Smile, Be Happy, Have Fun and Rock Until you Drop
Re: a new flame eater, just to be different
« Reply #24 on: April 07, 2011, 01:30:54 AM »
Great Job Jack  :clap: :clap: :clap: :clap: :clap:

And a real smashing runner

I learnt a lot from following your thread thanks for showing.  :nrocks:


Stew
A little bit of clearance never got in the road
 :wave:

Location:- Crewe Cheshire

lordedmond

  • Guest
Re: a new flame eater, just to be different
« Reply #25 on: April 07, 2011, 02:31:43 AM »
Jack

I may have missed something but which way is the relief valve,  valve seat at the bottom I think


Stuart

Offline madjackghengis

  • Hero Member
  • *****
  • Posts: 717
  • big engine
Re: a new flame eater, just to be different
« Reply #26 on: April 07, 2011, 09:17:31 AM »
Hi Stuart, the relief valve starts as a center drilled hole from the top of the head, centered front to back, so the small tip of the center drill is all that pierces the port, and does so in the taper section.  The angle of the center drill makes for a seat for the ball, it being about .112, with the body of a #1 center drill being .125.  I then drilled down most of the way with about a .140 drill, leaving about .100 in of the center drill body hole intact, to keep the ball in tight, but to allow it plenty of room to let built up pressure out on the return stroke, my testing initially having the ball fly about three feet in the air from the pressure, and fortunately found.  I then put the head in the mill vise cylinder side up, put a .042 drill in, lined it up on the hole where the center drill tip pierced the tapered port, and then drilled through the head, above where it seals with the cylinder, but below the edge, through the back side to the relief hole, then just about .030 in into the front side, so the pin which is going in the hole will be captive once the head was bolted in place.  The ball seats very well in the taper part of the center drilled hole, and holds a vacuum when the crank is turned backwards, but easily relieves pressure instead of the valve having to flap, and the pressure built up blowing out the flame, or at least causing it to flutter and interfering with its steadiness.  I've seen similar ideas with a port made, and a leaf of spring steel over it, as a reed valve, and these can be in any orientation, and hidden as well, as I've heard in some engines I've watched on u-tube, but couldn't see.
    I've found the initial start up with alcohol, always leaves lots of condensed water, both inside the cylinder, and on the valve surface, which makes for lots of friction, or strong sticking of the valve, and in the cylinder, makes an emulsion with such oil as is there, that makes for lots of piston friction.  In washing out the cylinder with WD-40 first, it washes out what old heated oil was there, leaves some solvent in the cylinder, and disolves most of any sticky oil, eliminating the extra "stiction", while the remaining solvent vaporizes very easily, and adds to the initial power of start up, helping the engine to start off with some speed, and build up enough heat to keep water vapor from condensing, and forming the sludge.
    I'm not sure if there will be as much water vapor from the butane, as there is from alki, I'm hoping not, but if there is, I will continue to pre-clean with WD, as it has been good  on both of my larger cylinder engines.  My Duclos "flame sucker" runs well with a bronze piston, a 360 brass cylinder, a bronze valve, and occasional take down and scribbling with a pencil for graphite lubrication.  Waiting too long on this means scoring of both cylinder and piston, but rubbing down the piston with very old 600 wet or dry, and a six by six inch rolled up piece of the same, rolled tight, dropped in the cylinder and allowed to expand, and used just to take off the tops of the scoring, about two minutes overall, and then the scribbling inside the cylinder and outside the piston, means it has another twenty or thirty minutes of good running.  Scribbling with the engine assembled can keep it together for weeks, but forgetting means the engine will be running great and then suddenly stop dead, and it's better dealt with before that.
    I'm pretty hot on the check valve idea, I think a lot of engines on shelves would possibly run with this addition.  It completely changed the feel of this newest engine, it just needs to be kept washed clean or the ball will stick. :poke: :beer:  hope that clarifies it somewhat, Jack

Offline cfellows

  • In Memoriam
  • Sr. Member
  • *****
  • Posts: 303
Re: a new flame eater, just to be different
« Reply #27 on: April 07, 2011, 11:19:40 AM »
The relief valve does make a huge difference.  Runs a lot better.  I may have missed it, but what was the diameter of the check ball?

Chuck

lordedmond

  • Guest
Re: a new flame eater, just to be different
« Reply #28 on: April 07, 2011, 11:54:38 AM »
Thanks Jack

Make it like a clack then to blow out seals on the suck


Stuart

Offline NickG

  • Madmodder Committee
  • Hero Member
  • *****
  • Posts: 1890
Re: a new flame eater, just to be different
« Reply #29 on: April 08, 2011, 04:35:36 PM »
Jack,

Wow - you've been busy! I like the fact that you've shown continuous improvement through all your designs of flame lickers. Using the best bits from other designs and your findings. When I first saw the still pictures I thought to myself "what is he doing", as you'd proven it was best to make the cam close the port, I had forgotten you said you would make the valve lift upwards in one of your previous postings or PMs! Great idea. The valve is more robust than the reed type and the little bits of graphite that wear off will help lubricate the engine, cast iron and cast iron is probably the best way to go, as shown in your previous experiments and now the pressure relief valve. Interesting results you got on that - I'm guessing it helps prevent the flame being blown around by the excess pressure pushed out. Running absolutely brilliantly there.  :thumbup:

I also like your method of doing the big end, I thought that was one of the most fiddley bits of poppin, but the way you did it soldering the two bits together then bringing it to size etc looked much easier and a better job.

Nick
Location: County Durham (North East England)

Offline arnoldb

  • Hero Member
  • *****
  • Posts: 515
  • Country: na
  • Windhoek, Namibia
Re: a new flame eater, just to be different
« Reply #30 on: April 09, 2011, 12:05:33 PM »
Well done Jack on a very informative and innovative build  :thumbup:.
I've been following along but wasn't posting a lot of late.

Kind regards, Arnold

Offline madjackghengis

  • Hero Member
  • *****
  • Posts: 717
  • big engine
Re: a new flame eater, just to be different
« Reply #31 on: April 09, 2011, 01:04:56 PM »
The relief valve does make a huge difference.  Runs a lot better.  I may have missed it, but what was the diameter of the check ball?

Chuck
Hi Chuck, I believe the ball miked out at .112, but I'm not sure, it's metric, and it has working clearance on the body hole left by the #1 center drill, which has a body diameter of .125 and probably makes a .127 or so hole, with a nice taper seat somewhere just above breaking through the taper in the port.
    Thanks for the comments, Arnold, and all, I am trying to do what a lot of other people are doing, seeing a need for new ideas in power production, and knowing these were the predecessors of internal combustion engines.  I don't like the fact a bunch of bureaucrats, who would have a hard time giving proper directions to bathrooms, are directing funding to "green projects", as if they were capable of discerning what is truly promising, when it has always been people just like us, playing around with the ideas we inherit, and with our own twists, who have always been the productive types who have put technology in the hands of the world.
   I know each and every currently "subsidized" green technology has been around for more than a century, alcohol was used for fuel centuries ago, windmills have been doing good work for more than three hundred years, and solar cells were only half as efficient in 1890 as they are today, and electric cars held the land speed record in the 20's, so I think it is far better for people like us to examine our ideas in such forums as this, freely share ideas and expand each other's knowledge, because we are far more likely to find a better idea than those who keep their hand out for a government subsidy, and we are far better capable of noting when it is just interesting, and not profitable, than those who depend on subsidies, and must produce something, anything, to keep getting paid, whether it works or not.  After all, is it not we, who have held these jobs and made the world turn while we work, despite the demands and weight of governments?  In my view, this is where the real action is.  I just wish we could all get together from time to time and share a beer or two, and enjoy the company, the forum is only second best in that way. :beer: :hammer:  Cheers, and thanks for commenting, learning is something we need to want, or we have no real purpose in life.  Jack

Offline dbvandy

  • Full Member
  • ***
  • Posts: 170
Re: a new flame eater, just to be different
« Reply #32 on: April 10, 2011, 01:32:15 AM »
How about a little video of it putt puttin.....   :zap:

Doug
"if you can pay someone to do it, then you can do it... just might cost more and take longer."  ~Grandpa Vanderbilt

Offline madjackghengis

  • Hero Member
  • *****
  • Posts: 717
  • big engine
Re: a new flame eater, just to be different
« Reply #33 on: April 10, 2011, 09:33:18 AM »
Well Doug, I'll have to see how the video I shot yesterday came out, I went and put a "klacker" as the check ball was so accurately described, in the "oddball", but the reed valve is so flexible, it made no discernable difference in the way it ran or sounded, however I have plans to put a graphite valve on it, and then I believe it will be very effective.  My big problem is that engine runs so nice I want to spend far too much time just watching it, and not enough time building new engines.
   By the way, I miked out the check ball, it is .118, or three mm, and it seems to leave enough room for hot air to flow around it effectively.  The method of retaining it, by a pin drilled from the cylinder side of the head, makes it easy to remove the check ball, when servicing the engine, and is dead certain in retaining it so now it's back to another engine, or on to another engine.  It might be time for a high speed engine, one that is square or thereabouts.  Cheers  :beer: Jack