Author Topic: Minnie TE Long term project  (Read 115386 times)

RobWilson

  • Guest
Re: Minnie TE Long term project
« Reply #225 on: May 13, 2016, 02:22:59 AM »
Nice going Joe  :thumbup:

Always interesting to see  your machining setups .


Rob

Offline Andrew Wildman

  • Full Member
  • ***
  • Posts: 167
  • Country: 00
Re: Minnie TE Long term project
« Reply #226 on: May 14, 2016, 04:39:37 AM »
Enjoying the build Joe. Nice to see that she goes! As for the name isn't is traditional to named it after the person that has been neglected during the build, partner cat or whatever?

Thanks for the well written narrative!

Offline Joe d

  • Sr. Member
  • ****
  • Posts: 251
  • Country: ca
Re: Minnie TE Long term project
« Reply #227 on: May 15, 2016, 11:37:22 PM »
Thanks, Rob.  Andrew:  you're trying to get me in trouble with SWMBO?  Might get away with naming a Lamborghini or Porsche after her,
not so sure she'd like to be commemorated by a model of century-old tractor technology....

Got the wood segments cut out, and fastened to a strip of re-purposed clock spring (Which was a bugger to drill even after
annealing)


Started on the bracket the ties together all the brake stuff:  needed a tapered hole for the brake shaft, finally got a use for the really cheap-o
tapered reamer that I bought 20 years ago for de-burring some copper plumbing line


some hack-saw and file work, milled some recesses to hold the gusset in position for soldering, and turned the shaft that the brake lever
rides on, drilled and tapped the blind-end of the first bit, again, just to hold it in position for soldering


and here it is dry-fitted, will get the torch out tomorrow...


Joe
 

Offline Joe d

  • Sr. Member
  • ****
  • Posts: 251
  • Country: ca
Re: Minnie TE Long term project
« Reply #228 on: May 20, 2016, 11:47:25 AM »
Turned and threaded some rod for the brake shaft, silver soldered a collar on it


made up the pair of plates that hold every thing together, and various pins that hold the brake band and a tapped one for the brake shaft,
took a picture of it but it didn't turn out, so you will have to imagine it.... so instead, here it is all assembled in place.


Hand wheel to make and the brakes are done

Joe

Offline tom osselton

  • Hero Member
  • *****
  • Posts: 1256
  • Country: ca
Re: Minnie TE Long term project
« Reply #229 on: May 20, 2016, 01:11:49 PM »
Looks great!

Offline Joe d

  • Sr. Member
  • ****
  • Posts: 251
  • Country: ca
Re: Minnie TE Long term project
« Reply #230 on: May 22, 2016, 05:04:07 PM »
Thanks, Tom.

Quick little bit of work to make the hand wheel:  set up the rotary table, milled the various diameters
Then milled out the spokes


cut out the wheel from the parent stock, a quick lick with a file in the lathe to round it over, tapped the central hole,
and here it is.


Joe

Offline SwarfnStuff

  • Hero Member
  • *****
  • Posts: 588
  • Country: au
Re: Minnie TE Long term project
« Reply #231 on: May 23, 2016, 02:29:08 AM »
Nice job Joe,
           Interesting thread and build log. Fascinating to see the parts slowly coming together as you create this probably not so mini project.

           If I understand the most recent photos and text correctly you milled through the spoke holes but left some metal on the web / spokes and outside diameter, finally cutting out.

           Question, Did you flip the blank to relieve the rear of the web / spokes or leave them flat on the rear?
           Just trying to get my head around the method used.
Thanks,

 John B
Converting good metal into swarf sometimes ending up with something useful. ;-)

Offline Joe d

  • Sr. Member
  • ****
  • Posts: 251
  • Country: ca
Re: Minnie TE Long term project
« Reply #232 on: May 23, 2016, 07:14:47 AM »
Hi John

Thanks for the kind words.  As drawn, the underside of the handwheel is flat, so I made it so...
saved me the trouble of getting it centred to relieve it!  So, simply cut it out where I had milled down
the outside diameter, screwed it on to a little threaded stub in a collet and with VERY small cuts trued it up and rounded
it over.

Cheers, Joe

Offline SwarfnStuff

  • Hero Member
  • *****
  • Posts: 588
  • Country: au
Re: Minnie TE Long term project
« Reply #233 on: May 24, 2016, 03:13:17 AM »
Thanks Joe,
        That's how I imagined it. Nice to know that I got it right. Way beyond my current level of doing but I learn heaps following these threads. Just need to recall the tips and tricks I see down the track if ever I attempt something as involved.
      Regards,
John B
Converting good metal into swarf sometimes ending up with something useful. ;-)

Offline Joe d

  • Sr. Member
  • ****
  • Posts: 251
  • Country: ca
Re: Minnie TE Long term project
« Reply #234 on: May 25, 2016, 11:16:21 AM »
John:  Just dig in and do it!  Many of the things required on this one were "firsts" for me....

Started tidying up some loose ends, made up the simulated oilers for the front wheels, straight forward
turning and threading


and the covers for the oiling points on the shaft bearings, turned & drilled, the bit that sits in the bearing is split vertically, to keep the
covers in place with spring action


and the locking pin for the gear selector


You can just see the bit of chain hanging down from the bracket that will be secured to the ring of the pin


Stay tuned... more to follow...

Offline Joe d

  • Sr. Member
  • ****
  • Posts: 251
  • Country: ca
Re: Minnie TE Long term project
« Reply #235 on: May 25, 2016, 11:31:20 AM »
And now the fun bit, a while back I mentioned that the commercially sourced worm and wheel for the steering
didn't actually mesh..... so finally got to making a new wheel.

Turned up a blank of brass and silver soldered it to a spare bit of steel rod


made up a fixture out of some flat stock out of the come in useful pile...


And here's the lucky part, the worm measures up at a very nice 3/8" - 16  thread, so acquired a spiral flute tap in that size, centred it in the
4 jaw, put the blank in it's fixture in a tool holder and squared it up, ran it in at a pretty low speed, and Happy Days, it worked!


Here's the factory-made one on the left, and the new one on the right


Set-up in the drill press to drill through for the eyebolt the secures the gear shaft inside the steering drum


and everything back where it belongs


Shouldn't have to come off many more times, so the socket head cap screws will disappear soon too.

More importantly, chuffed to report that the thing now works as it should.

Joe


Offline RotarySMP

  • Sr. Member
  • ****
  • Posts: 463
  • Country: at
Re: Minnie TE Long term project
« Reply #236 on: May 25, 2016, 01:05:05 PM »
Nice easy solution how you hobbed that gear.
You thread is real eye-candy. Thanks for posting so many detailed photos.
Mark
Best regards, Meilleures salutations, Mit freundlichen Grüßen, Cu salutari
Mark
https://www.youtube.com/c/RotarySMP

Offline SwarfnStuff

  • Hero Member
  • *****
  • Posts: 588
  • Country: au
Re: Minnie TE Long term project
« Reply #237 on: May 26, 2016, 02:44:34 AM »
John:  Just dig in and do it!  Many of the things required on this one were "firsts" for me....
Joe, thanks for the encouragement.

           Well, as a member of a local model engineering club I have the annual club challenge to get stuck into - (AFTER I find my bench somewhere under all that stuff that accumulates on any horizontal workshop surface).

      This year it's Elmer's H Twin wobbler at twice the original size. Supposedly it will take two weeks but at my speed probably two months. The last three challenges were various Stirling engines. It is interesting to see the variations on the design and materials that members come up with. We get judged on appearance and how well (or if) it runs.
           As Stirlings hate friction, at least a wobbler will be, (Hopefully) more forgiving in that respect. My last years effort failed to run on judging day but I did get it to behave later. Oh well, at least it ran eventually. Plus I learned a lot from the attempt, which is what it's all about for me.

  John B
Converting good metal into swarf sometimes ending up with something useful. ;-)

Offline Joe d

  • Sr. Member
  • ****
  • Posts: 251
  • Country: ca
Re: Minnie TE Long term project
« Reply #238 on: May 29, 2016, 10:39:49 PM »
Mark, Thanks!  John, I've never done a wobbler yet, going to have to correct that one of these days...

Catching up on some more stuff that got passed by earlier on...

turned and threaded a bit of steel rod,


rounded over the end, and drilled it for a handle


Turned a short handle and silver soldered it in place


and here it is holding the firedoor closed... and made up the final hinge pin as well, replacing the bent up piece of brass that
was temporarily serving...


Then did the pipe runs from the pump to the tank & valve


and another view:


and more to follow....

Offline Joe d

  • Sr. Member
  • ****
  • Posts: 251
  • Country: ca
Re: Minnie TE Long term project
« Reply #239 on: May 29, 2016, 10:59:22 PM »
A fun little bit here, decided to add some tensioning turnbuckles/bottle screws  similar to the Burrell engine plans that I have (just because I like the look of them)

started with turning the bodies of the bottles:
drilled through tapping size for the screw to come, then milled the slot, and parted them off the parent stock.
Then turned the eyes, milled the flat on them, and cross drilled:


Parted off the eyes, finished them with some filing, and then peened over the short little shaft inside the body of the bottle:


Turned and threaded some more stock for the screws, here they are in the mill for cutting the flats and cross drilling


The "Ta-Dahhh" photo:


and in place


Then after that photo, undid them, and rewound the chains on the drum other way about as I had reversed them.  Turning steering wheel right
should not make your vehicle turn left, now should it?

Offline Joe d

  • Sr. Member
  • ****
  • Posts: 251
  • Country: ca
Re: Minnie TE Long term project
« Reply #240 on: May 31, 2016, 10:15:30 PM »
Scratch another one off the list:  Pressure gauge in place:

Made up the bracket, (drill two holes, bend, & file)
made a nut, bent up some tube:


And here it is, the plans called for it to be secured at the lower bolt that you see on the right just above the third shaft...
having used up almost all of the copper tubing I had on hand trying to get the bends to accommodate that position, gave up and mounted it higher.


Although it seems all squint in the picture, it is actually straight... just a weird photo angle.

Joe

Offline Joe d

  • Sr. Member
  • ****
  • Posts: 251
  • Country: ca
Re: Minnie TE Long term project
« Reply #241 on: June 02, 2016, 12:12:23 AM »
I decided that I liked the look of a gear cover, (which Mason did not include in his drawings) so drew gear-sized circles
on some card stock and scissored away all that didn't look the part.  Once I had a shape that I liked, cut out two of them
from some brass sheet.  Then I bent up some thin brass stock to bridge the gap between the front and rear plates,
and riveted them in place. Added a strip to cover that space, riveted that in place, the soft soldered the heck out of it.

After some cleaning up, it looked like this: (I gave all the rivets a good bit of the soft solder as well, then filed the heads off in the clean-up phase of things)


I had already silver soldered some round stock studs on the outside of the rear piece, two of them are drilled and tapped for bolts through the horn plate to hold it in place, and the lower one is simply a spacer.  I had also cut away all of the inner plate that would have fouled on various things already bolted onto the hornplate.  You can just make out some of the thin brass cross-pieces in this shot.  At this point, there is a coat of self-etching primer as well.


And voila:


Joe


Offline Joe d

  • Sr. Member
  • ****
  • Posts: 251
  • Country: ca
Re: Minnie TE Long term project
« Reply #242 on: June 12, 2016, 10:34:10 PM »
Got to work on the lubricator assembly....

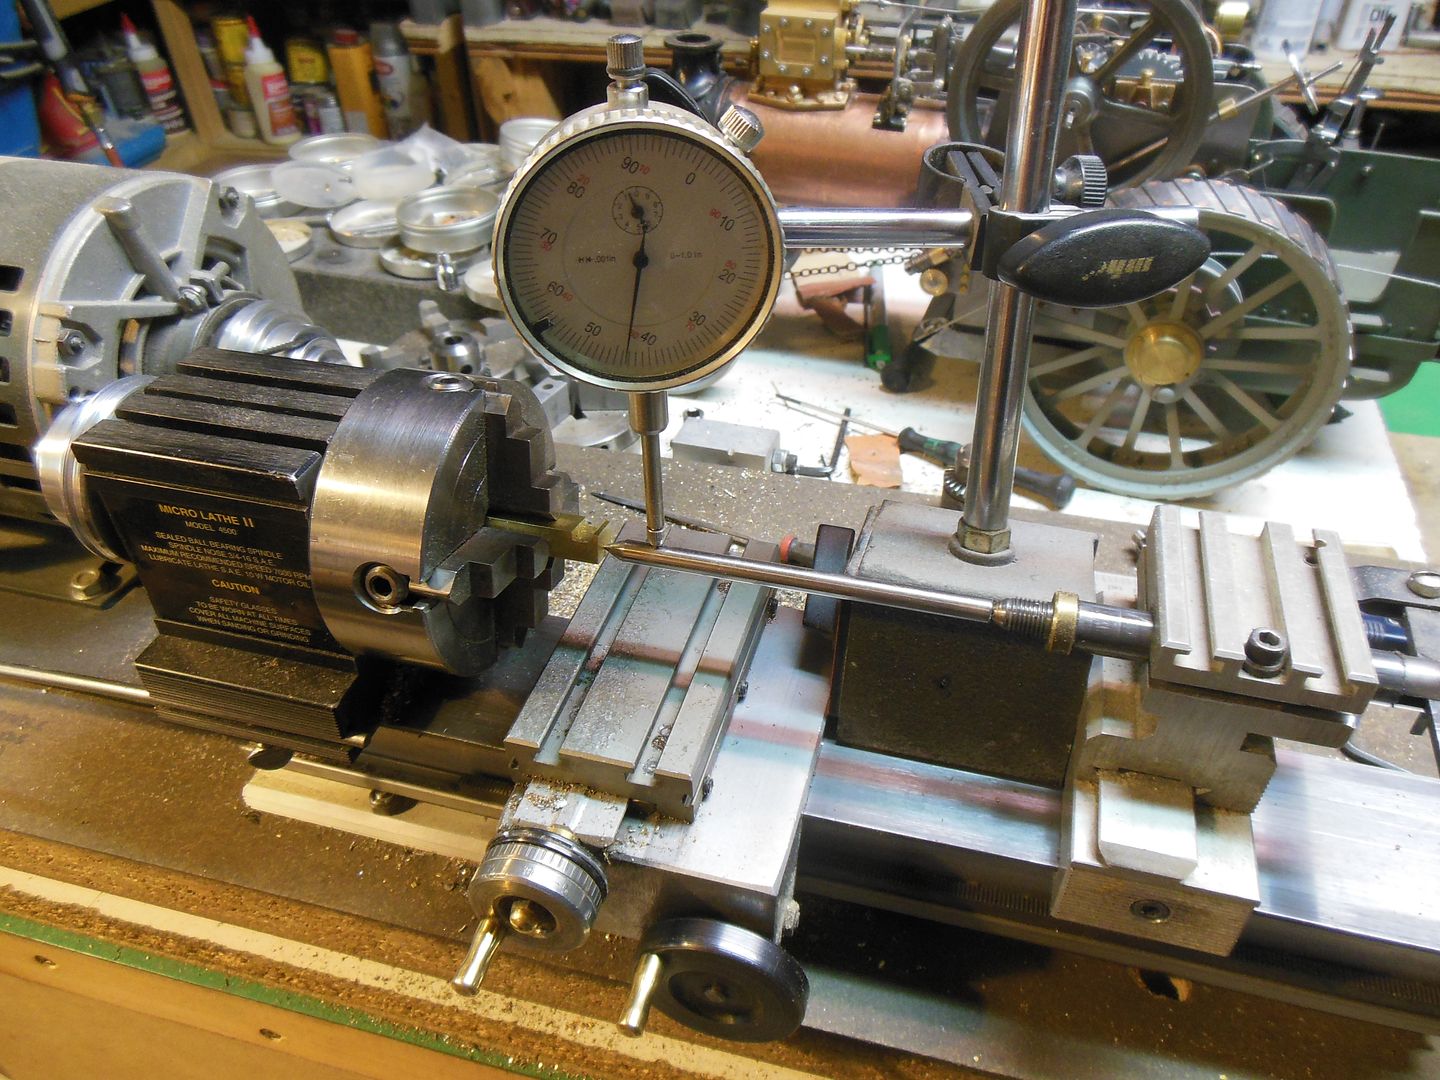
some milling, then set up in the lathe to drill and ream the bore of the cylinder:


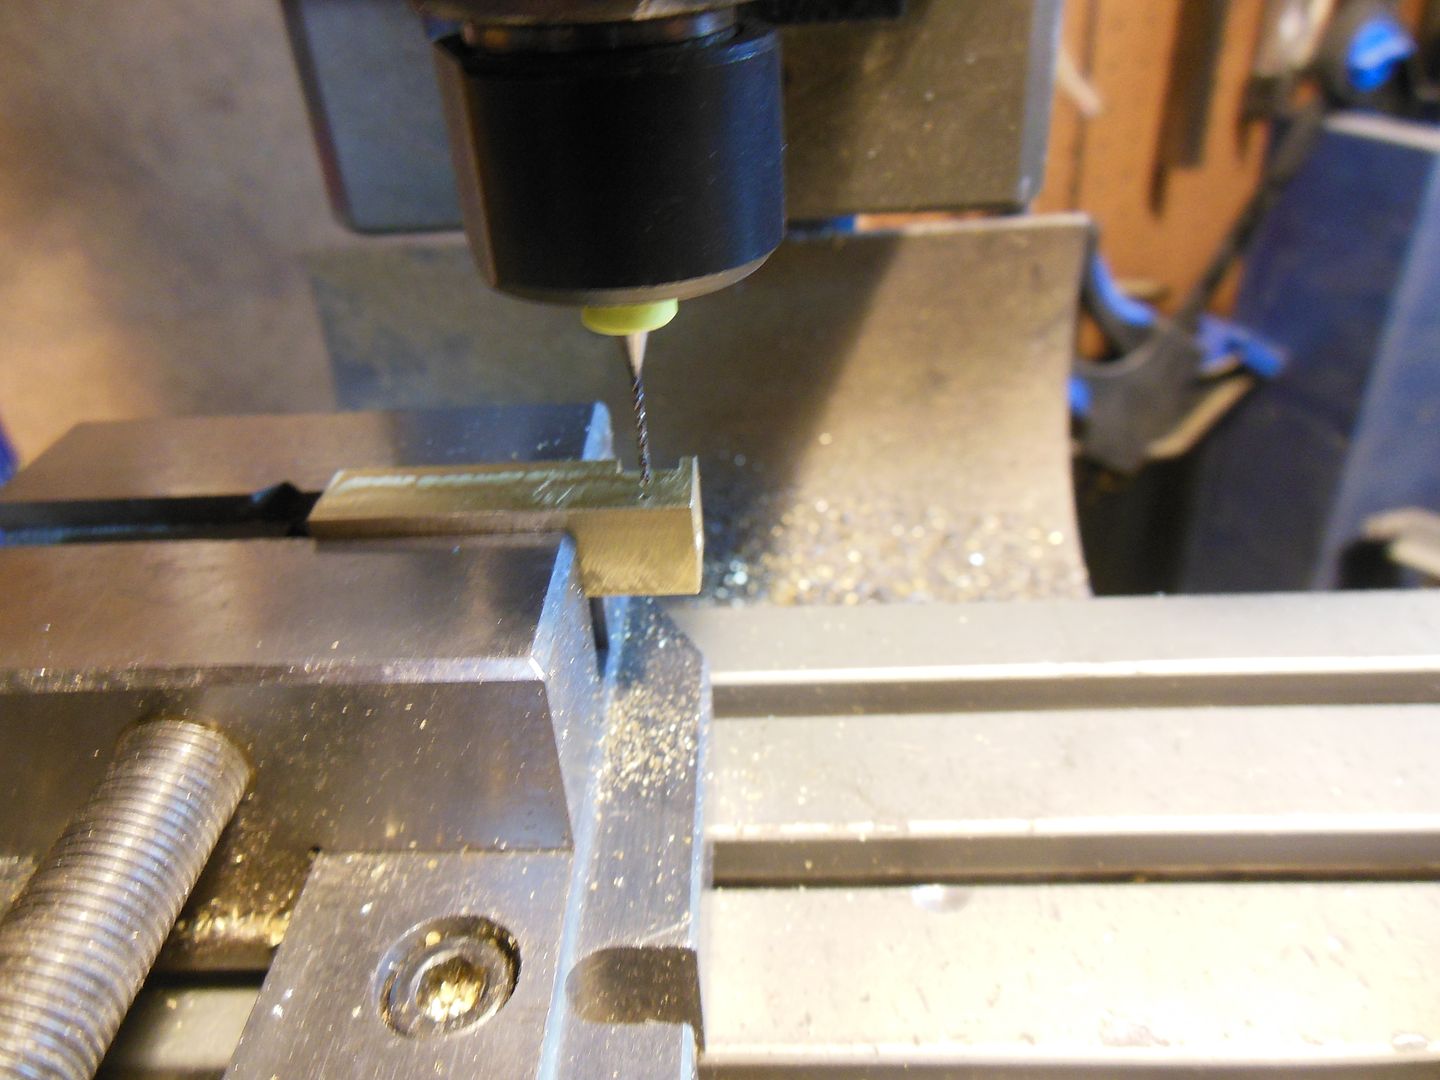
Then back in the mill to drill two No 65 holes as oil ports


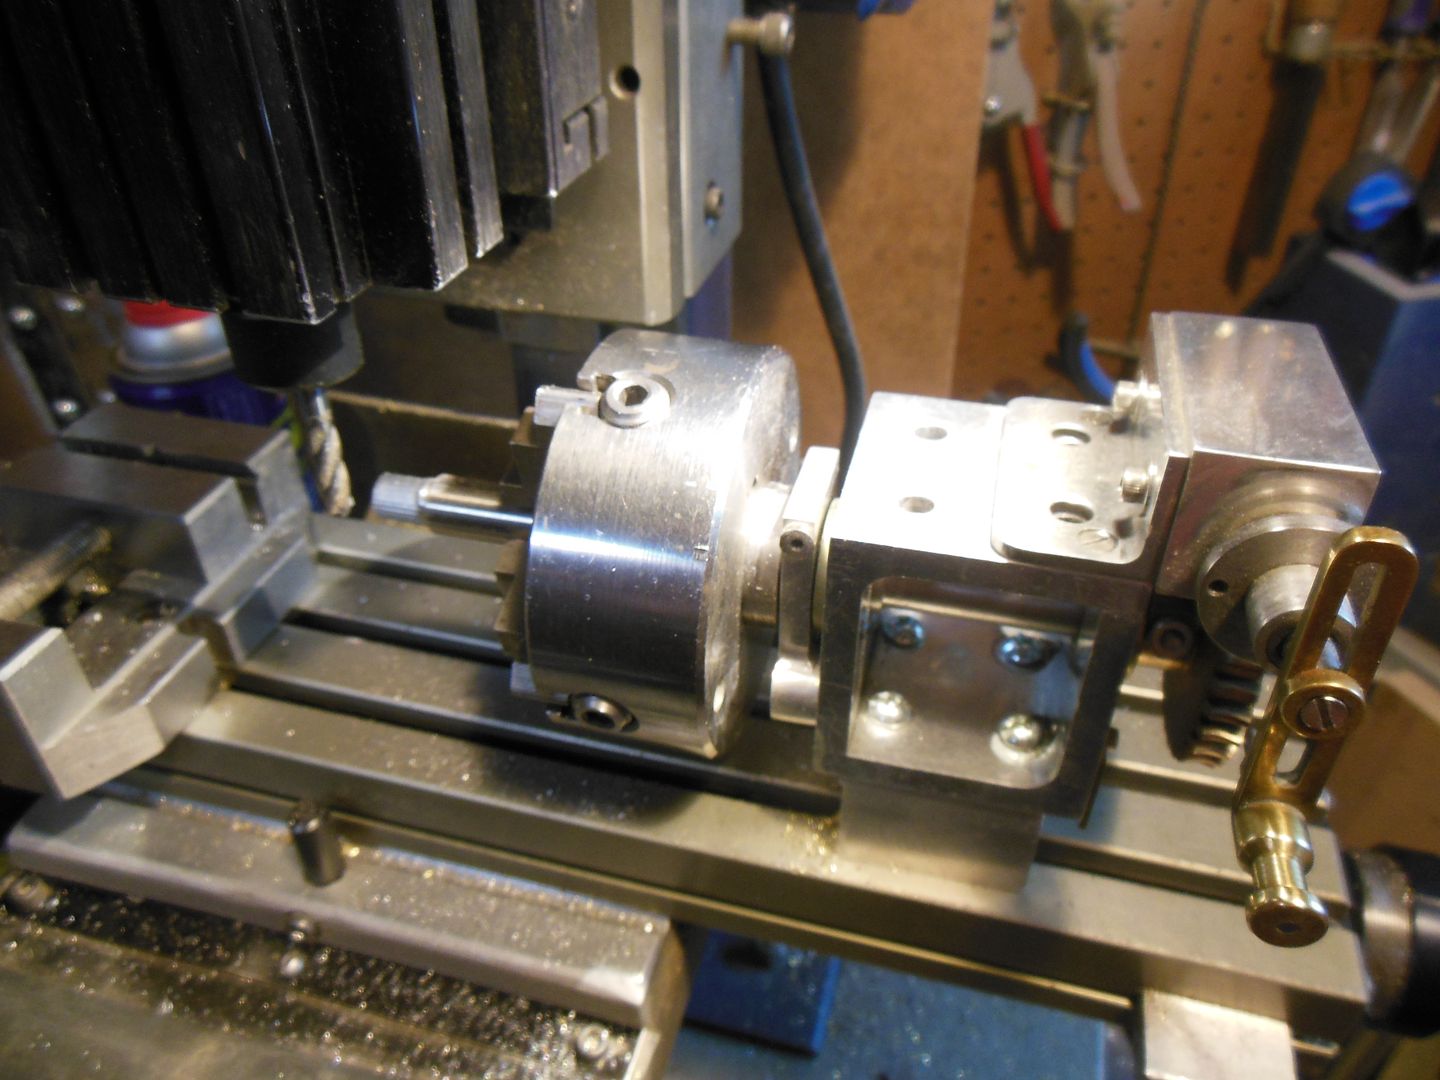
parted that off, and then turned some o-1 drill rod (silver steel) to size, and into the the dividing head to cut the ratchet wheel


parted that off and and hardened it,  then milled up a bit of spare ali as a former for the brass tank parts


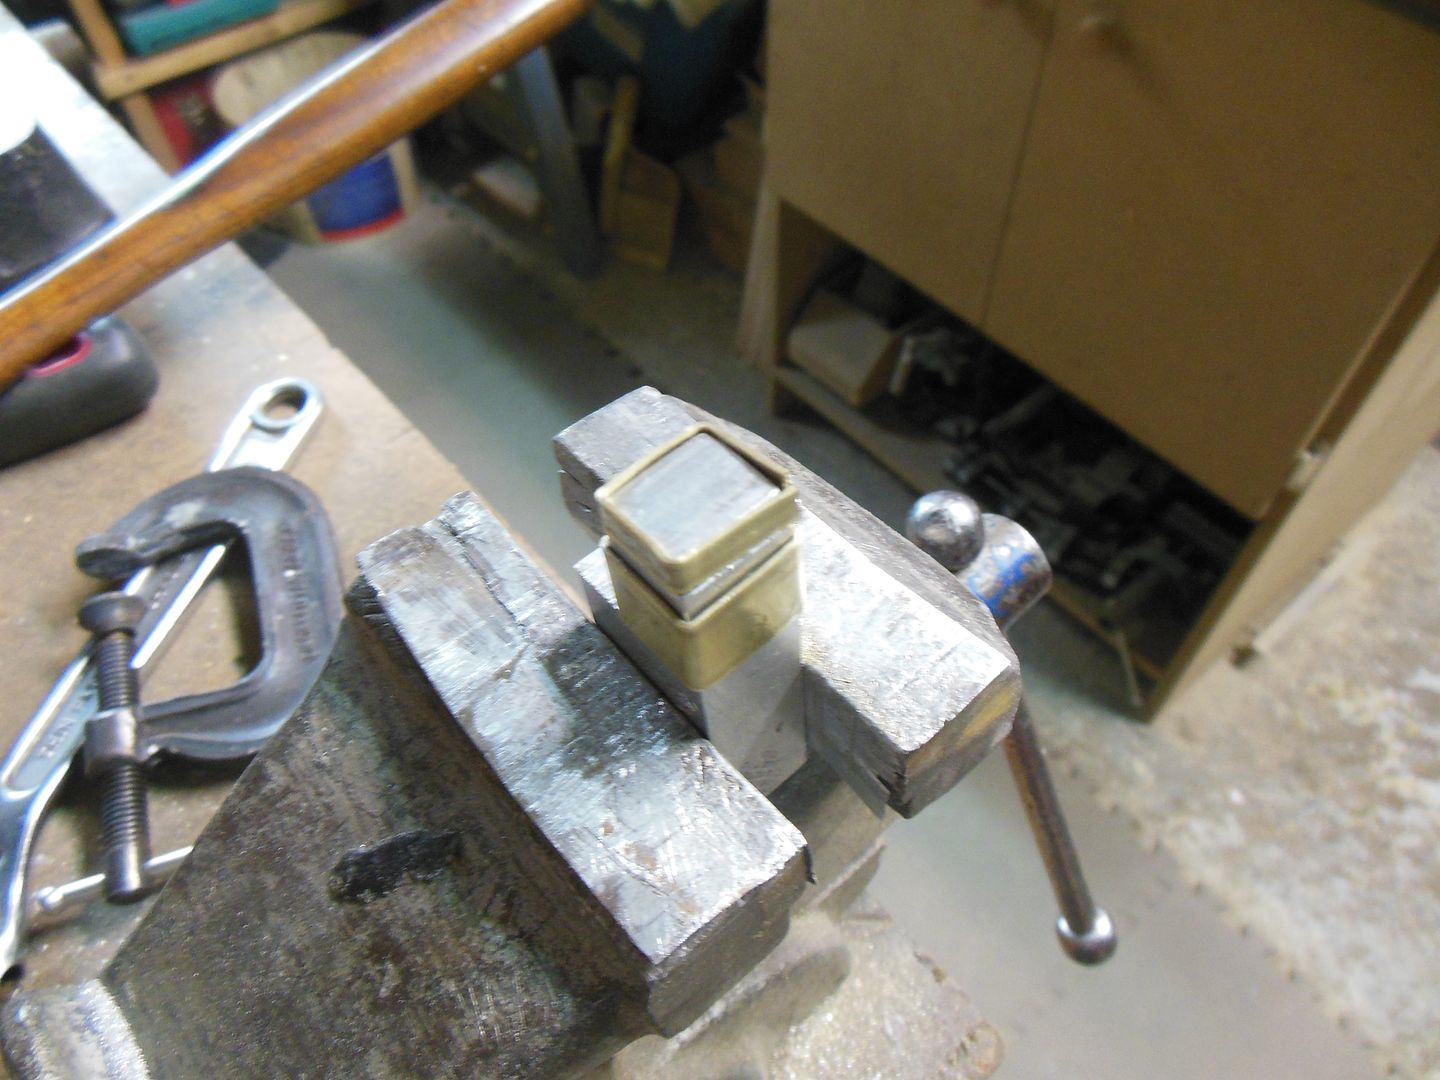
cleaned up, well fluxed, wired into place, and silver soldered


all the other bits were simple turning or drilling, bending and filing...


and that's the state of play to date...

have to fettle the fit of the ratchet dogs, get the springs sorted, and make up the pipe and valve that join the lubricator to the valve chest, and the lever that rides the valve shaft to actuate the ratchet, then need to make up the pipe that joins the blower valve to the chimney saddle, handles for the bypass valve and the damper control rod,
and a pipe for the blowdown valve on the sight glass assembly...and then it's done, bar complete dis-assembly and painting!

Sadly, all that is now on hold, as I am leaving town tomorrow for a summer contract in Ottawa... will have the occasional week-end at home,
so hopefully will complete those last few bits over the summer and will get to painting in September...

Joe

Offline DMIOM

  • Hero Member
  • *****
  • Posts: 676
  • Country: gb
  • Isle of Man
Re: Minnie TE Long term project
« Reply #243 on: June 16, 2016, 08:09:51 AM »
Hope you have a good summer Joe - we'll all be waiting & watching when you get back!

Dave (IOM)

RobWilson

  • Guest
Re: Minnie TE Long term project
« Reply #244 on: June 16, 2016, 11:11:12 AM »
Nice job Joe , that mechanical lubricator is a project in itself  :clap: :clap: :clap:


Will be here waiting for your return  :coffee:


Rob