Author Topic: 'Poppin' Flame Licker  (Read 77673 times)

Offline NickG

  • Madmodder Committee
  • Hero Member
  • *****
  • Posts: 1890
Re: 'Poppin' Flame Licker
« Reply #125 on: January 19, 2011, 02:28:15 PM »
Thanks arnold, I won't be again! Maybe just starting with the taper tap to make sure it goes in straight but even that can be done by hand by turning the chuck.
Location: County Durham (North East England)

Offline NickG

  • Madmodder Committee
  • Hero Member
  • *****
  • Posts: 1890
Re: 'Poppin' Flame Licker
« Reply #126 on: January 20, 2011, 08:47:31 PM »
Well, got some more done tonight but some things just seem to take a lot longer than you'd think!

First job was to put the conrod assembly in the vice and drill the hole in the big end for the crank journal.

I picked up the middle pretty much by eye and centre drilled lightly as didn't want to force the two bits apart. (I don't think it would have though as the vice had quite a tight grip squeezing it all together)


I opened it up to suit the journal. I didn't have a 5/32" reamer so just used a number drill the next size bigger which happened to be no.21. You need a nice loose fit anyway, don't want excessive friction.

Then I cut the big end strap from parent stock:


and tried to face it to length in the lathe. Luckily I took a very light cut as it moved:


So back across to mill to length instead!


Another picture seems to have gone missing but I basically set it up as follows, you can just see a bit of 5/32" rod in the pic which I put through the bearing and made it square with the table so I knew I was drilling the hole for the gudgeon pin parallel to the big end. Centre drilled


and drilled through. Again, next number drill size above the pin.


Here's the finished rod. You can see in a couple of pics that it's not spot on but once assembled you won't be able to see and I don't think it'll affect anything, it's neglibible.


So that was the last real component for the engine. Still got the burner and base to do but I decided to assemble the engine so it'll be ready to try a run tomorrow if I get the burner and base done.

I stripped the engine down into little bits, here they are:


Lapped the end of the cylinder and both sides of the cover again. I want to give it the best chance when I try to run it and there is no gasket so these surfaces have to be flat to seal well.

Assembled the engine back together with things placed more precisely. I found the build up of tolerances on the cylinder bolt holes, holes on the standard, piston and rod have meant the rod is slightly ofset to the left when looking down the bore at the piston. So I've put a washer in on the right side of the crank which keeps it just in the right place.

The assembly was very fiddly indeed! :bang:, I wouldn't recommend this engine for a beginner because of things like I mentioned, the build up of tolerances - there isn't much room for manoeuvre, everything is planned down to a tee, all the clearances are built in so you have to make everything to as near to drawing as possible.

Here are a few snaps of the engine assembled, ready for the base and burner tomorrow:


Looking quite good now I think, should look good when on its base. The question is, do I stick to my red flywheel scheme?! I deliberately left the centres of the flywheels rough so I could paint them.

Flicked it over a few times to get a feel for any tight spots, & whether everything seemed to work. It sounds promising, I can hear some suction and in fact it sounds just like Rick's from HMEM! Time to call it a night now, can't wait until tomorrow ...................

http://www.youtube.com/watch?v=4gkViVZm4WQ

Yeah right!!!  :lol: ... I've had you going long enough - I admit, I couldn't resist trying it to see if it would run!

Here are a few attempts. I missed the first one, I put the camera on but then didn't have enough hands so it just ended up pointing at the wall! I should have made the fixture for putting it on the mag base as Bogs suggested - will still do that soon.

I should point out that these are warts and all videos and unfortunately I've realised I waffle just as much in real life as I do in these posts. I seem to be mumbling quite a bit and probably not even making sense so apologies for that but anyway, you'll get the picture!

http://www.youtube.com/watch?v=pkMiXoXjBYI

http://www.youtube.com/watch?v=QlhpRWZ5OyM

http://www.youtube.com/watch?v=q4TQvSpKZMA


 :D :) :ddb: :ddb: :ddb:


« Last Edit: January 20, 2011, 08:54:35 PM by NickG »
Location: County Durham (North East England)

Offline Bogstandard

  • Bogs Group
  • Hero Member
  • *****
  • Posts: 1107
Re: 'Poppin' Flame Licker
« Reply #127 on: January 21, 2011, 02:36:22 AM »
Nick,

I bet you woke up still with a big grin on your face (if you managed to sleep that is).

That is a great result and proof that your machining techniques and problem solving are improving all the time.

Now just settle down, no rushing, do your little fiddles and tweaks without any bodging, and you will be able to enjoy your hard work for a long time to come.

Fantastic work


John
If you don't try it, you will never know if you can do it.

Location - Crewe, Cheshire

Skype - bandit175

Offline jim

  • Sr. Member
  • ****
  • Posts: 441
  • Country: 00
Re: 'Poppin' Flame Licker
« Reply #128 on: January 21, 2011, 02:54:18 AM »
its really great to see it run!!

thanks for sharing that!!!
if i'd thought it through, i'd have never tried it

Offline sbwhart

  • Global Moderator
  • Hero Member
  • *****
  • Posts: 3530
  • Country: gb
  • Smile, Be Happy, Have Fun and Rock Until you Drop
Re: 'Poppin' Flame Licker
« Reply #129 on: January 21, 2011, 02:58:11 AM »
Great result Nick

Do your fine tunning and make the burner and a bit of bling and you've an engine to be proud of  :thumbup:

Stew
A little bit of clearance never got in the road
 :wave:

Location:- Crewe Cheshire

Offline Stilldrillin

  • Global Moderator
  • Hero Member
  • *****
  • Posts: 4972
  • Country: gb
  • Staveley, Derbyshire. England.
Re: 'Poppin' Flame Licker
« Reply #130 on: January 21, 2011, 03:43:06 AM »
Yay!  :D  :ddb:  :ddb:

That's a great result Nick!  :clap: :clap:

A bit more fiddlin an twiddlin, and it will be a happy, reliable engine.  :thumbup:

Thank you, for letting us share your "moments"........

David D
David.

Still drilling holes... Sometimes, in the right place!

Still modifying bits of metal... Occasionally, making an improvement!

Offline NickG

  • Madmodder Committee
  • Hero Member
  • *****
  • Posts: 1890
Re: 'Poppin' Flame Licker
« Reply #131 on: January 21, 2011, 03:51:21 AM »
Thanks John,

I did have the big grin, it was a bit of a rush this morning though, didn't get to bed until 2am because I was waiting for the video to upload to utube - the last one took about 40 mins. So didn't get much sleep, I reckon about 2-3 hours. Thought i'd be in big trouble as my son woke up as I went upstairs but I got away with it for some reason!

Yep, I need to try to make a good job on the burner and base now rather than rushing it. I need to sort the valve out and the arm. Might put a dab of loctite on the valve rod (it should never need to come out) and a spring washer to stop the valve nut from vibrating, or it might work just nipped up a bit more.

Thanks Jim, it was yours on here that originally inspired me and thanks for the bearings. Thanks to Ade for the graphite too - seems to have worked a treat (so far!).

Thanks Stew and David. I'm amazed how insensitive it is to flame size, position, valve timing and overlap & spring tension. The author mentions it in his build instructions that at some timing settings it will run in either direction! I don't think my cam turned out right and that was the first position I put the cam in and it ran straight away. It's possible that changing the above things will give it better running characteristics though so may have to change something but am loathed to yet until I have a proper burner. I don't want it running away at full speed though so I think to get it running slowly the valve should shut later, lighter spring tension and least overlap. The other strange thing is that it runs straight from cold!

Thanks again for the support and advice along the way chaps. This one is supposed to be for my dad's birthday but I definitely want to get the other one done for my collection. I think I'm going to finish this one over the weekend, then have a short break from the workshop (except for making a gear linkage thing for a friend's Lotus Elise Honda conversion), then finish the other poppin.

Nick
Location: County Durham (North East England)

Offline arnoldb

  • Hero Member
  • *****
  • Posts: 515
  • Country: na
  • Windhoek, Namibia
Re: 'Poppin' Flame Licker
« Reply #132 on: January 21, 2011, 11:42:50 AM »
Well done Nick!  :clap: :clap: - Congratulations  :beer: :beer:

 :scratch: What's next - the other Poppin ?  :lol:

 :beer:, Arnold

Offline AdeV

  • Madmodder Committee
  • Hero Member
  • *****
  • Posts: 2434
  • Country: gb
Re: 'Poppin' Flame Licker
« Reply #133 on: January 21, 2011, 12:54:42 PM »
Cracking build, Nick - and a runner! Woo!

 :nrocks:
Cheers!
Ade.
--
Location: Wallasey, Merseyside. A long way from anywhere.
Occasionally: Zhengzhou, China. An even longer way from anywhere...

Offline madjackghengis

  • Hero Member
  • *****
  • Posts: 717
  • big engine
Re: 'Poppin' Flame Licker
« Reply #134 on: January 22, 2011, 09:13:29 AM »
Nick, that engine is really going together well, despite having to cut down all the stock to proper size, I thought I'd post in the middle and answer a question or two, with regard to the bushings, if it's a machine reamer, look at the angle on the leading edge where the cut is, go about half way up the angle, between the bottom of the relief and the o.d., and that's the minimum size hole to use, but you are better off with about half that.  Bronze and cast iron allow the most reaming with the least wear, stainless needs the least cutting, so the largest hole that will give a full cut.  If the bushes are made a press fit, ream them again in place, and they will fit perfectly.  As to threaded holes, a sixty percent thread cut with a tap will equal the strength of a grade five screw at 1 and a half diameters thickness, so with a tap hole giving sixty percent thread in an .125 rod for a .062 thread will give thread strength about one and a third the tensile strength of the sixteen in rod.  A 75% thread gives better than 90% strength of a 100% thread, and is about as much thread as you ever need unless working on rockets or something like that.  Stainless steel is the worst metal to work because it is amorphous, meaning the different metals in the alloy don't stay mixed well and evenly, but congregate with themselves, and come no where near the even hardness of a low alloy steel.  It is horrible for flywheels because it always is out of balance, and it never likes to be cut off, although it is very quiet when you give it a good whack with a hatchet, unawares.
   All that said, your progress is amazing, given the obstacles which pop up, and the rules which seem to be imposed, but it almost looks as if you could have built a "poppin" twice scale, and not had to cut all the raw stock in half before making the parts  :lol: all in all, you've done a very nice job getting things on spec, and with nice pictures showing all, I'm enjoying watching this and seeing it come out so well.  I cheated yesterday and looked ahead a bit, saw the poppin run a few strokes and then had to get out to work, so now I have to catch up on the log. :headbang: mad jack

Offline madjackghengis

  • Hero Member
  • *****
  • Posts: 717
  • big engine
Re: 'Poppin' Flame Licker
« Reply #135 on: January 22, 2011, 09:48:15 AM »
Hi Nick, my last post was yesterday's, so pretend it showed up before you got the engine running well, I didn't have time to view the long video, but I did today, and it looks great.  I'm still beating my head against my engine, but I think your build has shown up a few flaws in my design.  I need to get the mass of the flywheel right, more at the edge, much less in the middle.  I'm still fighting with excess friction in the valve gear, I think the valve gear design of the poppin is what makes it such a straight forward build, and not so picky about flames and position and such, and I think the poppin has the valve timing just about perfect as well, that last video is very impressive, particularly holding the flame by hand and moving it all about.  Definitely should paint the centers of the wheels red, no doubt about it :lol:  Once you've got the engine screwed down, and have an adjustable flame, you're dad's going to really enjoy that present, I have no doubt.  I was watching your valve and the timing very closely, and will use that insight in getting my engine to a running stage I believe.  This poppin build has been very informative, and helpful in establishing some ideas about ports, timing, and cam profile.  By the way, to make my own cam, I turned a hub for the grub screws, and turned a boss on the other side that was the small diameter, the clamped it in the mill vise, milled down to a smidge away from the boss diameter, then rotated the cam blank in the vise and milled another flat down to the boss, milling away the extra pointy metal left between the cuts, and used a file just to clean up where the two flats intersect, and got the minimum size dead on, and very little filing, with the boss to guide the filing without a button.  It was done in aluminum bronze mostly because that's what the piece of brass I found turned out to be.  I will be milling another flat, to remove another fifteen or twenty degrees off the cam, based on watching your video, and judging how far off my cam timing is based on your good working valve gear, since mine probably needs to work at least just as well.
    Very nice work, very good demonstration of making the material work to your needs, and getting it into its proper place, and a sure long runner, once you get it all fettled up and ready for Dad.  Very helpful in my own working out of bugs, and I truly appreciate that part  :lol: more than you will ever know  :poke:  Thanks much for the lessons, mad jack

Rob.Wilson

  • Guest
Re: 'Poppin' Flame Licker
« Reply #136 on: January 23, 2011, 04:24:54 AM »
 :clap: :clap: :clap: :clap: :clap: Nice one Nick  :bow: :bow: :bow: :bow:   :thumbup:

Rob   :)

Offline NickG

  • Madmodder Committee
  • Hero Member
  • *****
  • Posts: 1890
Re: 'Poppin' Flame Licker
« Reply #137 on: January 23, 2011, 05:07:43 PM »
Thanks guys for following, your kind remarks and advice mean a lot, cheers.  :beer:

Jack, keep going, I'm sure you're going the right way. I reckon your current valve set up is better (less friction) but I still think it is actuated the wrong way. The cam should forcibly close the valve when you chose, which is about anywhere between 50 and 10 degrees before bottom dead centre on 'Poppin', and the spring should open it-  but spring pressure should only be light so that the valve can actually stay sucked to the port until the pressures equalise, so the cam follower actually leaves contact with the cam. Of course, if you know the exact figures, you can build this into the cam design which is what you'd need to do if you stick with your current method as your cam forcibly opens the valve, but if you switch it so your arm is effectively on top of the cam, the cam will close the valve, spring tension will open it. I know you might need to change some geometry to do that but it's worth a thought. You could leave your swinging valve mechanism but just have it actuated like poppin.

I gave things a miss on Friday night as I was pretty tired after lots of late nights. I was allowed to go into the garage on Sat during the day to try and get things finished off  :whip:

Time to get some (as Bogs would call it) brown stuff out. This is the point where all my hard work is spoilt by not being able to make things out of wood! I spend about 0.1 seconds searching for the right bit and found this lovely bit of, well, wood.  :scratch:

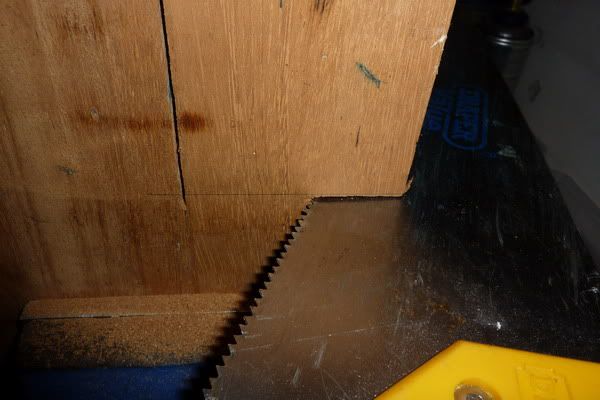
Hacked it into roughly a rectangular shape:
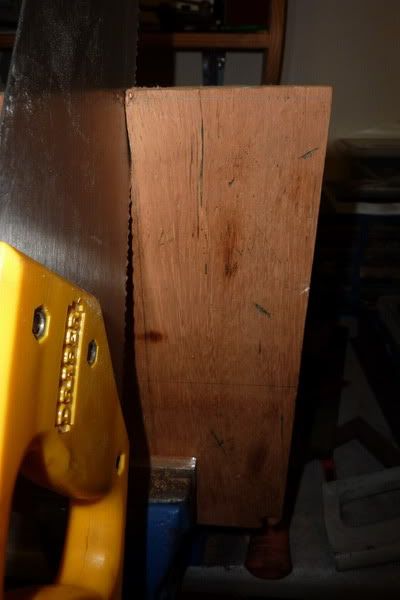


The saw just wouldn't cut it so to speak so transferred to a proper tool - yep, it's getting milled!

Flycutting to get it square:
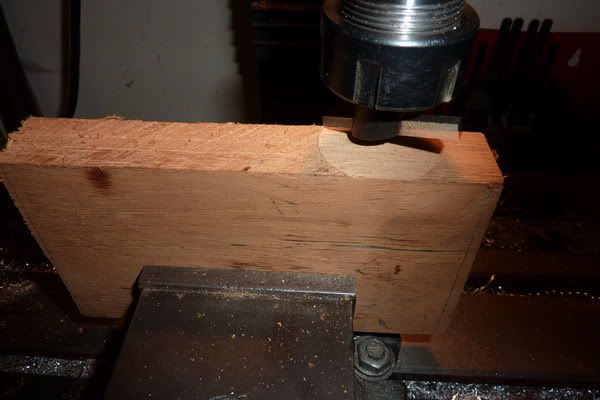


Then rotated around to do the end:
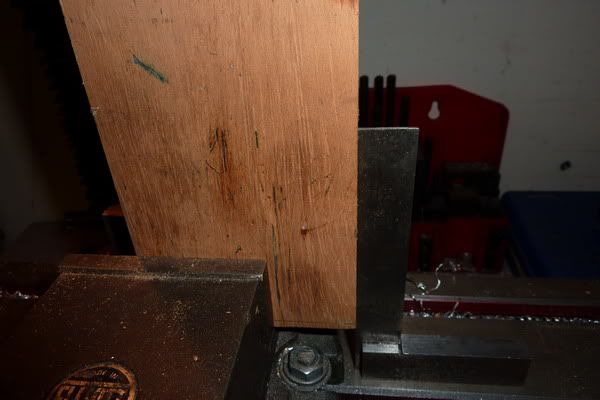


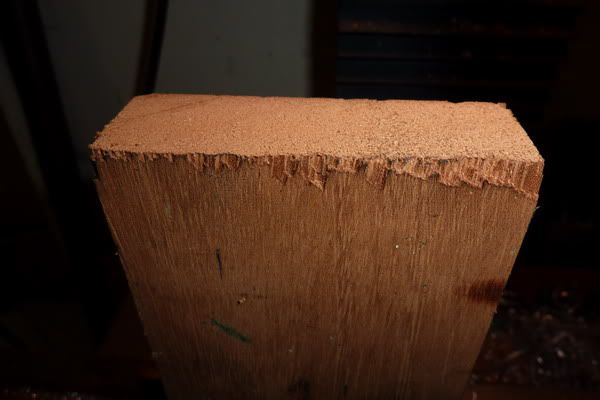
At this point I realised that if I went one way with the flycutter it splintered one side, the other way it splintered the other! Problem was, I'd splintered alternate sides when flipped it over!  :bang:


Anyway, i'll live with it!

At this point I drew on some newly found knowledge (kind of) from Bogs' Scott Vacuum Engine post. Working with wood is a bit like castings at first, except it's easy to grip and machine- but nothing is square! I couldn't fit this bit in my vice and didn't want to move the vice so I screwed a batton on underneath to grip it with:


Cleaned up the top - I thought it was a bit thick anyway and this would at least get rid of the splinters on the top surface:


Started my masterpiece, a stepped edge no less!  :lol:


Starting to take shape doing other sides:
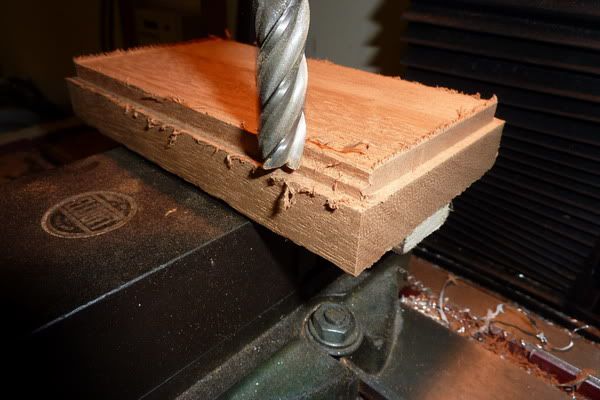


It looks a mess but these burrs come off with a few rubs of sandpaper by hand:
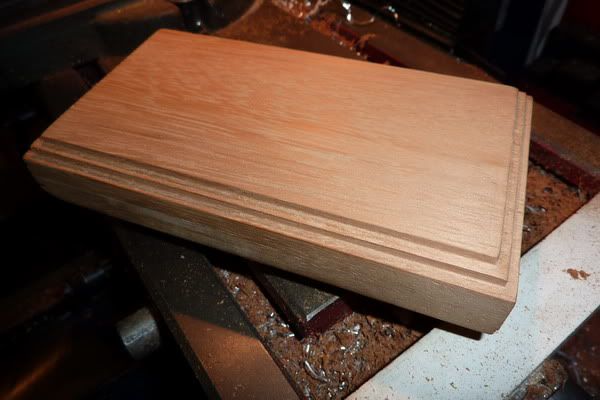


Looks not too bad for me!

Marked up for engine mounting holes and drilled:
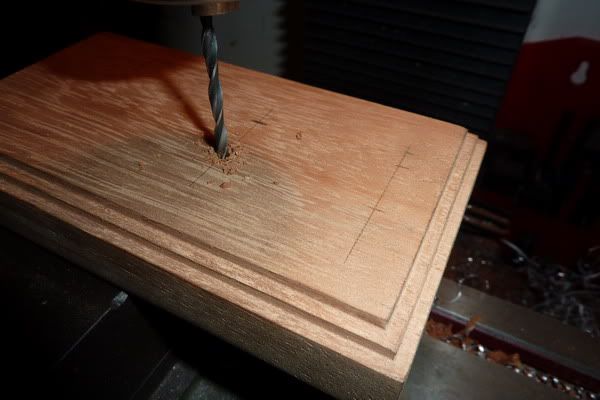


The beauty of this is, you don't need to clamp, just position by eye and because the cutting force is low and the bit of wood relatively large you can just hang onto it and quickly drill through.

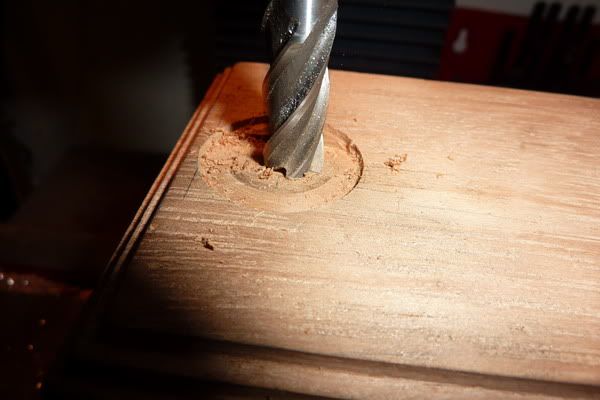
Turned over to counterbore the holes as the 6ba screws aren't long enough to go right through.
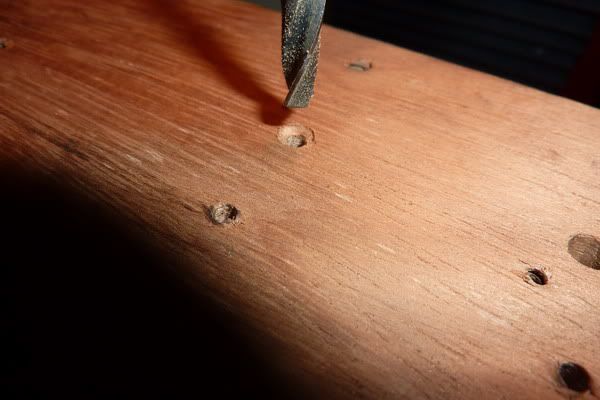


That's the base nearly finished. Now onto the burner.

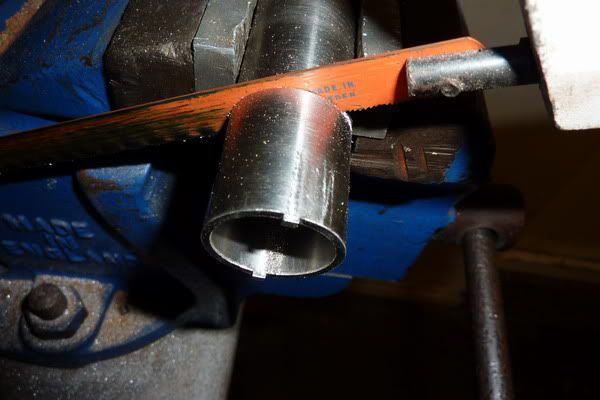
I found a bit of (I think) stainless tube that I got given at work:

Cut to length after facing, then other end was faced:


Then found some brass hex just right size for lid and base:

Facing off:
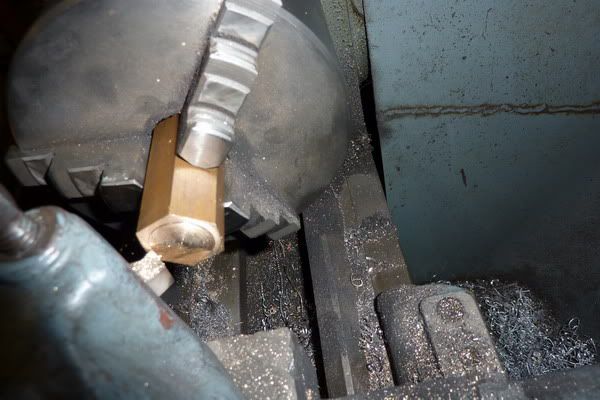


Turning down to size - I overestimated how much needed to come off so had to go again!
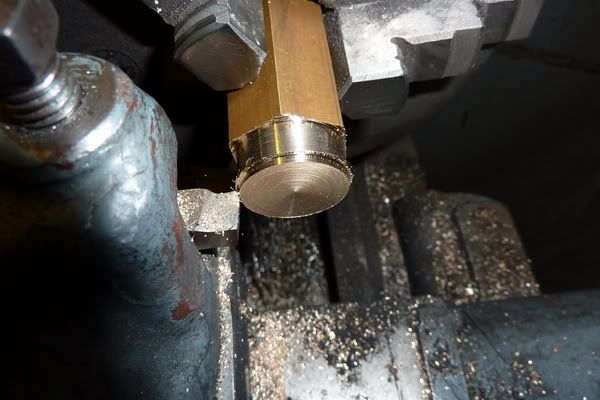


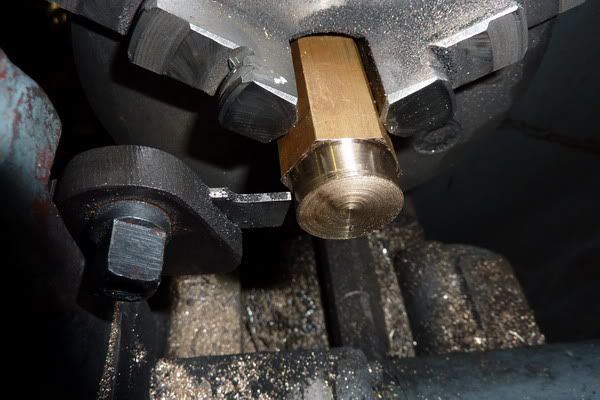
Parting off for the base, this was to fit inside the tube and be soldered:


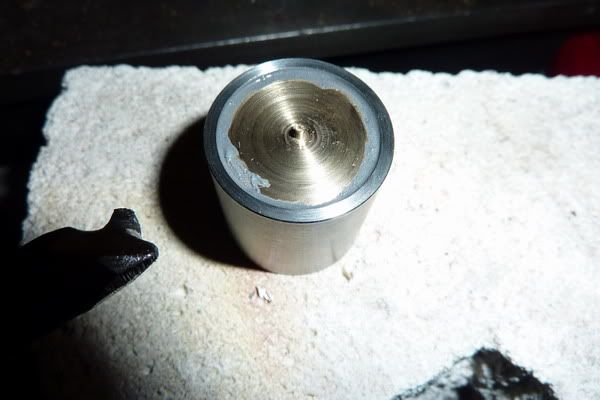
Ready to solder in, I would just soft solder this as it shouldn't get hot enough to melt and doesn't need any massive strength, just be leak proof. I use this soft solder paste as flux that I found in my grandad's garage for soft soldering. Seems to work well, only thing is, it gets solder wherever you put the paste. Doesn't need to be too neat this though as underneath:


Heated up and a bid more soft solder fed in:
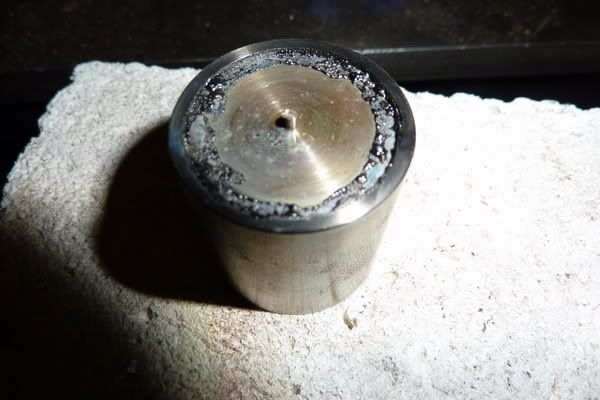


This didn't work. It's stuck to the brass but hasn't taken to the tube whatsoever. So all this had to be cleaned off.  :scratch:  :bang:

I decided to continue and make the cap while I had a thought how to stick it together:

This just needed a slightly smaller dia than the base for a sliding rather than push fit:

Still in the lather from before so it was faced and skimmed down to size:
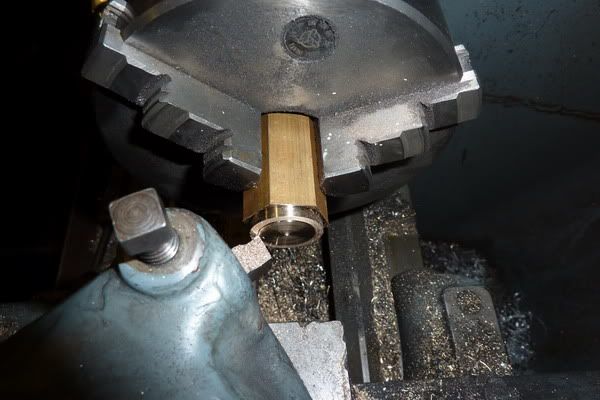


Then partly parted off:
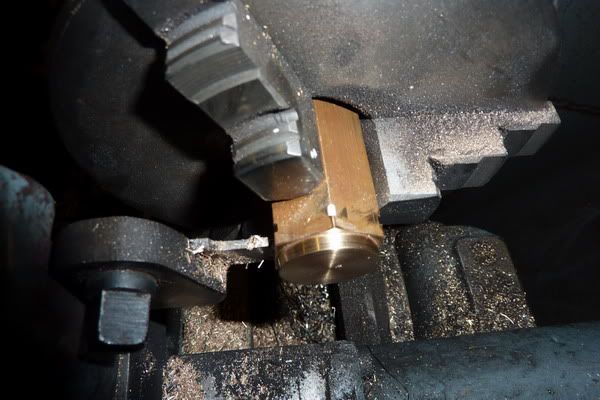


At this point I came over a bit funny and heard a voice in my head about artistic license! I would apply a little here, wouldn't recommend this but I just took very light cuts to give a chamfer:
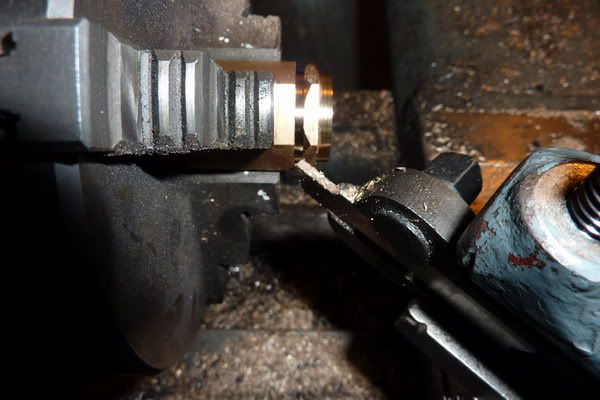


Then parted off but leaving a couple of steps:
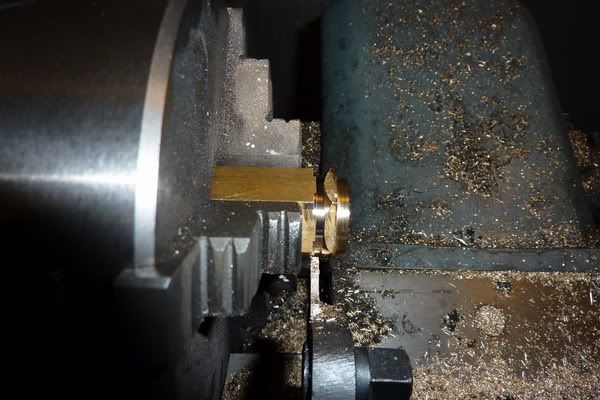


I sawed through the last bit as things were a bit close to the chuck for my liking so flipped it around and faced:
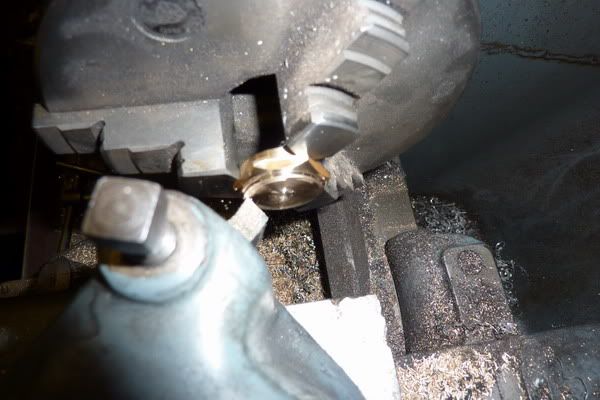


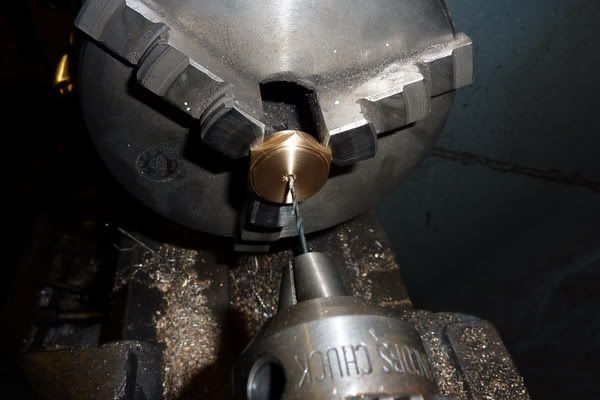
Then just centre drilled and drilled through for an air hole:


At this point I decided to put the angled wick tube into the side of the tube to get the correct height rather than into the cap as I had done with my Jan Ridders Flame Licker. So I set about drilling the angled hole. I just gripped in vice with the base half way up for support:
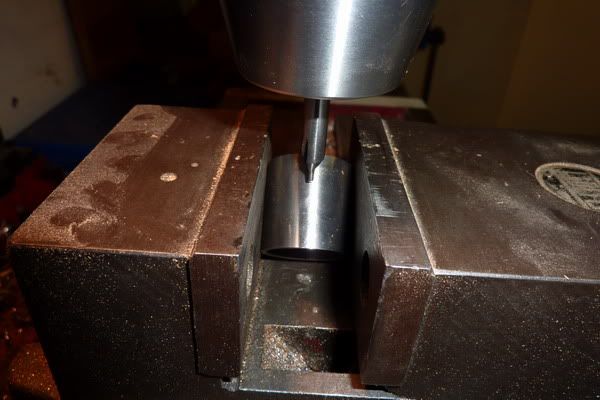


I wasn't sure how to set the angle but then remembered I got a digi angle gauge for xmas which I hadn't used yet. Luckily it just fit between the jaws so I knew that for the first time, an angled thing of mine was about right!

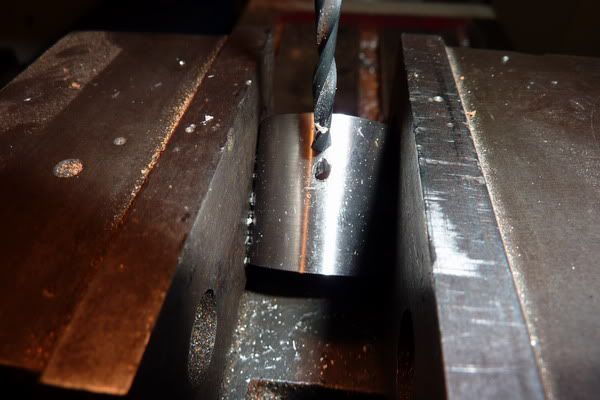
Gradually opened up to 1/4" dia to accept some copper tube I had found:


I had decided I would silver solder the base and wick tube in now - but that didn't work either. It just wouldn't take to the steel for some reason. I was sure I'd silver soldered stainless before, or at least seen it done?  :doh:

So even more of a mess had to be cleaned off now. I was mulling over what to do and decided that being as I had a good fit on the parts, I would loctite them together. Don't know whether it will work long term or not, I was going to use some epoxy glue like araldite but I didn't have any and didn't want to wait for ages for it to dry.

Can't find a pic of the completed burner but I went on to finish the base. I wanted to put a good fitting recess in it so as the burner would be positioned in the right place and the speed could be varied by rotating it within that recess. It would also stop the burner sliding about with vibration.

I was going to do this in the lathe but my lathe doesn't have a gap bed and couldn't quite swing it. So I thought I'd use the milling machine.

I have no boring head so I used the flycutter to outline the recess / sort of trepan to depth:
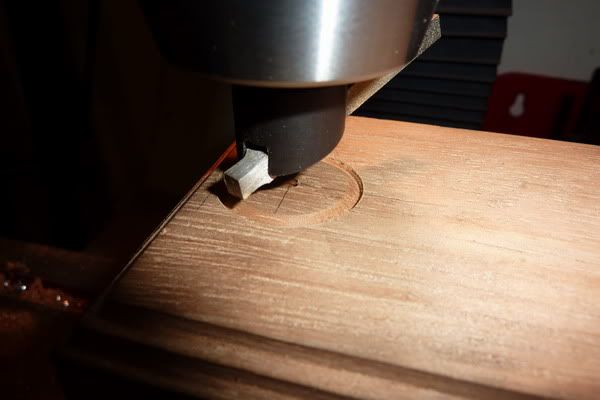


Then used an end mill to carve out the middle to the same depth. This was tricky, kept forgetting which way my hands were turning if that makes sense!  :lol:


I should have used the biggest end mill I had but never thought at the time.

Here you can see I went over the lines a little in a couple of places but not too bad:
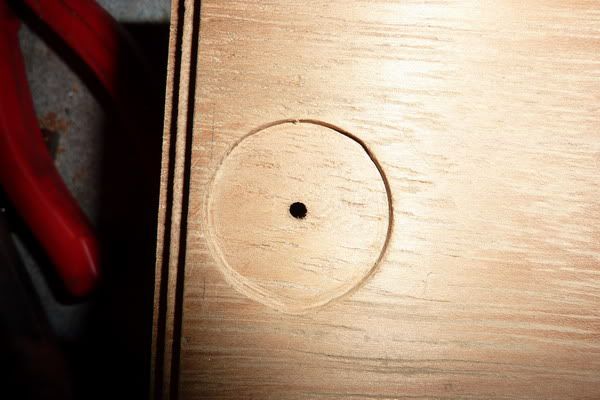


The brown stuff then had some more brown stuff rubbed onto it (teak oil) before the engine and burner were put into place.

Here is the finished engine no.1. I should have mentioned, since this is my dad's present, I decided to just put some emery cloth and oil on the flywheels to stop them going rusty rather than paint them:
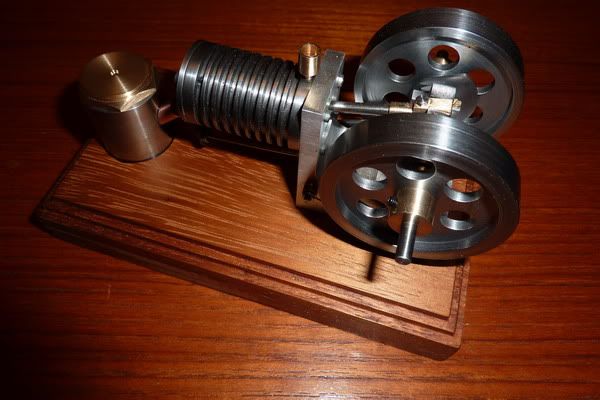
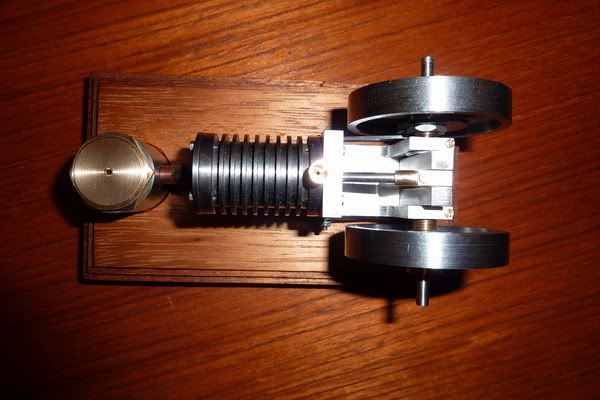
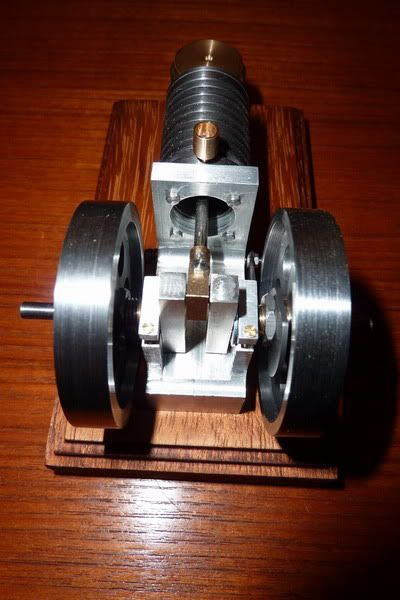


I took a couple of videos last night but the engine kept running away with itself and getting a bit of valve bounce, then the valve would stick. So I had a slight adjustment to do giving it less valve overlap (as per instructions, I just didn't think it mattered before, but guess they are there for a reason!) today and took this video. Apologies if you can hear kids messing around in the background, this was just before a trip to mother in laws  :palm: !

http://www.youtube.com/watch?v=pMfmtRP4OPc

As I said, I'll be having a short break from the workshop now, catching up on other peoples projects and getting back in the wife's good books before finishing off poppin no.2! She's feeling a little neglected over the last couple of months with me being in the workshop a lot!  :wack:

p.s. Just noticed that in those photos at the end, it looks like the engine overhangs the wooden base. It doesn't it's been carefully measured to ensure there is a nice border all around it. I've got OCD when it comes to things like that!  :lol:

Also, the pic of the stainless tube, must have been sawing it off before I'd faced the end, think I was sick of showing pics of facing off!

Nick
« Last Edit: January 23, 2011, 05:12:24 PM by NickG »
Location: County Durham (North East England)

Offline sbwhart

  • Global Moderator
  • Hero Member
  • *****
  • Posts: 3530
  • Country: gb
  • Smile, Be Happy, Have Fun and Rock Until you Drop
Re: 'Poppin' Flame Licker
« Reply #138 on: January 23, 2011, 05:23:52 PM »
Great run Nick  :thumbup:
 
:clap: :clap: :clap: :clap: :clap: :clap:

 :nrocks: :ddb: :nrocks: :ddb: :nrocks:

Nice job with the brown stuff as well, I can't touch the darn stuff I've developed an allergy to it and just swell up.

Stew

A little bit of clearance never got in the road
 :wave:

Location:- Crewe Cheshire

Offline NickG

  • Madmodder Committee
  • Hero Member
  • *****
  • Posts: 1890
Re: 'Poppin' Flame Licker
« Reply #139 on: January 23, 2011, 05:44:42 PM »
Thanks Stew!  :D  :nrocks:

Oh yeah, I remember you saying that now  :doh: Best left alone anyway. It did get right up my nose after milling it actually, feel like I've got a cold but know it is the dust from that still in there. Will wear a mask next time, can be pretty awful stuff.

Nick
Location: County Durham (North East England)

Offline madjackghengis

  • Hero Member
  • *****
  • Posts: 717
  • big engine
Re: 'Poppin' Flame Licker
« Reply #140 on: January 23, 2011, 08:41:57 PM »
Hey Nick, that run looks great :headbang: even the brown stuff looks good.  The kids sounded good too, mine are too old, now they're just a pain or a lifesaver, depending on what day it is.  Funny you should say that about the poppin valve gear and using it.  I've almost got it running, leaking too much around the .013 gauge so I'm moving my pivot north and going to try coming down with the valve, but just like the poppin.  I kind of was thinking along the same line as you with the valve opening from the spring, and only having to close against it.  I'm finishing up starting up a fresh '51 stroker panhead bottom, shovel head top custom chopper, doing the final checks and making it fire, and it's not been cooperating much either.  I've got to say, I was truly stoked to see that engine of yours finally running like a top, sounding good.  I'd bet you dad will we quite pleased when he gets it, bet you wish you had that second standard done about now,  :lol: don't you :poke: good going, mad jack

Offline NickG

  • Madmodder Committee
  • Hero Member
  • *****
  • Posts: 1890
Re: 'Poppin' Flame Licker
« Reply #141 on: January 24, 2011, 05:36:23 AM »
Thanks MadJack,

Haha, the kids were a bit of a nightmare yesterday!  :palm: But on the positive side they tired themselves out and slept all night without a peep!

Well done, sounds like you're about there, think I used a 0.005" feeler gauge, the drawing calls for 0.002" but I was thinking it'd be better a bit thicker to avoid creasing. The thinner one probably seals better (getting sucked against the port face) but maybe won't last as long.

Sounds like you ar a man of many projects!

I am very pleased with it too - hope dad likes it, but yeah wish I'd done the other!!! I've already being thinking about trying to turn the bits I have into a vertical to give it a bit of variation  :lol:

Location: County Durham (North East England)

Offline Stilldrillin

  • Global Moderator
  • Hero Member
  • *****
  • Posts: 4972
  • Country: gb
  • Staveley, Derbyshire. England.
Re: 'Poppin' Flame Licker
« Reply #142 on: January 24, 2011, 12:18:05 PM »
Nick.
Looks beautiful......  :clap:

Runs beautiful......  :clap:

Yer lucky Dad, will be proud of you......   :D

Blummin well done!  :thumbup:

David D
David.

Still drilling holes... Sometimes, in the right place!

Still modifying bits of metal... Occasionally, making an improvement!

Offline NickG

  • Madmodder Committee
  • Hero Member
  • *****
  • Posts: 1890
Re: 'Poppin' Flame Licker
« Reply #143 on: January 24, 2011, 02:40:49 PM »
Thanks very much David. Looking forward to a bit of  a break now but also looking forward to the next project!

Nick
Location: County Durham (North East England)

Offline madjackghengis

  • Hero Member
  • *****
  • Posts: 717
  • big engine
Re: 'Poppin' Flame Licker
« Reply #144 on: January 24, 2011, 09:50:18 PM »
 :beer: cheers Nick, that idea about turning the second one into a vertical one sounds pretty good to me, that keeps you from having to machine a second standard.  I think it just adds to interesting. :jaw: mad jack

Offline NickG

  • Madmodder Committee
  • Hero Member
  • *****
  • Posts: 1890
Re: 'Poppin' Flame Licker
« Reply #145 on: January 25, 2011, 03:22:11 AM »
That was my thinking MadJack, I can keep all dimensions the same so can still use all existing parts I have made but it will give me something different to do rather than repetative. The only thing I'm not sure about is, will it be ok with the flame directly underneath the port - will it heat up too much? Also, will it be too tall and spindly? guess I can space it how I want really though. Will have to do some mock ups on CAD. I can see the advantage of milling the standard from one piece though, everything stays nice and square and inline, so it'll be more of a challenge to do that with separate bits, or will it - because if necessary and I mess up slightly, I can just elongate holes until it finds its own correct position then bolt down. Another advantage is, if that all goes wrong, I can just make the standard and convert back to how it was intended!

Should be interesting.

Nick
Location: County Durham (North East England)

Offline AdeV

  • Madmodder Committee
  • Hero Member
  • *****
  • Posts: 2434
  • Country: gb
Re: 'Poppin' Flame Licker
« Reply #146 on: January 25, 2011, 05:51:33 AM »
The only thing I'm not sure about is, will it be ok with the flame directly underneath the port - will it heat up too much?

You could always really challenge it & try to run it with the cylinder pointing upwards....
Cheers!
Ade.
--
Location: Wallasey, Merseyside. A long way from anywhere.
Occasionally: Zhengzhou, China. An even longer way from anywhere...

Offline NickG

  • Madmodder Committee
  • Hero Member
  • *****
  • Posts: 1890
Re: 'Poppin' Flame Licker
« Reply #147 on: January 25, 2011, 08:09:45 AM »
Ade - believe it or not that was my first thought!  :wack: :palm:
Location: County Durham (North East England)