Author Topic: Robinson Hot Air Engine.  (Read 102910 times)

Offline Bogstandard

  • Bogs Group
  • Hero Member
  • *****
  • Posts: 1107
Re: Robinson Hot Air Engine.
« Reply #150 on: January 28, 2011, 12:29:15 PM »
Much rarer to find are serial taps, where they get larger on the main cutting thread the less taper they have on the end. Arc Euro are the only cheaper, but fairly good brand that do these types of taps. It makes cutting an almost or full contact thread easier in harder materials, as you are not trying to go to full thread depth from the very beginning. Each subsequent tap of the three sizes cuts the thread a little deeper, just like you should do when using a die.

http://www.arceurotrade.co.uk/Catalogue/Cutting-Tools/Taps


But for cutting stainless, I have yet to come across any better than these.

http://www.tapdie.com/


Bogs

If you don't try it, you will never know if you can do it.

Location - Crewe, Cheshire

Skype - bandit175

Offline Stilldrillin

  • Global Moderator
  • Hero Member
  • *****
  • Posts: 4972
  • Country: gb
  • Staveley, Derbyshire. England.
Re: Robinson Hot Air Engine.
« Reply #151 on: February 05, 2011, 09:38:27 AM »


Haven't achieved a lot, this past week or so. But, I'm pretty pleased with end quality.....  :thumbup:

I planned long and hard, how to seal between displacer and cylinder.  :scratch:

Eventually, I decided to follow the previous pattern, with a threaded tube......

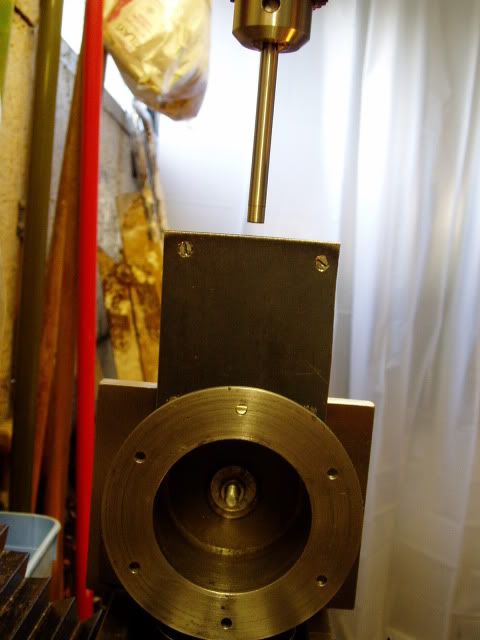
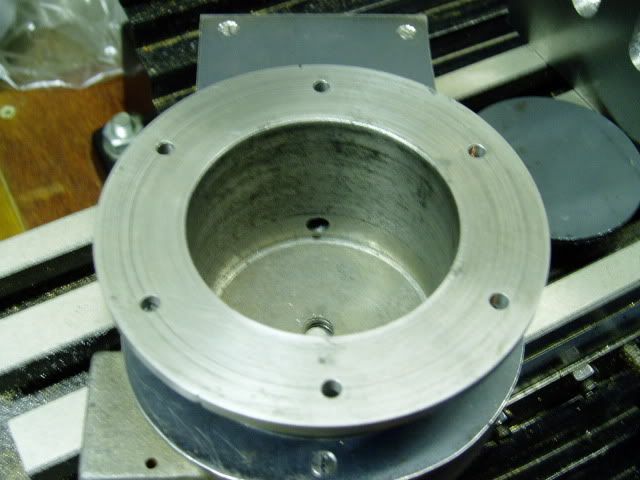
First, I needed the top deck fixing in alignment with the rest of the engine. Referenced the exhaust pipe.....


Then aligned the deck to it, and held with a through bolt/ clamp.


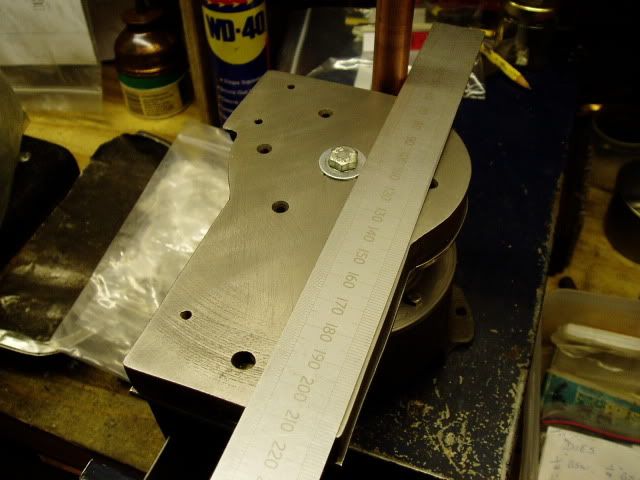
I then spot drilled the 6 hole pcd, through the deck.

Drilled & tapped all ok, after replacing the plug tap for a better quality one.  ::)


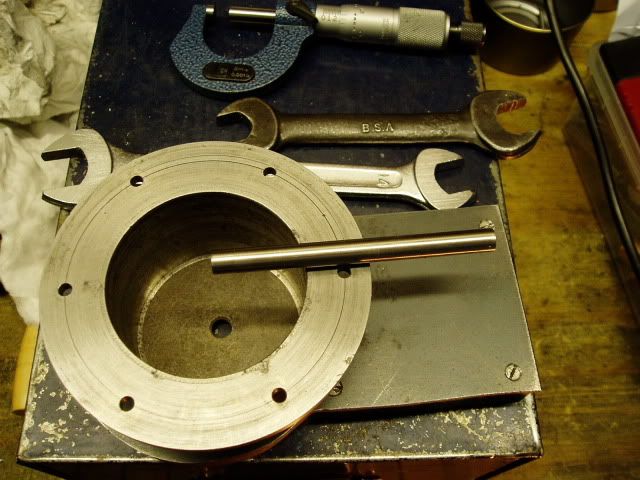
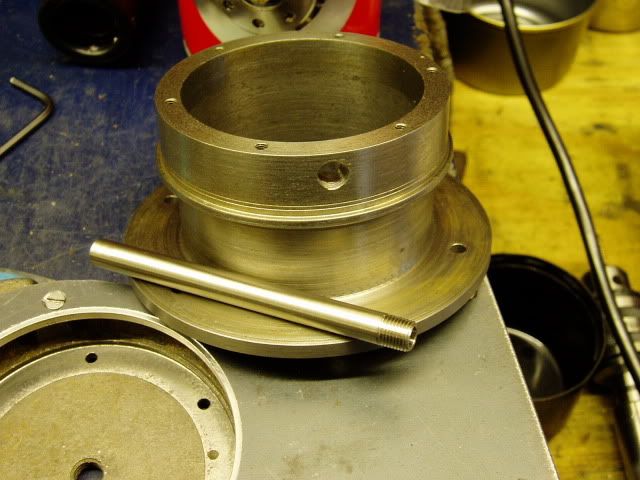
Found a nice piece of stainless bar. Drilled through 4.5mm. Then turned the o/d to a nice sliding fit in the brass repair tube......


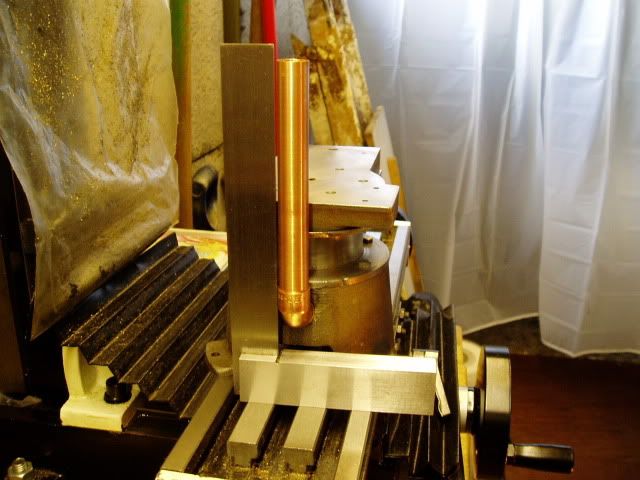
Used the blank to align the casting tube hole......


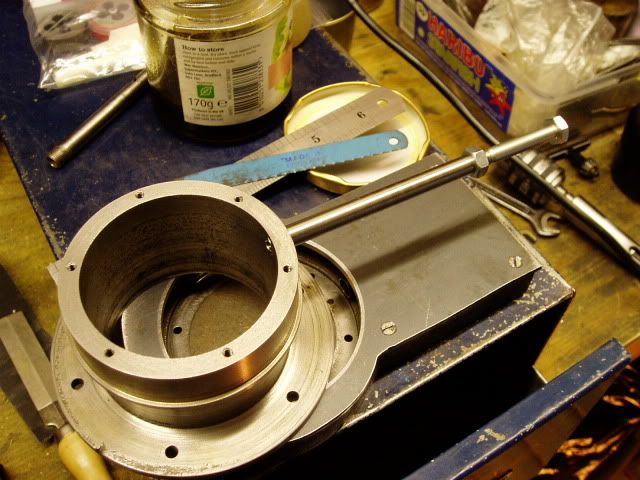
Plunged it all the way in. Then aligned in X to a snug fit against the angle plate. (No gap, as is shown here)......


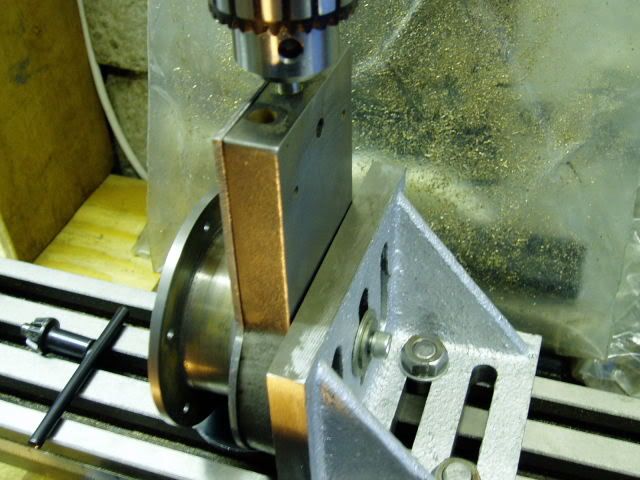
Aligned in Y direction, and tightened to the angle plate. Leaving the assembly vertically in line with the m/c spindle.


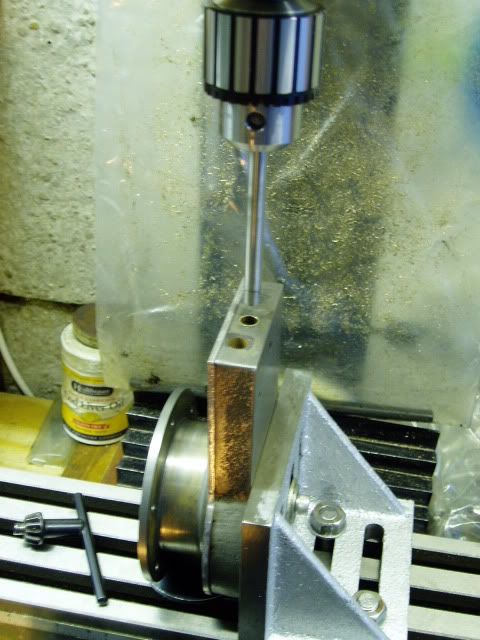
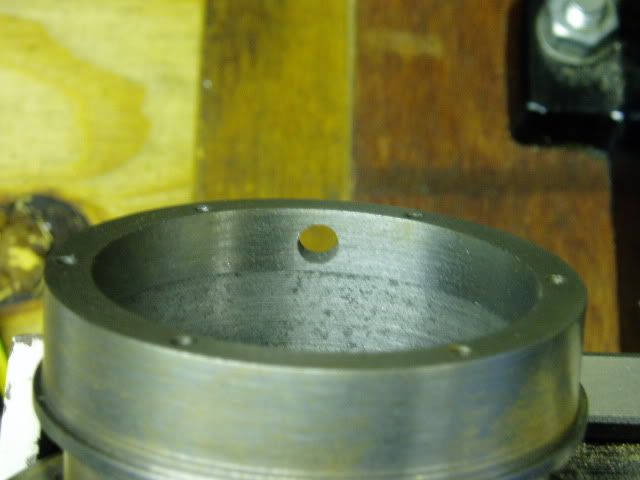
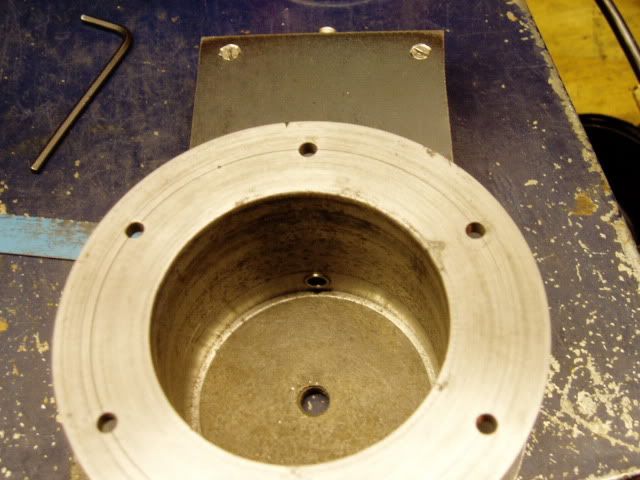
Made a 5mm bore drill bush, and dropped it down to rest on the cast iron displacer sleeve......


Drilled through 5mm. Fished out the bush, then opened out to 6mm......


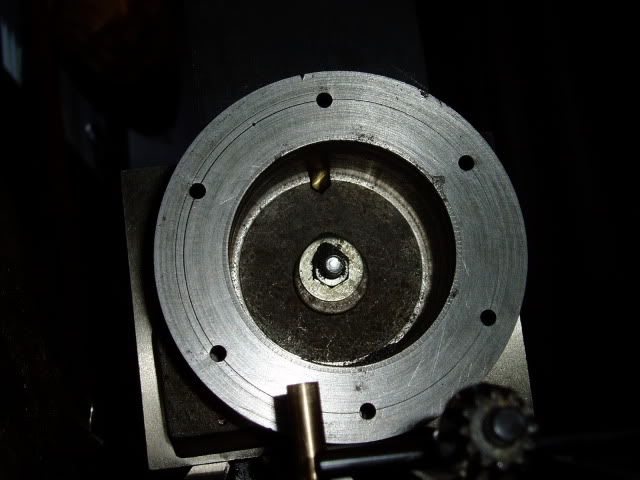
Nice crisp hole......


In the new section......


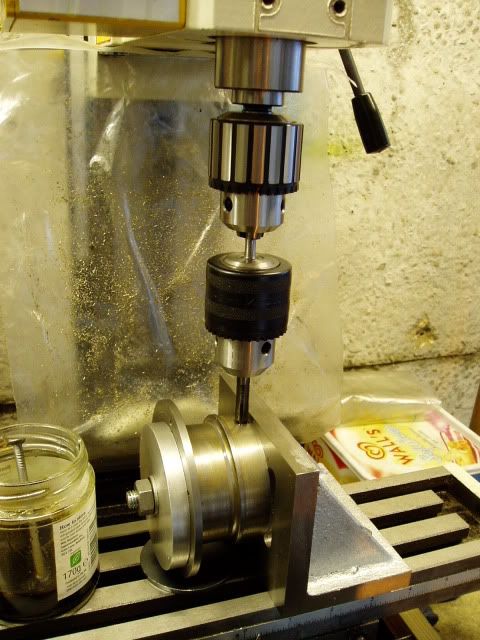
As before, aligned in X, then Y, using a piece of 6mm bar in the drill chuck and snug in the hole......


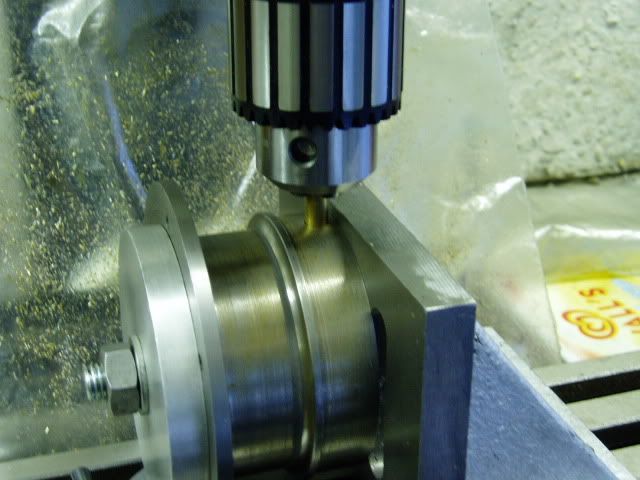
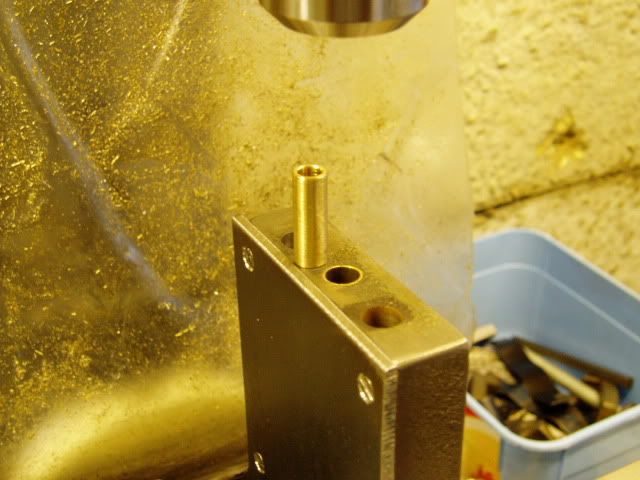
Perfect alignment for tapping, M7 x .75.......


Threaded the tube, and tapped M6 in 'tother end......


After all my worries over alignment of several components, and threads. It screws smoothly into place, between finger & thumb!!  :ddb: :ddb:


Thinking how I it previously had a screwdriver slot, and wanting something neater looking.......

I realised I could insert and extract, with a locknut in the speed control threads!  :thumbup:


Just a bit pleased.....  :D

Hope the euphoria lasts...... Can't see much being done next week! ::)

David D

David.

Still drilling holes... Sometimes, in the right place!

Still modifying bits of metal... Occasionally, making an improvement!

Offline NickG

  • Madmodder Committee
  • Hero Member
  • *****
  • Posts: 1890
Re: Robinson Hot Air Engine.
« Reply #152 on: February 05, 2011, 11:16:56 AM »
Not surprised, it's looking a top quality job - well done  :thumbup:
Location: County Durham (North East England)

Offline madjackghengis

  • Hero Member
  • *****
  • Posts: 717
  • big engine
Re: Robinson Hot Air Engine.
« Reply #153 on: February 05, 2011, 11:22:24 AM »
Well.....
With the amount of cast iron dust I'm producing, I should have called this posting. "Getting down n dirty with Mrs Robinson".  :D

The saga continues.
Fitted the skirt and displacer tube together..... Just a little mismatched!  :scratch:

The crescent, is the end of the displacer tube.......


No wonder I couldn't get the hot cap properly centralised!  :bang: :bang:

Bored the mouth of the skirt concentric to the displacer bore......


That's the new, glued in place, repair section I'm gripping on.....


Great stuff, that high temp slidelock Dean! Thank you!.  :thumbup:

Drilled and started tapping, the 6off, 6BA threads holding the deck casting to the repair section. The (new) plug tap feels very stiff to turn.....  :doh:

Job stopped. Quality tap ordered, before anything goes snap....... I hate that sickening/sinking feeling!  :(

David D


I was just thinking, "with the amount of cast iron dust I'm creating", maybe you should be collecting it, and then put it all in a little dam and with an oxy-acetalene torch, melt it down into a new foot. By the way, that fix on the air tube, sealing out the water looks like it should do a fine job and make that engine run. Just a thought :lol: :poke: mad jack


« Last Edit: February 06, 2011, 02:28:38 AM by Stilldrillin »

Offline sbwhart

  • Global Moderator
  • Hero Member
  • *****
  • Posts: 3530
  • Country: gb
  • Smile, Be Happy, Have Fun and Rock Until you Drop
Re: Robinson Hot Air Engine.
« Reply #154 on: February 05, 2011, 12:10:44 PM »
Give that man a coconut:-  :thumbup:  :clap: :clap: :clap: :clap:

Looking real nice Dave.

Ther's a nice pic in latest issue of model engineer of a robson hot air engine that was made in 1900 and used for turning roasting Coffee.

Ther's also a nice picture of a three cylinder radial engine on the front cover

  :D :D :D :D

Stew
A little bit of clearance never got in the road
 :wave:

Location:- Crewe Cheshire

Offline NickG

  • Madmodder Committee
  • Hero Member
  • *****
  • Posts: 1890
Re: Robinson Hot Air Engine.
« Reply #155 on: February 05, 2011, 03:26:54 PM »
Stew, I've been looking out for your articles, will have to have a look - might even buy it!  :beer:
Location: County Durham (North East England)

Offline arnoldb

  • Hero Member
  • *****
  • Posts: 515
  • Country: na
  • Windhoek, Namibia
Re: Robinson Hot Air Engine.
« Reply #156 on: February 05, 2011, 03:52:52 PM »
Really nice job David  :thumbup: - Well done!

 :beer:, Arnold

Offline shoey51

  • Full Member
  • ***
  • Posts: 214
Re: Robinson Hot Air Engine.
« Reply #157 on: February 05, 2011, 04:15:12 PM »
 :bow: David im really impressed with ingenuity wish I had it :scratch:

keep up the great work mate 

Offline Dean W

  • Hero Member
  • *****
  • Posts: 571
  • My kingdom for a lathe!
    • Projects web pages
Re: Robinson Hot Air Engine.
« Reply #158 on: February 05, 2011, 07:53:11 PM »
David, what a nice clean job!  Excellent use of that bushing for drilling the hole in the bottom of the..  hole.  : )
You do good work.
Dean W.

Shop Projects:
http://www.deansphotographica.com/machining/projects/projects.html

Praise the Lord and pass the Carbide!

Offline Stilldrillin

  • Global Moderator
  • Hero Member
  • *****
  • Posts: 4972
  • Country: gb
  • Staveley, Derbyshire. England.
Re: Robinson Hot Air Engine.
« Reply #159 on: February 06, 2011, 04:06:28 AM »
Thanks for all your positive comments Chaps!  :thumbup:

They're really appreciated, especially after some planning/ machining has gone right......  :ddb:

Stew. I've got to get meself a copy of Model Engineer.  :D

David D
David.

Still drilling holes... Sometimes, in the right place!

Still modifying bits of metal... Occasionally, making an improvement!

Offline Stilldrillin

  • Global Moderator
  • Hero Member
  • *****
  • Posts: 4972
  • Country: gb
  • Staveley, Derbyshire. England.
Re: Robinson Hot Air Engine.
« Reply #160 on: February 08, 2011, 06:41:31 AM »
Just measuring up. Before sorting the wobbly displacer piston......


Is there any reason for the displacer to have .2" clearance at the bottom, (hot end) of it's stroke. And "nil" clearance at the top, (cold end)?  :scratch:

I can easily extend the shaft by .1", to make both clearances the same.  :thumbup:

David D
David.

Still drilling holes... Sometimes, in the right place!

Still modifying bits of metal... Occasionally, making an improvement!

Offline NickG

  • Madmodder Committee
  • Hero Member
  • *****
  • Posts: 1890
Re: Robinson Hot Air Engine.
« Reply #161 on: February 08, 2011, 08:07:58 AM »
Do that David, it's quite a bit of clearance though 0.1". What is the clearance around the displacer piston? The hot air engine that I made I think I gave 1/32" all around and at each end.

The clearance should be minimal but also enough so that it doesn't cause any sort of drag when squeezing the air from one end to the other.  :thumbup:

Nick
Location: County Durham (North East England)

Offline Stilldrillin

  • Global Moderator
  • Hero Member
  • *****
  • Posts: 4972
  • Country: gb
  • Staveley, Derbyshire. England.
Re: Robinson Hot Air Engine.
« Reply #162 on: February 08, 2011, 08:20:59 AM »
Nick.
There's around .08" difference, between slightly distorted displacer, and the cylinder. (.040"/ side).

2.25" bore x .75" stroke.

David D
David.

Still drilling holes... Sometimes, in the right place!

Still modifying bits of metal... Occasionally, making an improvement!

Offline Dean W

  • Hero Member
  • *****
  • Posts: 571
  • My kingdom for a lathe!
    • Projects web pages
Re: Robinson Hot Air Engine.
« Reply #163 on: February 08, 2011, 06:40:48 PM »
Nick.
There's around .08" difference, between slightly distorted displacer, and the cylinder. (.040"/ side).

2.25" bore x .75" stroke.

David D

David, that clearance (0.040") sounds okay, considering how large the displacer piston is.  I'll (dis)-qualify that by saying
I have not built this particular stirling design, but on others the displacer fairly flops around in there.  The last one I built
had near .020"/ side on a 3/4" diameter piston.
For the distance between piston at the top and bottom, the ones I've built have been quite close at the end of
each stroke.  I would think splitting the top and bottom clearance would be appropriate. 
Dean W.

Shop Projects:
http://www.deansphotographica.com/machining/projects/projects.html

Praise the Lord and pass the Carbide!

Offline NickG

  • Madmodder Committee
  • Hero Member
  • *****
  • Posts: 1890
Re: Robinson Hot Air Engine.
« Reply #164 on: February 08, 2011, 06:49:09 PM »
Was just going to say the same as Dean, that's a relatively small gap so will be fine. You just aim for the least dead space possible but it will be fine.  :thumbup:

Nick

Location: County Durham (North East England)

Offline Stilldrillin

  • Global Moderator
  • Hero Member
  • *****
  • Posts: 4972
  • Country: gb
  • Staveley, Derbyshire. England.
Re: Robinson Hot Air Engine.
« Reply #165 on: February 09, 2011, 04:17:43 AM »
Thanks for your replies, Chaps!  :thumbup:

I wondered if it was some sort of tuning bias. Rather than another builder's bodge......  ::)

The pot is in sound condition. I will be able to turn a new top/ shaft location, to repair nicely. Probably.....   :D

David D
David.

Still drilling holes... Sometimes, in the right place!

Still modifying bits of metal... Occasionally, making an improvement!

Offline madjackghengis

  • Hero Member
  • *****
  • Posts: 717
  • big engine
Re: Robinson Hot Air Engine.
« Reply #166 on: February 10, 2011, 12:04:54 PM »
Well David, it looks really good so far, and like you should have it running up to snuff shortly.  I'm really looking forward to seeing that video of it running, and maybe doing something useful, like pulling the cat's tail or some other good domestic job.  :lol:  :beer: cheers,
mad jack

Offline Stilldrillin

  • Global Moderator
  • Hero Member
  • *****
  • Posts: 4972
  • Country: gb
  • Staveley, Derbyshire. England.
Re: Robinson Hot Air Engine.
« Reply #167 on: April 18, 2011, 03:39:37 PM »


The pot is in sound condition. I will be able to turn a new top/ shaft location, to repair nicely. Probably.....   :D

David D

Ah! Well........ They were prophetic words!   ::)

As you now know, everything stopped with a bang.  :bang: ...... Well, more of a clatter from the machine, and a whimper from me.......  :bang: :bang:


So, I sulked for a while.
Thought about making my own design.....  :scratch:

No!...... I want to keep it standard. So, I'll just buy another pot, and work from there. But not really in my comfort zone.....

I contacted Polly Models via email, explaining I needed a displacer pot/ cup. The reply was, "A replacement displacer is £18.00 inc vat plus postage of £3.00"....... Hmmm..... Ok, then......

This is what arrived! Which I would call a hot cap........


Twice the thickness of brass, (.045", rather than .022"). 'Orribly big, dead space radius. Wouldn't fit in place of my hot cap.......


So, I contacted Poll Models, and was told this best fitted my description of a displacer pot/ cup!!  :bugeye: .......  Hmmm.....

Didn't like to argue with a lady. So, I asked for an exchange for the displacer, as named on the invoice......

This arrived...... After I had paid to return the hot cap, and after I had paid another £3 for their postage to me......


Looks ok.... Dunnit!


Only, it's twice the original material thickness, and larger diameter.........   ::)


The working clearance is/ would be .020"! And obviously, I can't bore out my hot cap to match!

£27, for a displacer pot, I can't use!  :bang: :bang: :bang:


So, I put it away....... And went and did a few other things, for a couple of months!

Normal fumblings will be resumed in a few weeks. Probably!  :thumbup:

David D
David.

Still drilling holes... Sometimes, in the right place!

Still modifying bits of metal... Occasionally, making an improvement!

Offline sbwhart

  • Global Moderator
  • Hero Member
  • *****
  • Posts: 3530
  • Country: gb
  • Smile, Be Happy, Have Fun and Rock Until you Drop
Re: Robinson Hot Air Engine.
« Reply #168 on: April 18, 2011, 03:54:16 PM »
That's a bummer Dave  :(

How about bushing the bore to get a fit  :scratch: .

Stew
A little bit of clearance never got in the road
 :wave:

Location:- Crewe Cheshire

Offline HS93

  • In Memoriam
  • Hero Member
  • *****
  • Posts: 788
  • Country: gb
Re: Robinson Hot Air Engine.
« Reply #169 on: April 18, 2011, 06:43:21 PM »
is the old one beyond repair? I know it looks bad but woith a bit of taping hear and there I have seen worse.   :dremel:

Peter
I am usless at metalwork, Oh and cannot spell either . failure

Offline Dean W

  • Hero Member
  • *****
  • Posts: 571
  • My kingdom for a lathe!
    • Projects web pages
Re: Robinson Hot Air Engine.
« Reply #170 on: April 18, 2011, 07:13:49 PM »
Glad to see an update, David, but not your troubles getting a simple part!  I think you could fix the old one, too.
A bit of bashing and a few spots hard soldered to fill the holes and... original part back in service.  The small dents and
dings shouldn't matter to the displacer can, since it fairly flops around in the hot cap anyway.  Not like it has to be
a close fit.
Good luck how ever you do it.  Hope it doesn't keep you away from this project for another two months!  ; )

Dean
Dean W.

Shop Projects:
http://www.deansphotographica.com/machining/projects/projects.html

Praise the Lord and pass the Carbide!

Offline madjackghengis

  • Hero Member
  • *****
  • Posts: 717
  • big engine
Re: Robinson Hot Air Engine.
« Reply #171 on: April 18, 2011, 09:37:54 PM »
Well David, call me a cynic, but can you take about half the thickness off the displacer, and gain it as clearance, and get enough to make it run? Jack

Offline Stilldrillin

  • Global Moderator
  • Hero Member
  • *****
  • Posts: 4972
  • Country: gb
  • Staveley, Derbyshire. England.
Re: Robinson Hot Air Engine.
« Reply #172 on: April 19, 2011, 02:09:11 AM »
Thanks for your replies Chaps!

Stew.
Not sure as I understand "bushing" for fit.... The displacer spinning is oversize to my bore and cap. Only .02" clearance....
I think it should be around .1"....... Unless anyone else has an opinion on what the clearance should be? :scratch:

Jack.
Frankly, it's slightly tapered, and skimming would only release around another .02", giving .04".... Hardly enough, probably!

Peter, Dean.
Looking at it, now.... Yes! You're right. I could probably knock it into some semblance of original shape......

Fortunately..... After my, "blunders you make?", posting....... I had a pm from a Gentleman of this Parish, offering to make one for me.......  :thumbup:

I now have to decide on sizes, and produce a drawing..... Does anyone have any objections to .1" clearance, o/d and .05" clearance either end?

Or, any other comments?  :wave:

David D
« Last Edit: April 19, 2011, 03:42:08 AM by Stilldrillin »
David.

Still drilling holes... Sometimes, in the right place!

Still modifying bits of metal... Occasionally, making an improvement!

Offline sbwhart

  • Global Moderator
  • Hero Member
  • *****
  • Posts: 3530
  • Country: gb
  • Smile, Be Happy, Have Fun and Rock Until you Drop
Re: Robinson Hot Air Engine.
« Reply #173 on: April 19, 2011, 03:22:24 AM »

Stew.
Not sure as I understand "bushing" for fit.... The displacer spinning is oversize to my bore and cap. Only .02" clearance....
I think it should be around .1"....... Unless anyone else has an opinion on what the clearance should be? :scratch:

David D


Nither do I  :lol: sorry misunderstood how it worked  :hammer:

Stew
A little bit of clearance never got in the road
 :wave:

Location:- Crewe Cheshire

Offline Stilldrillin

  • Global Moderator
  • Hero Member
  • *****
  • Posts: 4972
  • Country: gb
  • Staveley, Derbyshire. England.
Re: Robinson Hot Air Engine.
« Reply #174 on: May 15, 2011, 10:03:11 AM »
Well..... Here we go again!  ::)

Unfortunately, shop time is a bit restricted these days. I have to grab what I can, when I can......

As you all know, Gentleman John supplied a new, superb displacer piston.....


Assemble with displacer and linkage at bdc. Mark the hole position......


Rotate to tdc. Piece of paper towel holding displacer at tdc. Mark hole position......


This gave two marks, 5mm apart. Drill pin hole central, to give 2.5mm clearance at each end of stroke.

Then assemble with piston and rod. Shorten shaft to just clear underside of conrod. (Tiny chink of light showing)......


Orientated the cylinder and bearing  pedestal square to each other, and drilled for 1/8" dowels.

The air transfer hole was some distance off tube centre. It took a 10mm recess to clean up.

Drilled through 5mm.......


Machined a brass bush......


Sleevelocked into place to make a recess for an O ring......


Every internal area which had been rusty, had a coat of Hammerite.....


Including inner end of the cylinder, and piston crown.......


Assembled with new hot cap gasket, and Hylomar.......


More twiddling and fiddling to come. Water test to come next! Hmmmm.........

David D


« Last Edit: July 21, 2012, 06:24:18 PM by Stilldrillin »
David.

Still drilling holes... Sometimes, in the right place!

Still modifying bits of metal... Occasionally, making an improvement!