I am a huge fan of having LOTS of quality light when doing machining work, and in the lathe, I typically have 3 sources:
- a hotwire which is fixed, points down in front of the chuck
- one fixed LED lamp that is bolted to the carriage
- and one smaller, portable lamp that is usually mounted in the carriage, but that I move depending on the operation to get light right where I need it.
This post is about the hotwire lamp, which sits above my lathe, an Electrix S631 with a magnetic base. The lamp itself has proven very reliable, and it seems to have some soft-start since the bulb always comes up slowly, and since I am "still" using the same bulb that the lamp came with 4-5 years ago - simply amazing, specially given how often I use the lathe.
The base of the lamp sits on top of the control box for the lathe, and it over hangs on top of the chuck. This of course puts strain on the base of the flexible arm, but it has been solid for about 4-5 years, until a couple of weeks ago when this happened:

I cleaned it, and used Devcon 2-part epoxy on my first repair attempt:

And after about 1-2 weeks, it failed again. So this time I decided to try JB Weld. I not only cleaned everything really well, but I also roughed-up the surface to provide JB Weld the best chance possible to work well. I waited over 24 hours, and started doing machining work again.

That lasted also about 1-2 weeks. It sheared off the JB Weld big time!


So I said to myself: screw this!. Lets throw this one away, and get a new one. But as I was getting stuff ready to throw away, I decided to completely dissasemble it to see if there was something I could "salvage" for a future project - except for the broken base, it is a very strong unit after all:

That is when I realized that maybe there was something I could do - maybe I could make a new base. But I did not want to spend too much time, so I decided to try do something almost entirely on the lathe. Looking at my parts bin, I found a large Aluminum scrap round piece that looked "promising", since it had about the right diameter "as is". Plus this new base would be helpful when I convert this lamp to LED, specially now that I have the wonderful Nichia 219's at my disposal. So I started with the scrap piece:

Did some light turning to clean it up:

And then following the advice from Will, I decided to try parting it on the lathe - I have an Iscar Do-Grip which barely allows me to part the 3" diameter piece:


The base of the flexible arm has a male threaded part (1/8 - 27, N.P.T) and a matching female nut, so I decided to re-use these:

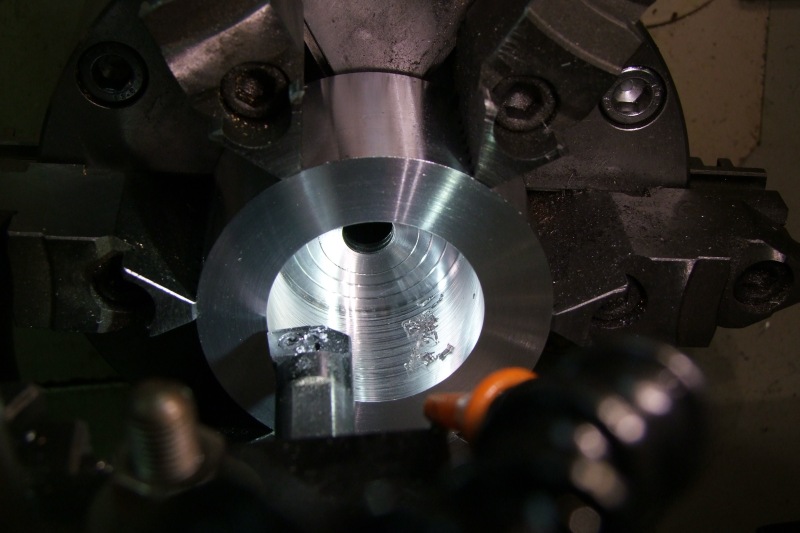
So I bored the existing hole a little bit to clear the female nut:

And then bore the inside to allow room for the wires, switch, and future LED Driver. I also designed a small area near the top which will be a press-fit for the OD of the female nut. Of course I did the boring in several passes, and then one final cleaning pass:


I then took the sharp edge from the top (don't need anything else in the shop capable of giving me a cut!):

Here is the semi-finished new base, with the broken one for comparison:

I used the metal base (which houses the magnet) to mark the position of the holes:

And then drill and tapped all screws using my laser to aid in spotting the middle of each marked hole:

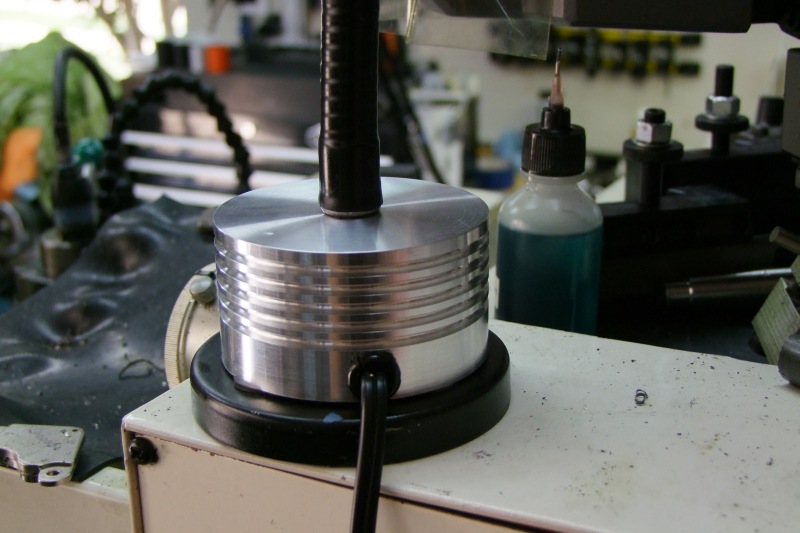
Since in the future this base will house an LED driver, I went ahead and cut some deep grooves to aid with air flow - plus yes, it makes it look like a piston:


Since the walls are so freaking thick compared to the plastic base, I had to go back to the mill and cut a recess for the ON/OFF switch:

This is how everything looks like before bolting up - yeah, I know the 4x holes are not concentric - I only cared that they matched the 4x holes in the base, so this was "close enough":

Here is the assembled, and once again fully functional lamp:

I hope some time this year to go back and do the full LED conversion

Will


