Author Topic: Minnie TE Long term project  (Read 115480 times)

Offline Stilldrillin

  • Global Moderator
  • Hero Member
  • *****
  • Posts: 4972
  • Country: gb
  • Staveley, Derbyshire. England.
Re: Minnie TE Long term project
« Reply #50 on: October 09, 2013, 02:06:16 AM »
I've never had to build a gear assembly. But.........

I've often wondered how they were spaced accurately to each other. As, once the hole is drilled, nothing can be adjusted.  :scratch:

Nicely shown/ explained Joe!  :clap: :clap: :thumbup:

David D
David.

Still drilling holes... Sometimes, in the right place!

Still modifying bits of metal... Occasionally, making an improvement!

Offline awemawson

  • Global Moderator
  • Hero Member
  • *****
  • Posts: 8967
  • Country: gb
  • East Sussex, UK
Re: Minnie TE Long term project
« Reply #51 on: October 09, 2013, 02:45:43 AM »
If you get it slightly wrong you turn eccentric bushes then loctite them in the correct alignment
Andrew Mawson
East Sussex

Offline vtsteam

  • Global Moderator
  • Hero Member
  • *****
  • Posts: 6466
  • Country: us
  • Republic of Vermont
Re: Minnie TE Long term project
« Reply #52 on: October 09, 2013, 09:31:08 AM »
Or even if you get them ridiculously wrong.

I recently read about another person with a round column mill-drill correcting backlash in the Z axis handle that way. Been thinking about following suit. Disconcerting turning a handle 180 degrees before a rack engages.
I love it when a Plan B comes together!
Steve
https://www.youtube.com/watch?v=4sDubB0-REg

Offline Joe d

  • Sr. Member
  • ****
  • Posts: 251
  • Country: ca
Re: Minnie TE Long term project
« Reply #53 on: October 19, 2013, 10:46:39 PM »
been a while, but I've been busy...  The hornplates were set aside for a bit while I was waiting for some reamers to arrive
(always nice to have a reason for getting some more tooling :clap: )

So, not wanting to sit idle, I started on some blanks for wheel rims...

cleaning up a bit:


chain drilled to remove a lot of material from the middle


cleaned up the bore on the lathe, you can see that I've centre drilled already to free up the outside bit as well:
this chunk of steel is big enough that I will get both front wheel rims out of the middle bit as well as one rear rim.
Bored the centre so I will have a useable surface for chucking it up to finish turning instead of trying to centre it on the rather ragged drilled surface.


Here's the other piece drilled to free up just enough for the other rear rim


At this point, got a package in the mail with some reamers in it :ddb: , so went back to the hornplates.
Did the last couple of axle holes, and the went to riveting... made up a couple of tools for this: turned some O1 tool steel
and inlet the space for the rivet head with a ball mill cutter, and then hardened them.  Made a small anvil sort of rivet snap to clamp in the vise, and a set and snap with a narrow neck to fit into the space available in the angles I need to attach;

set the "anvil"  in the vise, held up the outboard edge of the work on a spare chunk of 2x4, and away we go


And here they are in place:


I'm pretty happy with how it turned out, 1st riveting I've done since grade school shop class which was a while ago  :thumbup:

cheers all,  Joe

Offline Joe d

  • Sr. Member
  • ****
  • Posts: 251
  • Country: ca
Re: Minnie TE Long term project
« Reply #54 on: October 30, 2013, 11:10:21 AM »
So: progress is being made, my reamers showed up, so got back to the bearings...  reamed the remaining mounting holes,
chucked up a bearing blank using the spigot on one end to clean up the opposite face, sweated that onto a spare bit of brass, and centred pretty much by eye in the 4 jaw  to start cleaning it up .


moved over to the mill to clean up the non-circular side:


Coming along:


and then working on the 6th of 8 had a little   :hammer: moment, it came loose in the vise and I now have an interesting pattern engraved on the top face:


so time for a  :coffee: and a break....

Pondering options: I can sweat on a bit of material and shape it down to size, or just mill out the offending marks and live with the thing not matching the other side... will probably stop waffling and fix it right...

Cheers, Joe


Offline Pete W.

  • Hero Member
  • *****
  • Posts: 852
  • Country: gb
Re: Minnie TE Long term project
« Reply #55 on: October 30, 2013, 12:57:57 PM »
I've never had to build a gear assembly. But.........

I've often wondered how they were spaced accurately to each other. As, once the hole is drilled, nothing can be adjusted.  :scratch:

Nicely shown/ explained Joe!  :clap: :clap: :thumbup:

David D

One way I was taught is to turn a pair of disks whose ODs are precisely equal to the pitch circle diameters of the two gears concerned and whose centre holes are precisely concentric with their ODs.  Clamp them to the gear-case plate(s) with their ODs in contact (but see below) and with their centres aligned with their desired positions as accurately as possible, then either spot through the centre holes onto the gear-case plates or centre under the mill by clocking the centre holes.  It helps if the disks are not too thin.  If there are more than two gears in the train, repeat as required.

To avoid over-meshing if the gears are up on tolerance, the gear manufacturers often quote a backlash figure - one way to implement that is to interpose a suitable bit of feeler stock between the disks.

The method above is not quite the same thing as using tool-makers' buttons.  I haven't looked but I'm sure that method (i.e. TMBs) is well described on the web and in reference books.
Best regards,

Pete W.

If you can keep your head when all about you are losing theirs, you haven't seen the latest design change-note!

Offline Joe d

  • Sr. Member
  • ****
  • Posts: 251
  • Country: ca
Re: Minnie TE Long term project
« Reply #56 on: November 01, 2013, 11:28:56 PM »
Pete:  Thanks for that, always good to learn alternative methods.


JasonB pointed out to me that there was an easy solution to my milling mishap:
Stuck both of the bearings on a little stub of appropriately sized rod, and milled them down together until the offending
divots were gone.  Maybe eventually it would have occurred to me that this was an  entirely arbitrary dimension...


got them all in place now, with some random bits of rod to check for fit & relation to each other, and a notch in the hornplate to simplify crankshaft insertion/removal


Going to go quiet for a short time, heading out of town for a week.

Cheers, Joe

Offline Its Me

  • Jr. Member
  • **
  • Posts: 10
Re: Minnie TE Long term project
« Reply #57 on: December 15, 2013, 11:18:58 AM »
Joe, Interesting build, you good 2, I have a dividing head and the gear cutters building the courage to try it, guess I am going to end up with a half gear tooth or possible even worse, will follow the build, Its Me.

Offline Joe d

  • Sr. Member
  • ****
  • Posts: 251
  • Country: ca
Re: Minnie TE Long term project
« Reply #58 on: February 08, 2015, 05:46:44 PM »
Well, it hadn't seemed like so long.... :hammer:

 :update:

after a number of things getting in the way I'm finally back to the Minnie.

When I left off, I had concluded that the hornplates just wouldn't do, so
have now made up a new set with holes where they are meant to be
and not so many where they shouldn't


and from the other side:


and the Driver's view:


the gears mesh reasonably well, the shafts turn well enough that a little running in will sort them,
so now I'm ready to move along.

Cheers, Joe

Offline Stilldrillin

  • Global Moderator
  • Hero Member
  • *****
  • Posts: 4972
  • Country: gb
  • Staveley, Derbyshire. England.
Re: Minnie TE Long term project
« Reply #59 on: February 08, 2015, 05:55:35 PM »
Well (re) done Joe!  :clap: :clap:

It's good to see you're back to it, again........  :thumbup:

David D
David.

Still drilling holes... Sometimes, in the right place!

Still modifying bits of metal... Occasionally, making an improvement!

RobWilson

  • Guest
Re: Minnie TE Long term project
« Reply #60 on: February 09, 2015, 01:06:02 PM »
 :D , coming along VERY nicely Joe  :thumbup: 

I do like the look of all those gears  :dremel:


Rob

Offline Joe d

  • Sr. Member
  • ****
  • Posts: 251
  • Country: ca
Re: Minnie TE Long term project
« Reply #61 on: February 09, 2015, 03:08:52 PM »
Thanks, David.  It is good to be back at it!

Rob:  Thanks, and I've still got that fractional gear if you ever need it.... :)

Cheers, Joe

Offline R.G.Y.

  • Jr. Member
  • **
  • Posts: 44
Re: Minnie TE Long term project
« Reply #62 on: February 09, 2015, 03:23:26 PM »
Looking great Joe. Just a small slip with the bearing block. As the saying goes, he who never made a mistake, never made anything. My father always told me, any one can make a mistake, only a good man can get over it.
Now one of mine. :doh: I put the water tank filler in the wrong place. Counted the wrong rivet holes. I just managed to squeeze the brake, bypass & reversing controls in.  Only by pinching a 1/16" here and there.
At the moment I have rubber on the wheels, undecided about the cleats. RGY.

Offline Joe d

  • Sr. Member
  • ****
  • Posts: 251
  • Country: ca
Re: Minnie TE Long term project
« Reply #63 on: February 09, 2015, 03:37:27 PM »
RGY

That looks good from here!  I've still got lots to do to catch up to where you're at, so lots
of opportunities for more chances to make things twice.... :bang:

Joe

RobWilson

  • Guest
Re: Minnie TE Long term project
« Reply #64 on: February 09, 2015, 04:45:01 PM »
 :lol: :lol:  aye send it over Joe, it will probably mesh just fine  with my 28.7 toothed gear  :lol: :lol:


Rob


Offline Joe d

  • Sr. Member
  • ****
  • Posts: 251
  • Country: ca
Re: Minnie TE Long term project
« Reply #65 on: February 11, 2015, 10:37:16 PM »
Just sing out when you need that gear, Rob!

Some progress now, instead of re-working stuff....

Moving on with the gear selection lever.  Happily all from the "come in handy" pile of off-cuts from other things....

shaping the bracket that bolts on to the back plate


then indexed it around the drill bit that made the hole to remove the bulk of the unwanted metal before finishing rounding it over with a file


Started the forked lever by boring out the end of the stock


then through drilled both ends, and silver soldered in a bit of drill rod


Cut out the middle bit and filed the pins down to size


milled away a bunch more of the parent stock


turned the handle in the Taig lathe


soldered the handle onto the end of the lever, cleaned everything up a bit, attached the fork to the bracket with a temporary cap-screw while I wait for the die to thread the real pivot pin, and bolted it into place


Next up will be the water gauge.

Cheers all, Joe

Offline Joe d

  • Sr. Member
  • ****
  • Posts: 251
  • Country: ca
Re: Minnie TE Long term project
« Reply #66 on: February 16, 2015, 12:34:26 AM »
Got the water gauge mostly done now (haven't acquired the glass yet :Lol:)

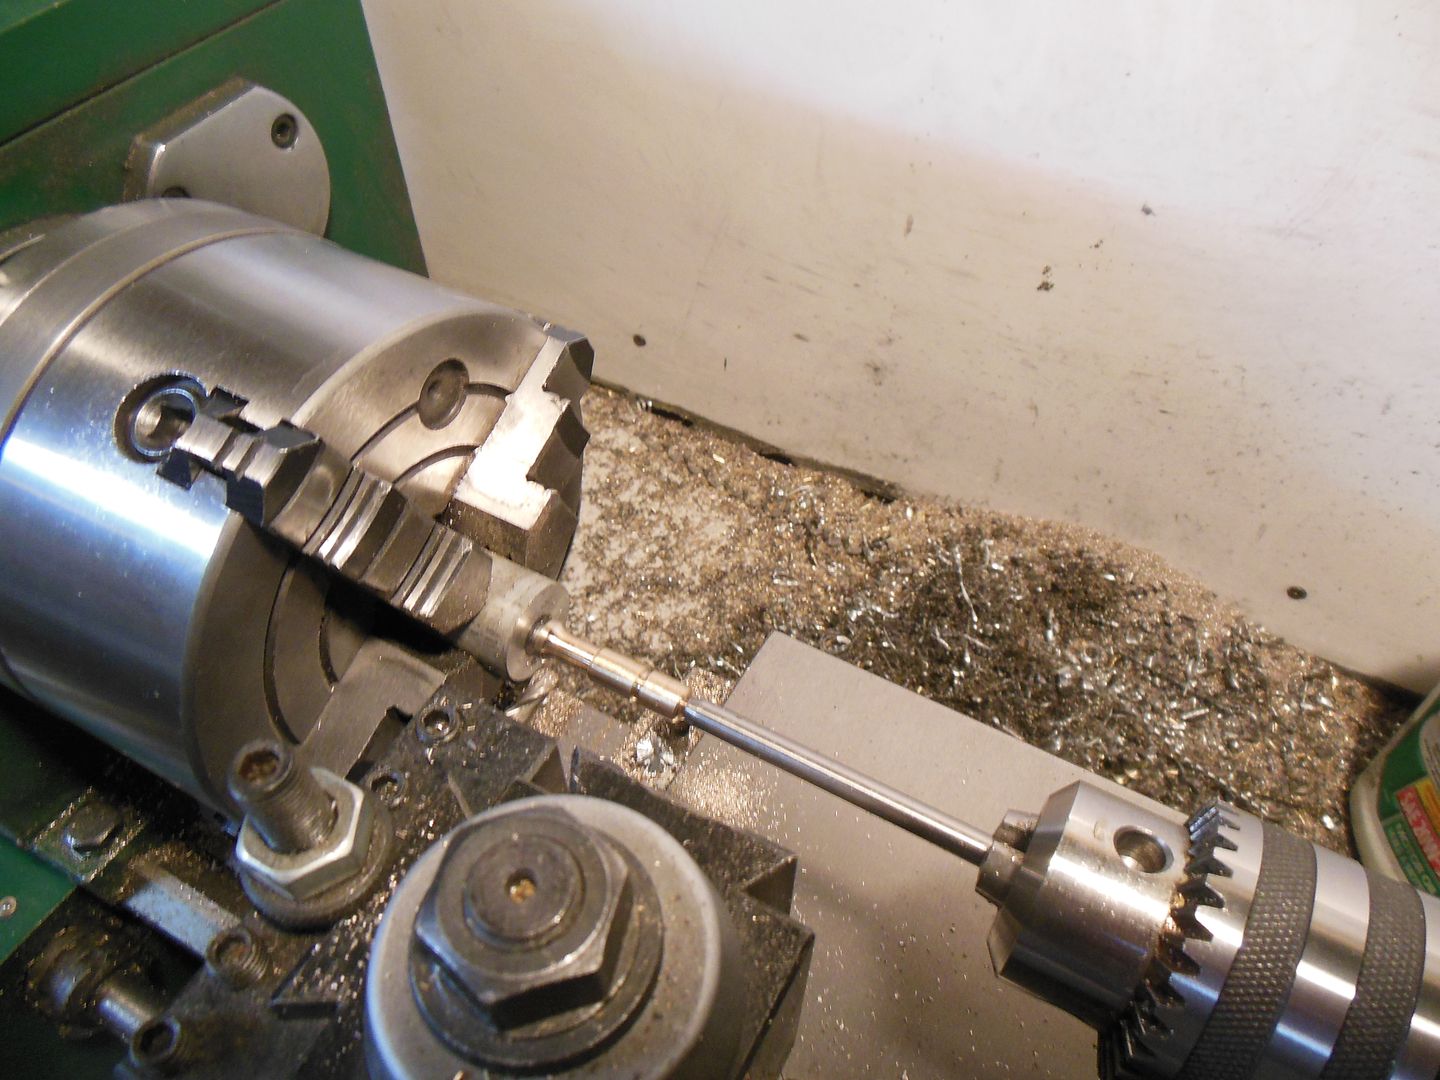
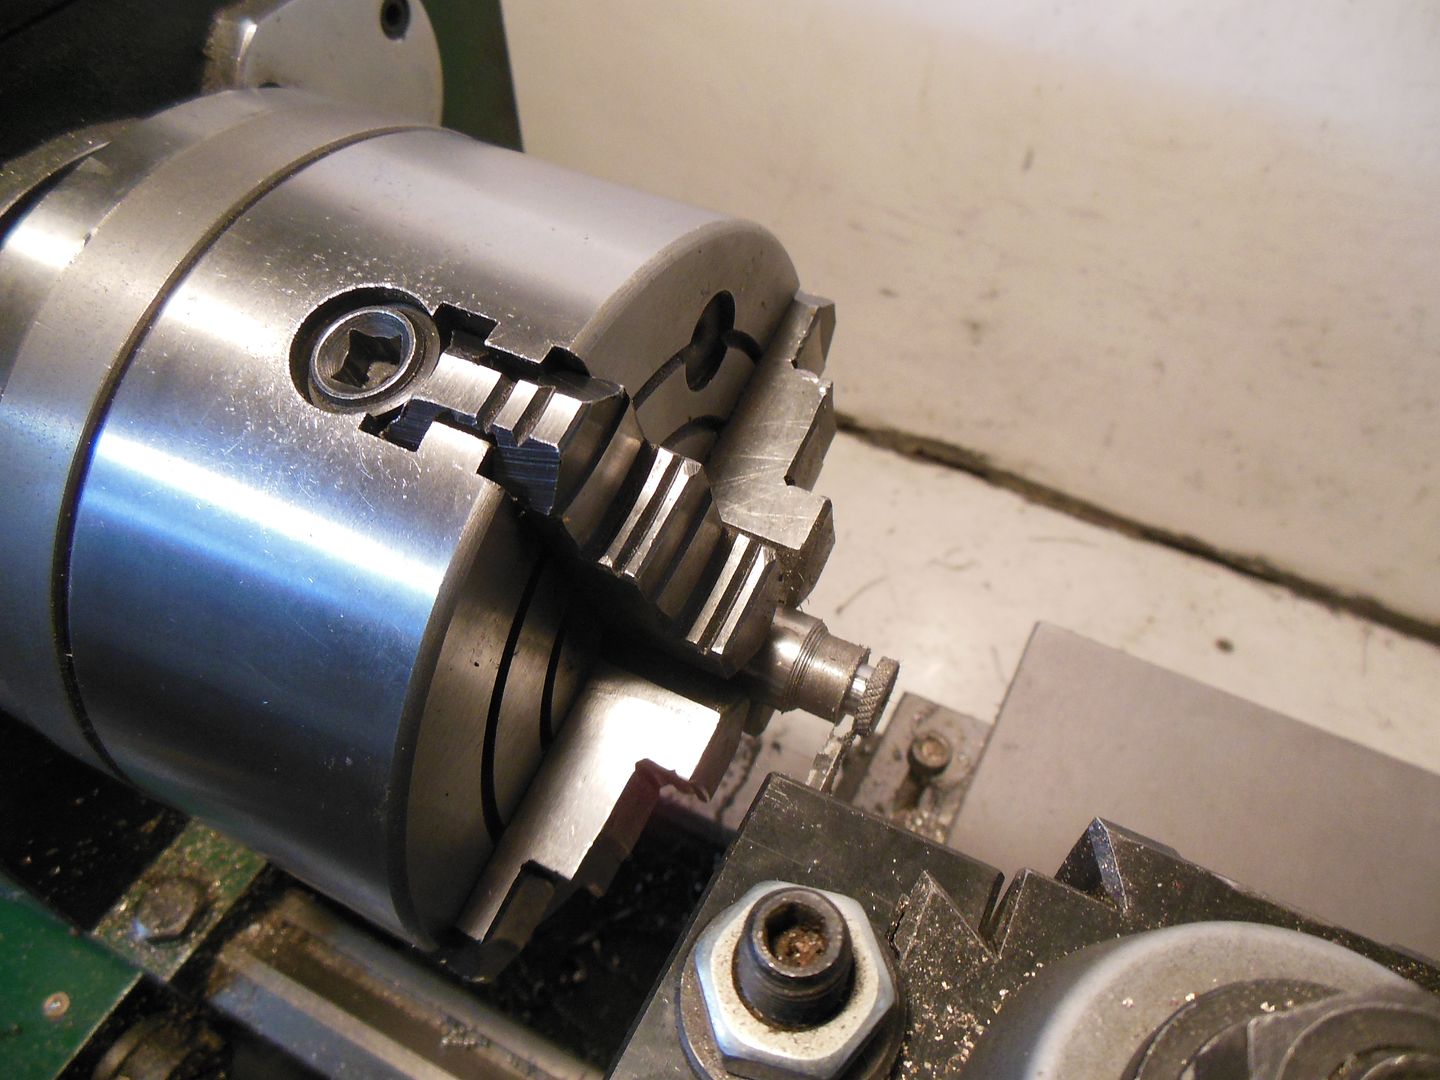
turned a bit of bronze, and threaded one end, then screwed that into a slug of ali in the 4jaw.
This was pretty unstable at the length sticking out, so ran a temporary centre out of the tailstock
and took really light cuts.  Used a ball end mill to form the transition from the shaft to the base of the part


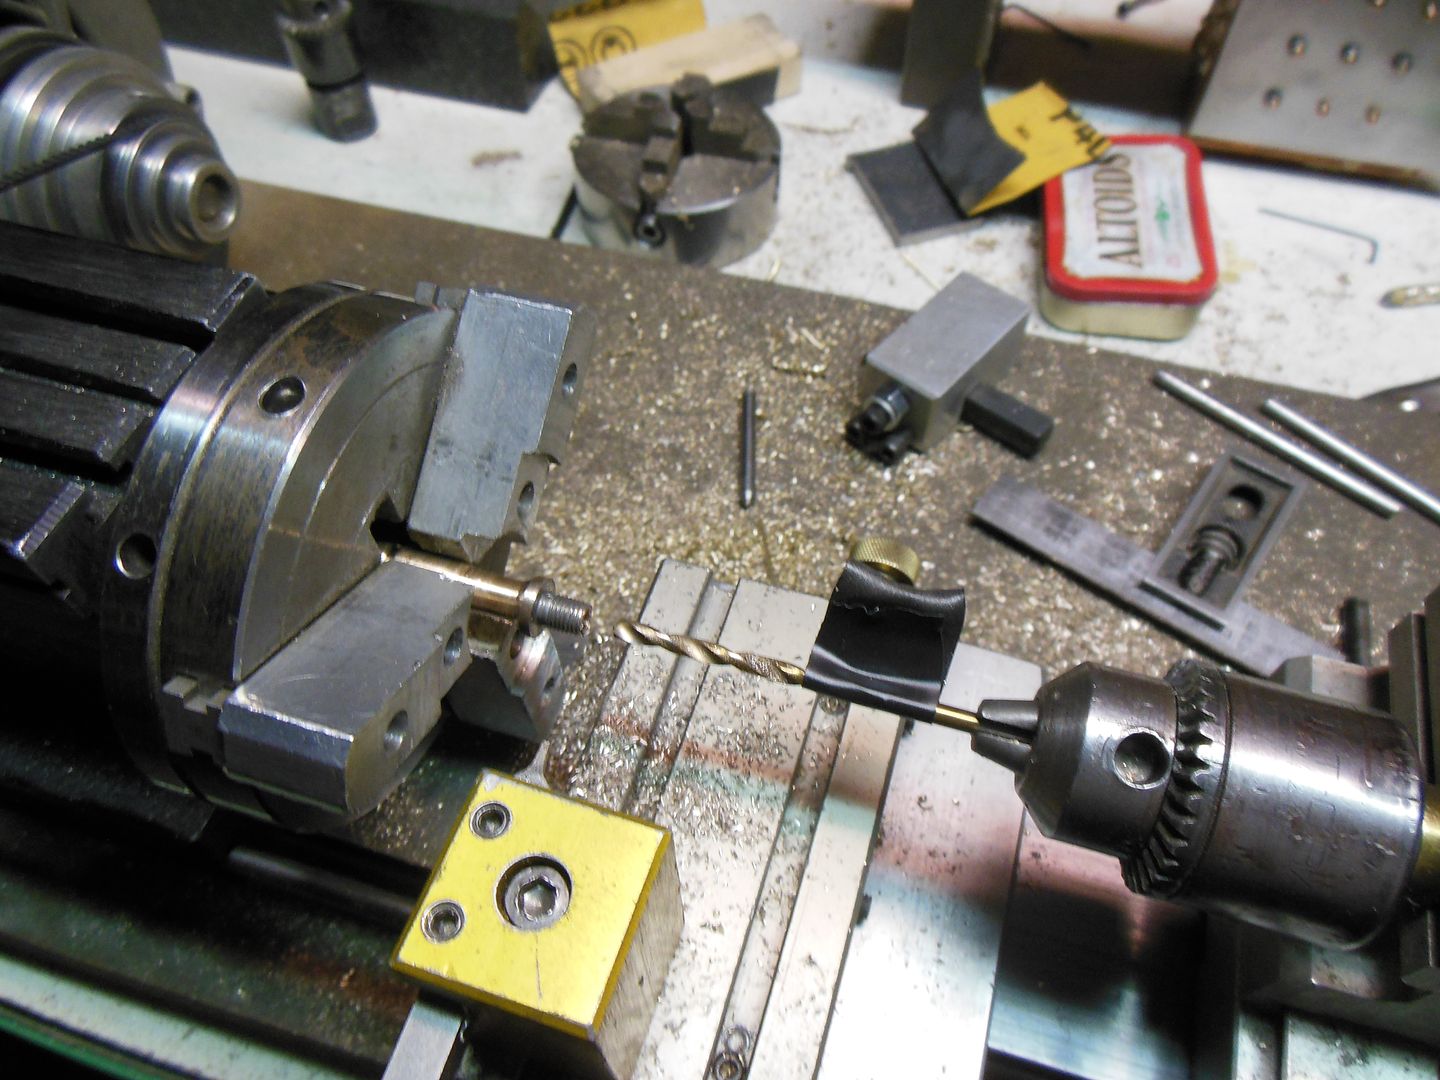
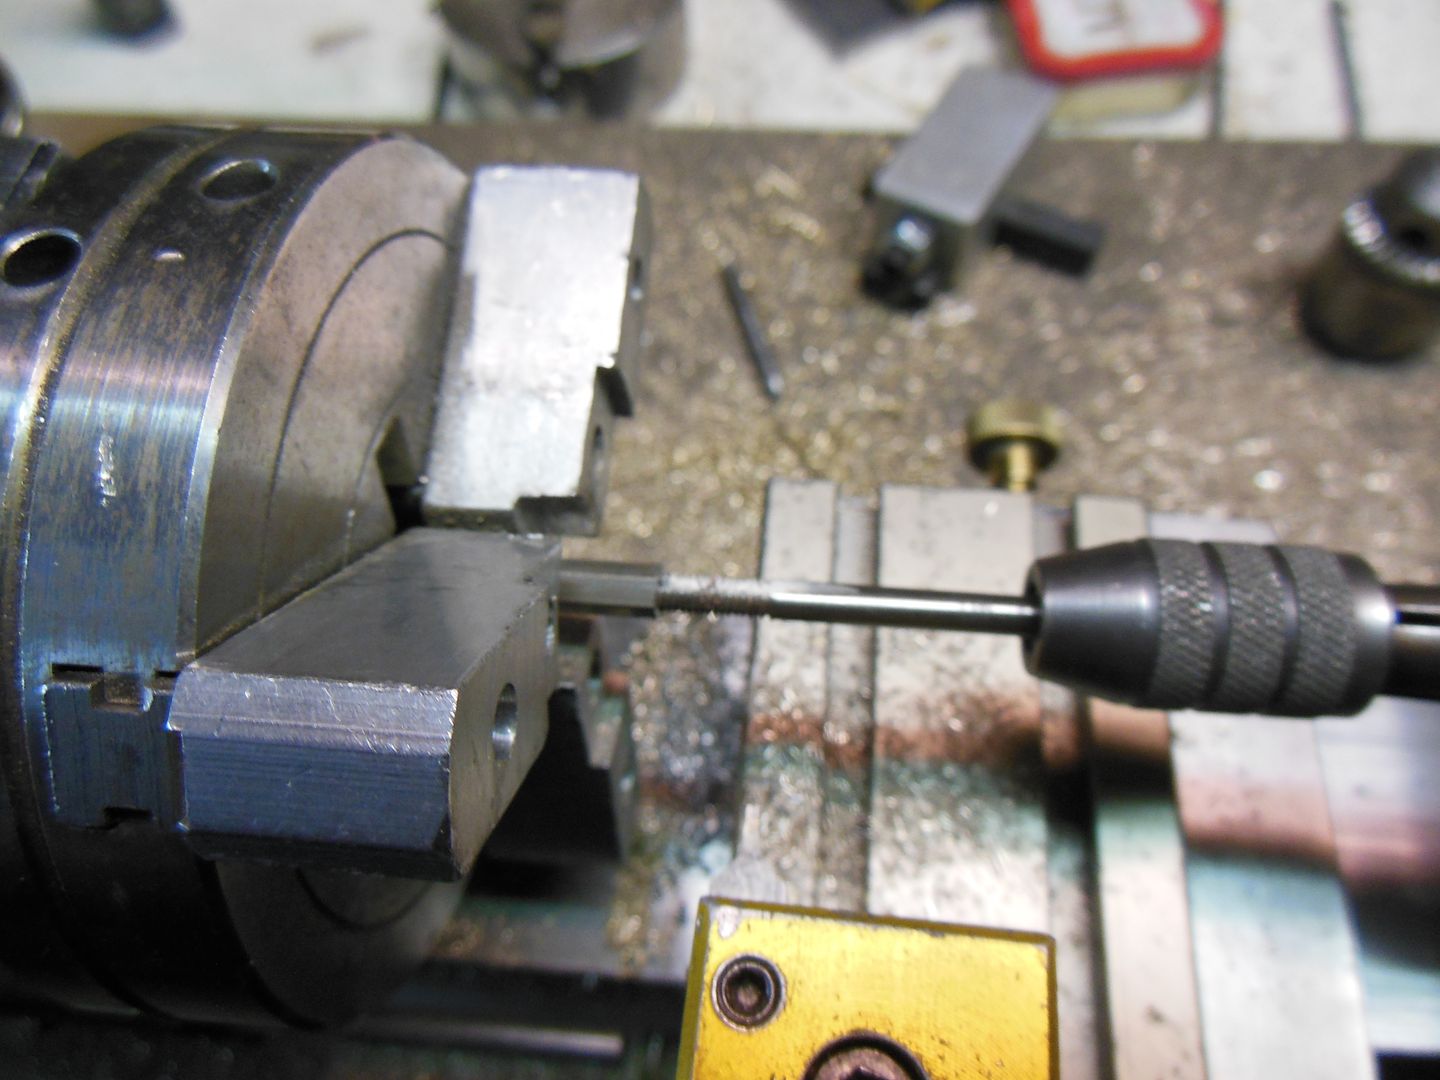
once all the turning was done, chucked it up in the Taig to drill out the steam passage (the second time around.  First time,
drilled it the same time I threaded the end, and it sheared off when I tried to do the turning...not enough meat left for the
stresses imparted :doh:  note the high-tech depth gauge on the drill bit. Tolerance of +/- 1/8" on this hole....


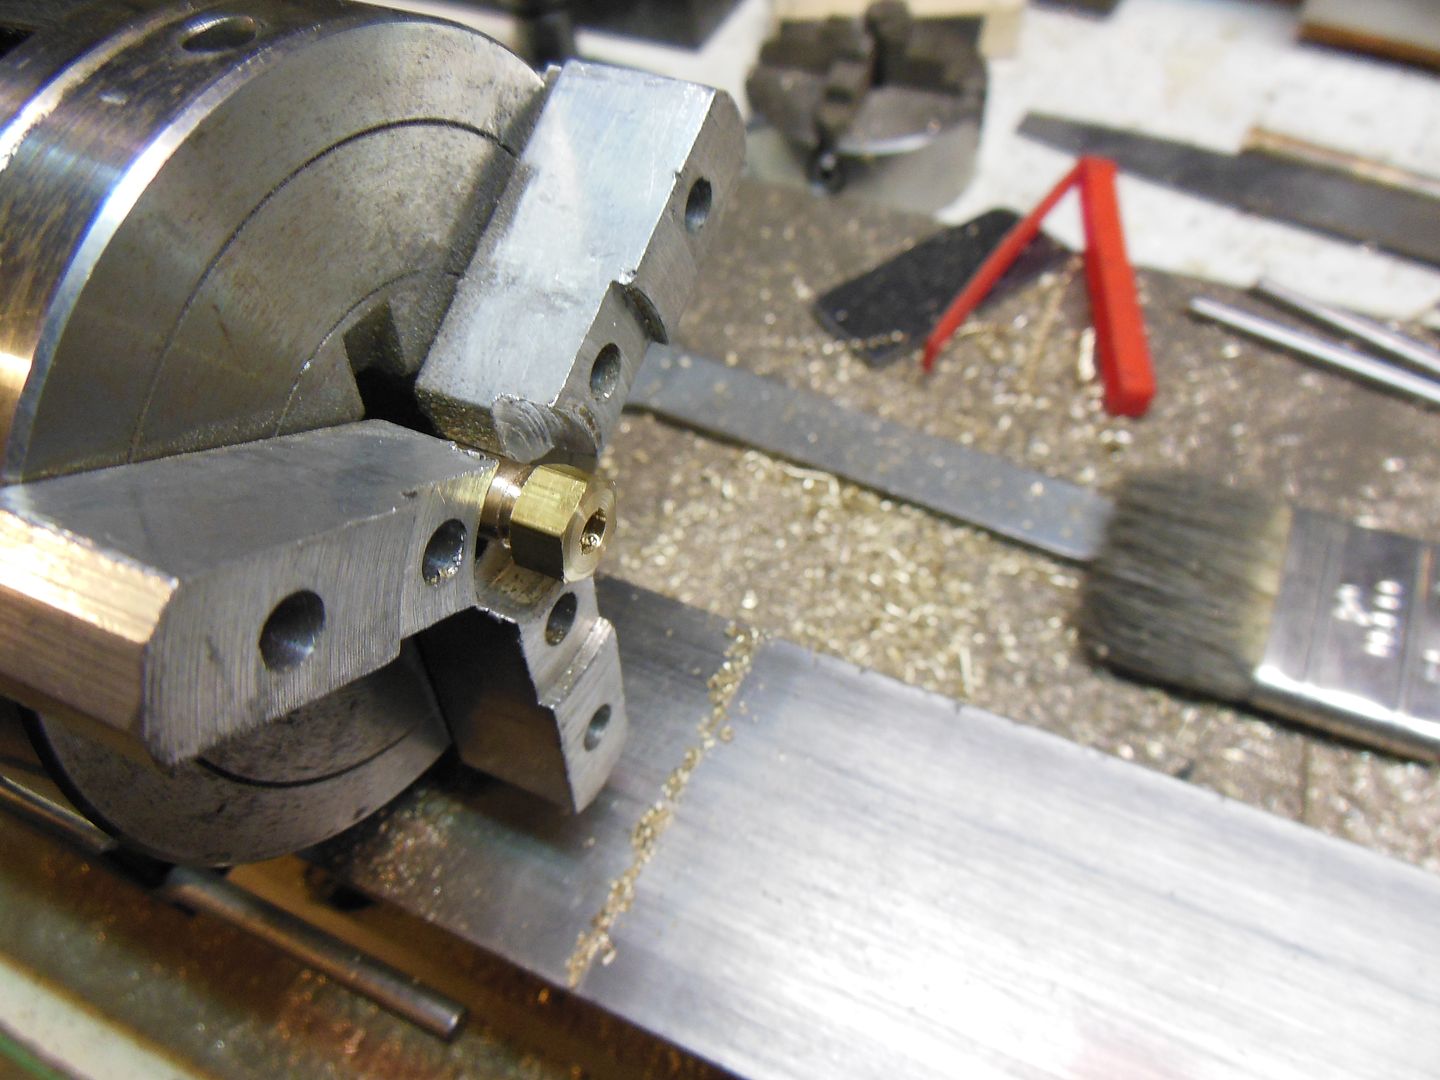
these parts have tapped or threaded spigots coming off them, this was straightforward turning drilling and threading with a die,
and then assembled with some flux and silver-soldered


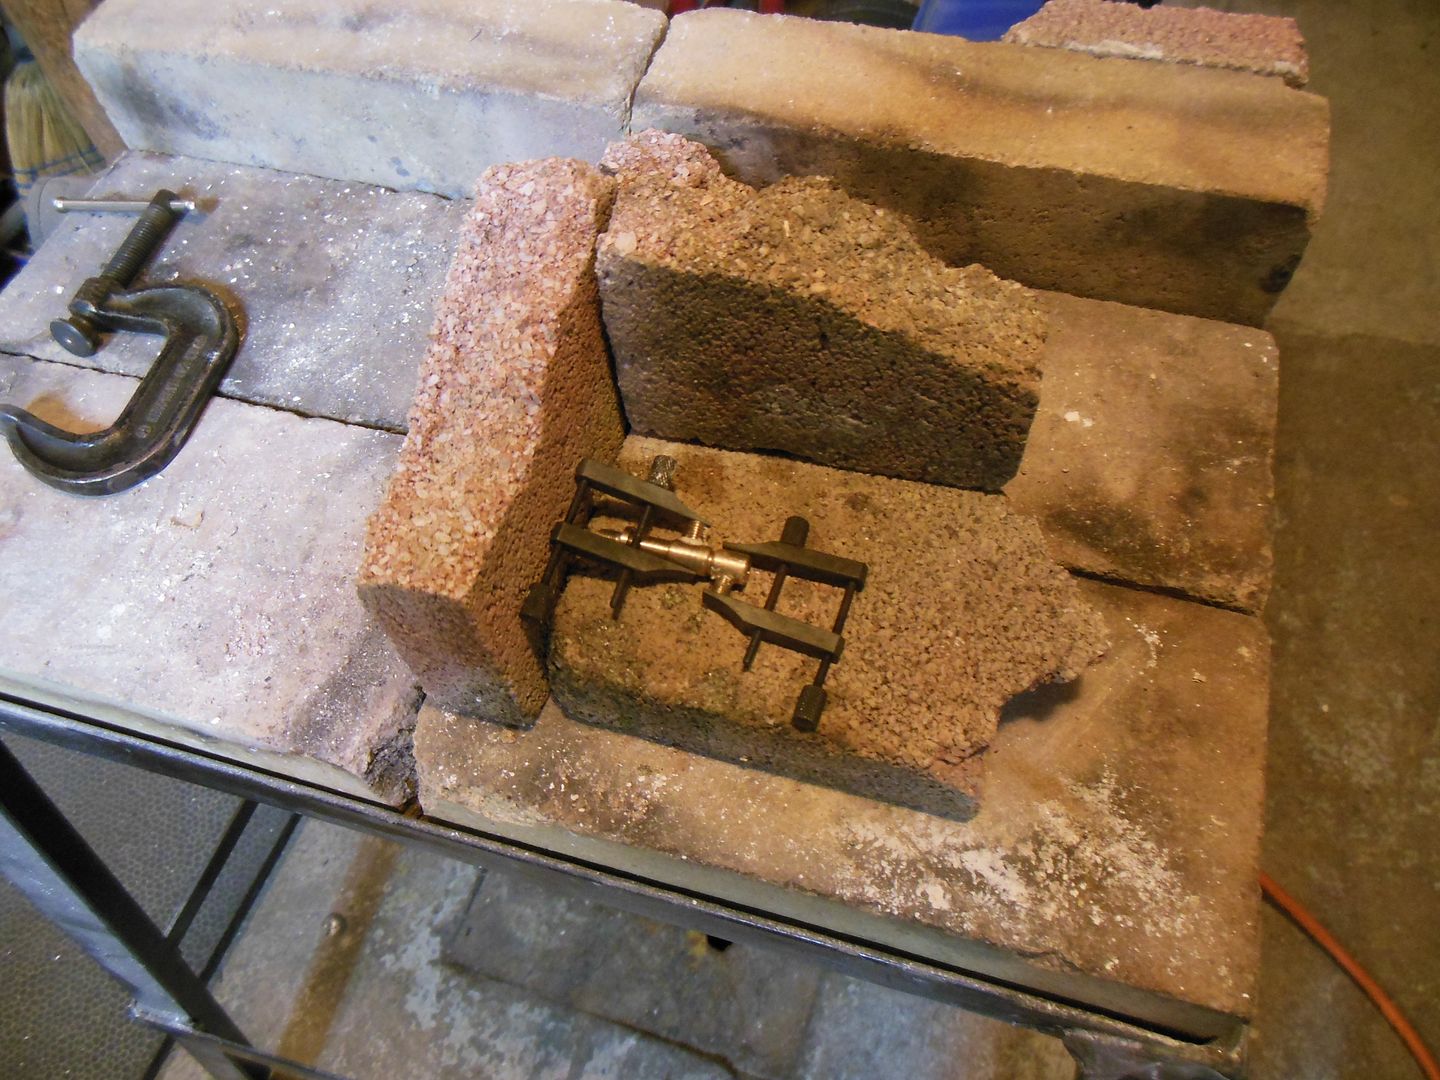
and then into the pickle, and do it all again for the upper end. 

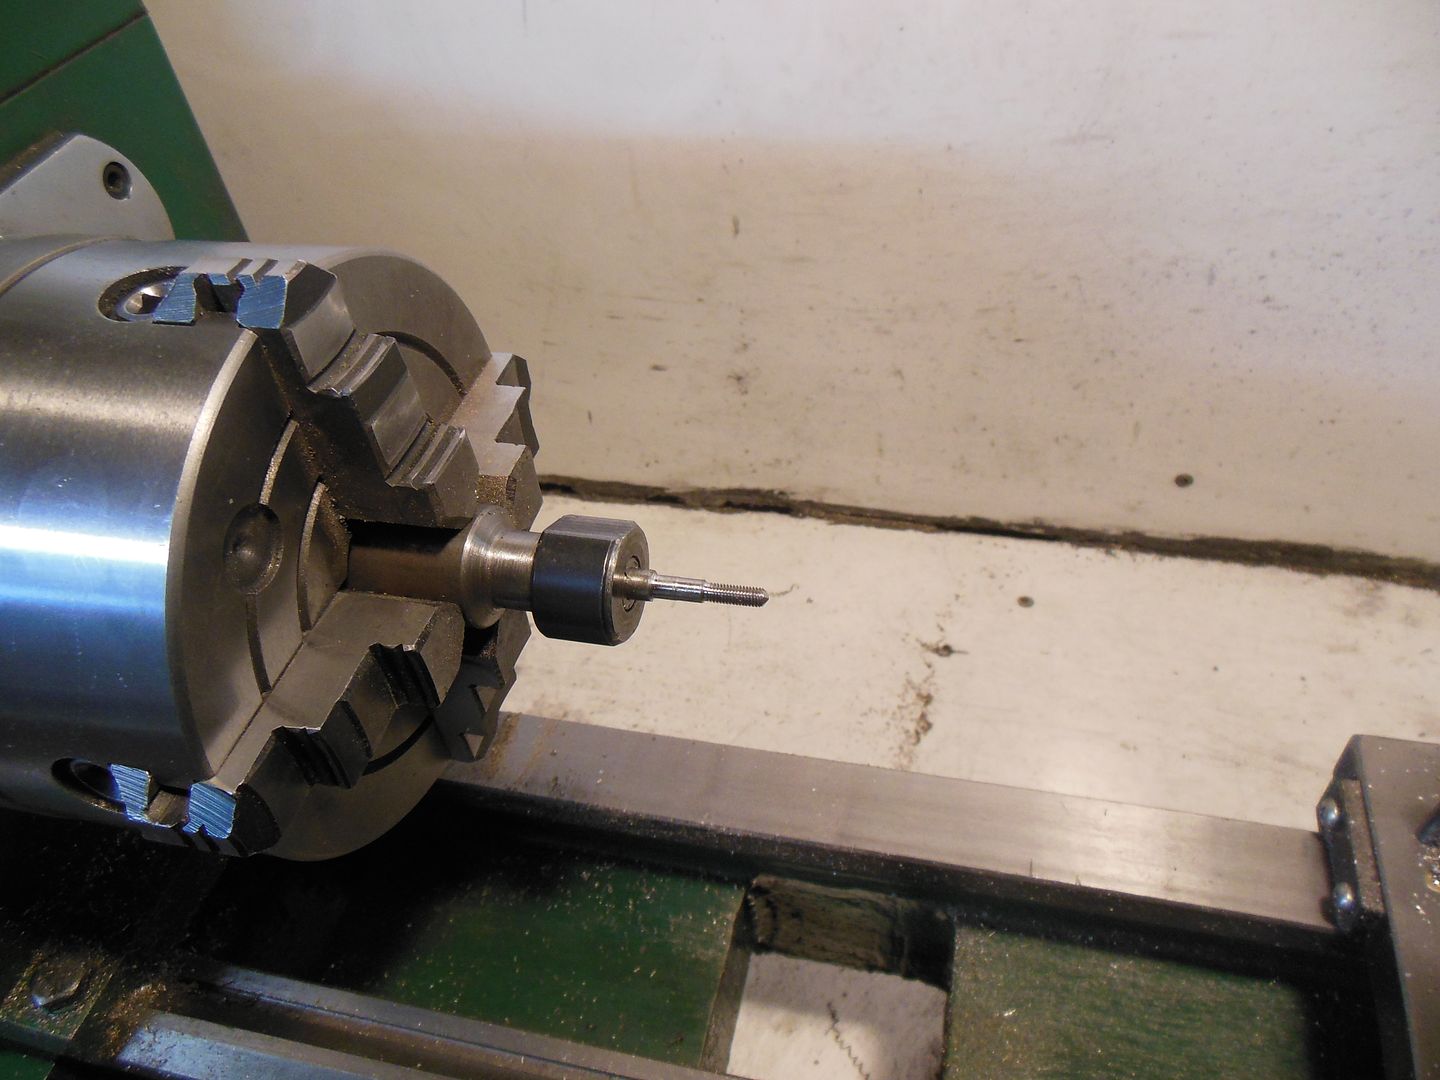
The lower fitting has a blow-down valve so turned and threaded a bit of stainless (started out life as a 1/4"bolt) as a valve spindle.  The big lathe can't handle stock this small in it's 4 jaw, so for a previous project I had turned a spindle that mimics the spindle nose of my Taig lathe so I can use the collets that fit that lathe in it's big brother


Turned, drilled, tapped, knurled, and parted off a bit of 12L14 for a handwheel


Made a really small locknut for the handwheel in the Taig


finally, made up the nuts that will secure the glass tubing


and after some clean-up with a wire wheel in the dremel, put all together, and put it in place.  will work better once the tubing is there!


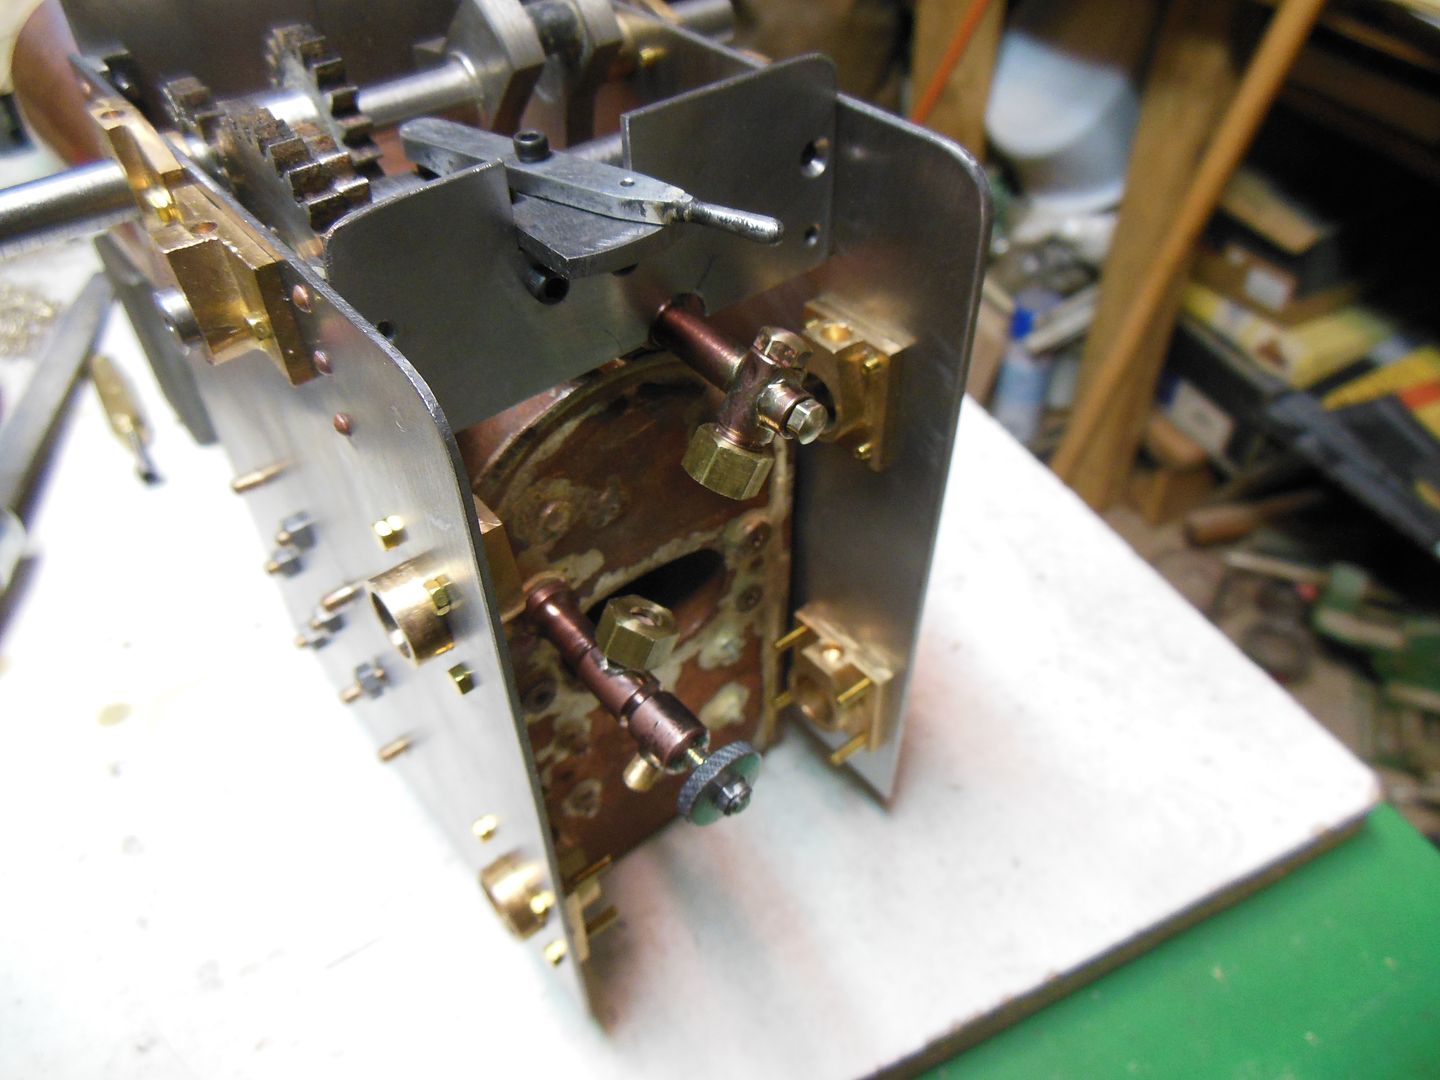
and that's it for now!

cheers, Joe


RobWilson

  • Guest
Re: Minnie TE Long term project
« Reply #67 on: February 16, 2015, 05:02:35 PM »
HI Joe

Looks like your making good steady progress  :thumbup: :clap: :clap: have you threaded anything 16BA yet  :palm:


Rob

Offline Joe d

  • Sr. Member
  • ****
  • Posts: 251
  • Country: ca
Re: Minnie TE Long term project
« Reply #68 on: February 16, 2015, 06:25:58 PM »
HI Joe

 have you threaded anything 16BA yet  :palm:Rob

Hi Rob

Happily, to date my smallest adventure in tapping has been a 0-80.... which at .06" is about double the diameter of 16BA?

If I need any doing, I'll just mail them to you, your lathe is geared for screw cutting isn't it? :lol:

Cheers, Joe

RobWilson

  • Guest
Re: Minnie TE Long term project
« Reply #69 on: February 17, 2015, 02:52:15 PM »
 :lol: :lol: :lol: I cant see 16BA Joe  :Doh:

Rob

Offline Joe d

  • Sr. Member
  • ****
  • Posts: 251
  • Country: ca
Re: Minnie TE Long term project
« Reply #70 on: February 19, 2015, 12:28:30 PM »
:lol: :lol: :lol: I cant see 16BA Joe  :Doh:Rob

Don't think I can either :clap:

got the fire door done;
started by silver soldering a bit of round stock to some left over hornplate, some filing, and there it is, a hinge part


the catch for the latch is just a little piece of flatbar drilled and threaded on the back for an off-cut of a 7BA screw that then screws into the
bushing on the boiler.  In the it's better to be lucky than good mode, the thing ended up vertical with no fussing about needed with
the point of thread engagement...


The actual door is also a bit of round soldered onto a piece of leftover hornplate, some filing here and there, rivet on the latch bar,
file up the keeper/guide and rivet it on and here it is


and here it is where it lives:


Still have to make the "real" hinge pin to replace the temporary one, and add the chain to the latch handle.  Two more things on the
"little details" list....

So, onwards and upwards with a lot of repetitive stuff now, making 70+ strakes and a bunch of spokes to start assembling the rear
wheels.

Joe

Offline Joe d

  • Sr. Member
  • ****
  • Posts: 251
  • Country: ca
Re: Minnie TE Long term project
« Reply #71 on: March 02, 2015, 09:56:45 PM »
Sneaked out of town for a week on the beach in Curacao, damned good thing to do after the winter we've been "enjoying" here in Montreal.  :clap: 

Now that I'm back, been slogging along with what is probably the most repetitious machining in this whole project

cut a bunch of steel strips into smaller bits, then stacked them in the mill to bring them down to size
(the strips were sheared, so they all had less than square edges)

Here's the last Stack-O-Strakes getting taken down to size


and here's the blanks for front spokes, rear spokes, and strakes:


and here's the set-up on the rotary table for the 1st op on the spokes, curving the end that lies next to the rim of the wheel


lots to do still, but it's coming along.

Cheers, Joe

Offline vtsteam

  • Global Moderator
  • Hero Member
  • *****
  • Posts: 6466
  • Country: us
  • Republic of Vermont
Re: Minnie TE Long term project
« Reply #72 on: March 02, 2015, 10:35:55 PM »
This is definitely a Curacao winter......one way or another!  :lol:

Good for you.  :thumbup: And the traction engne is looking great!  :clap: :clap: :clap:
I love it when a Plan B comes together!
Steve
https://www.youtube.com/watch?v=4sDubB0-REg

RobWilson

  • Guest
Re: Minnie TE Long term project
« Reply #73 on: March 03, 2015, 10:07:03 AM »
Just think of ALL the holes that will need to be drilled into them Joe  :)


That will help bring you back to reality  :lol: :lol:


Rob

Offline Joe d

  • Sr. Member
  • ****
  • Posts: 251
  • Country: ca
Re: Minnie TE Long term project
« Reply #74 on: March 03, 2015, 03:47:05 PM »
Thanks, Steve.

And thanks (I think?) to you too Rob.  Go ahead, cheer me up some more .... :)

Joe