Author Topic: Rod's Aussie Shed  (Read 8324 times)

Offline RodW

  • Full Member
  • ***
  • Posts: 120
  • Country: au
    • Vehicle Modifications Network
Rod's Aussie Shed
« on: May 06, 2013, 12:40:03 AM »
HI guys, I thought I take you for a tour of my shed. It will be short as it is only a tiny shed! 3.8x 2.4 metres actually. I built it myself 5-6 years ago


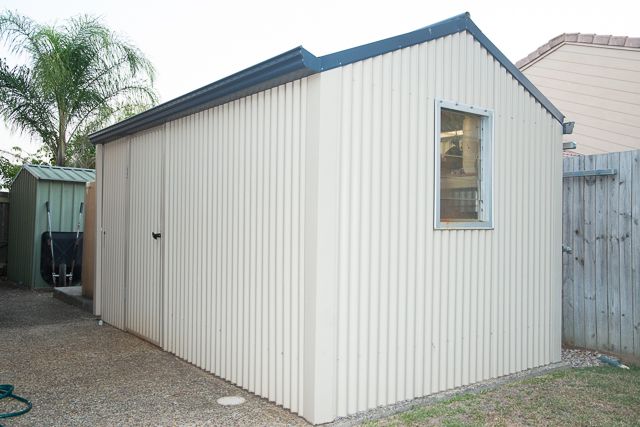
One good thing is that I have a separate garden shed behind my workshop to store everyday things like mowers and the like.

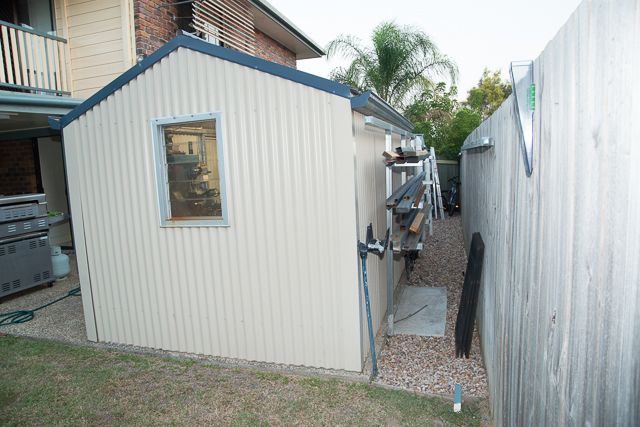
A while ago, we tidied up along the fence and I decided to put up a storage rack and pour a slab for an air compressor down the side. One day, I will have to get around to putting the roof on as the compressor went in yesterday.


Anyway, come inside. This is how i tlooked at the beginning of the year. It started off as being an ordinary shed with some shelves I put in as it was built but over time, I started moving things out to make room for my metal work stuff. First the push bikes, then the woodworking stuff but you know you have got the bug bad when you have to move out a perfectly good drill press to make way for a mill!


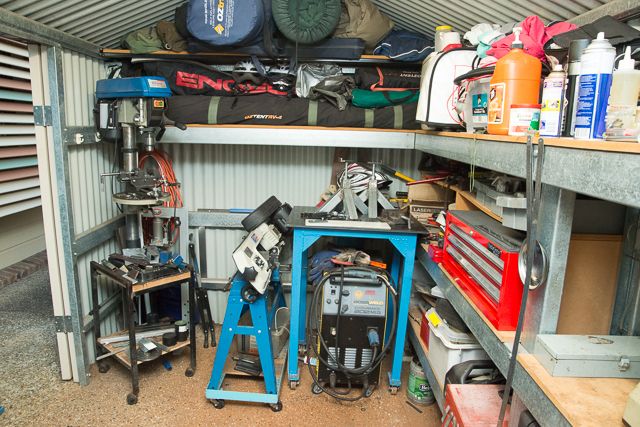
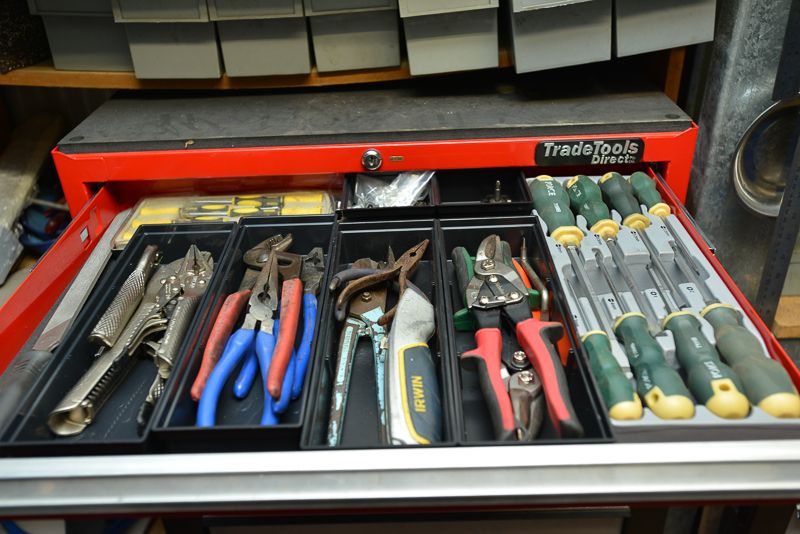
You can see the camping gear has stayed but I have a 200 amp MIG welder parked under a welding table I made. The bandsaw is on wheels so it can pull out for use and long stock can come in via the door. The red tool chest was a recent addition to help find a bit more storage.


Hmm, I must fix that wonky shelf...

Electric Diamond hone to keep the knives sharp, Grinder (which will get a linishing belt soon) and a very small work bench.


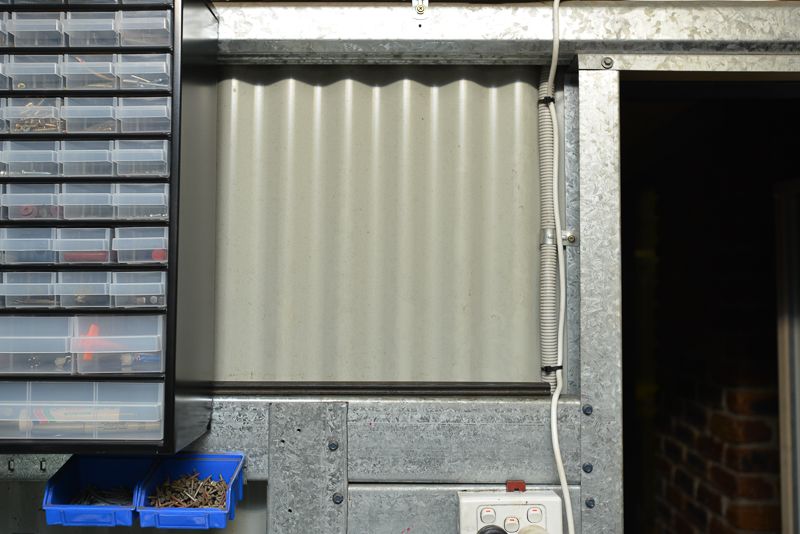
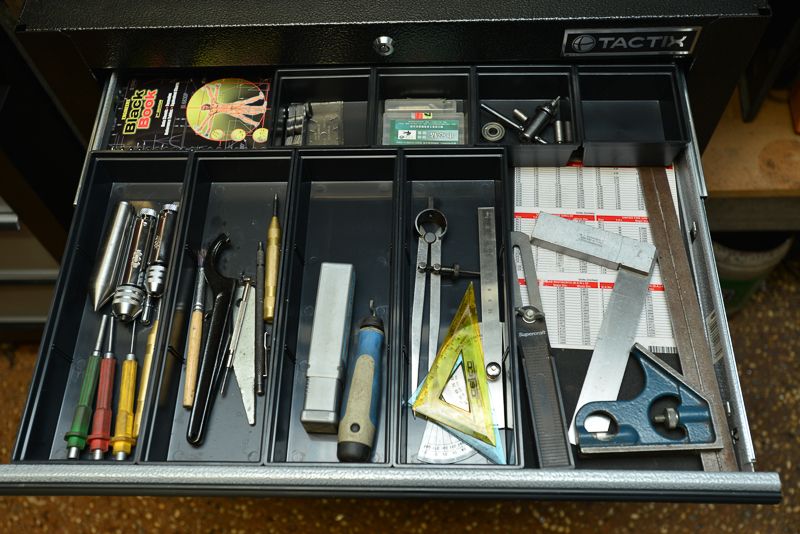
And my old lathe and an assortment of little storage drawers accumulated over the last 30 years sitting above it.

Then in January, I had a bit of a spending spree


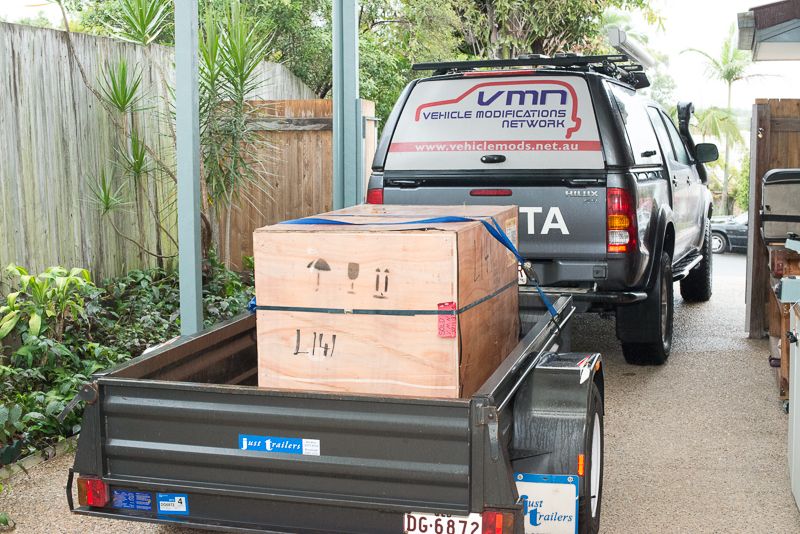
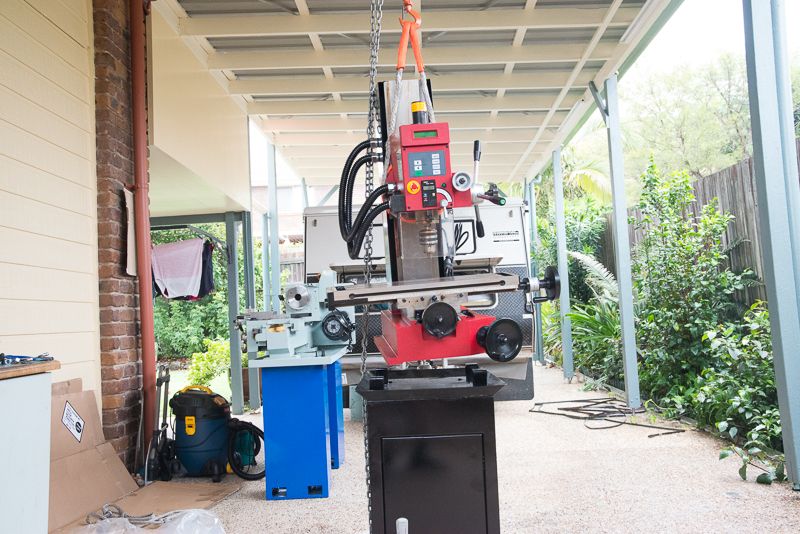
Which took a bit of work to get into my shed at the other end of the house.  But I got there


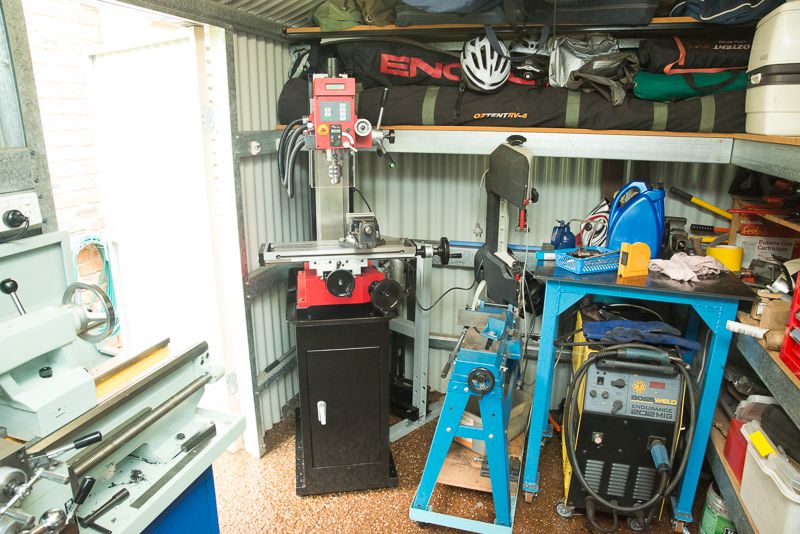
So now I have a Seig SX3 mill and a Hafco AL320G 13" lathe with 38mm spindle.

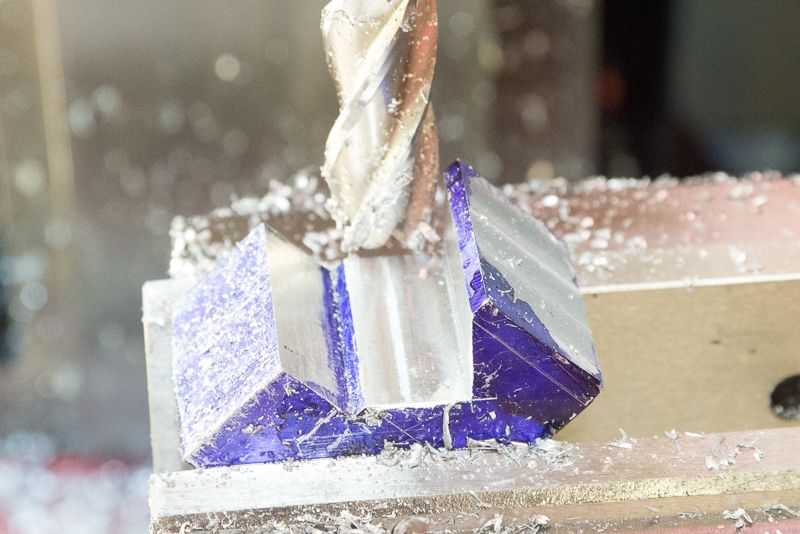
It was not long before I was doing stuff


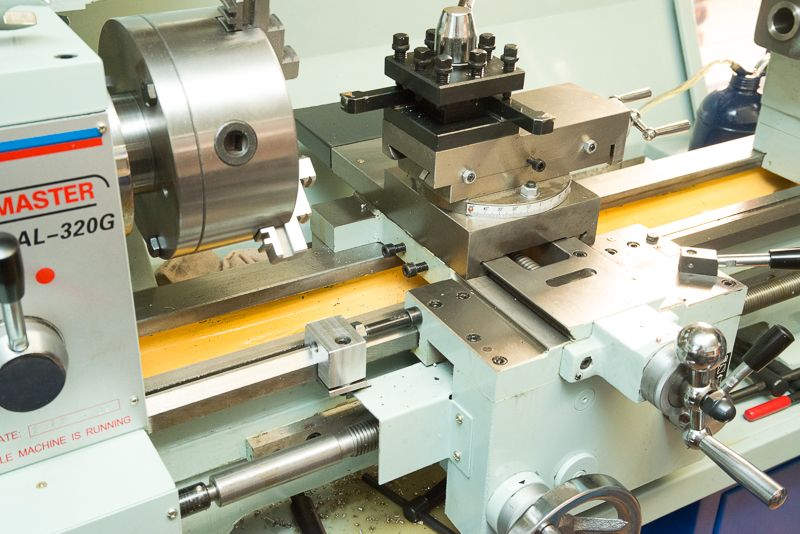
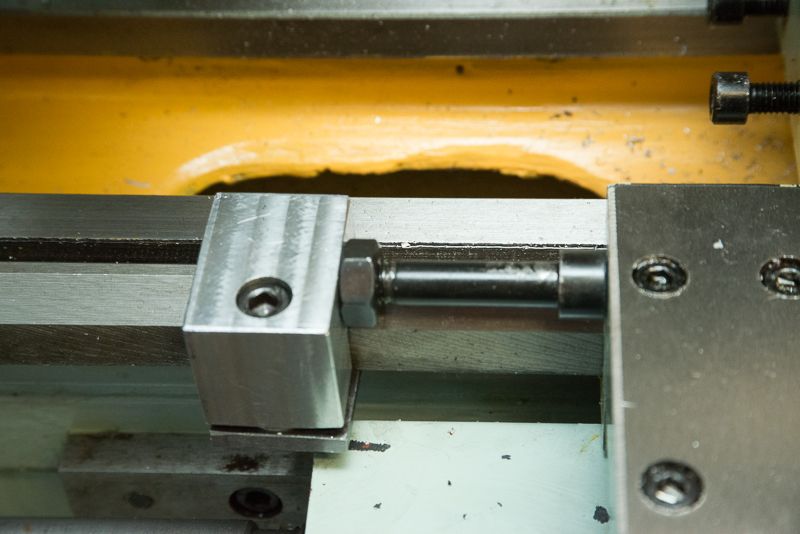
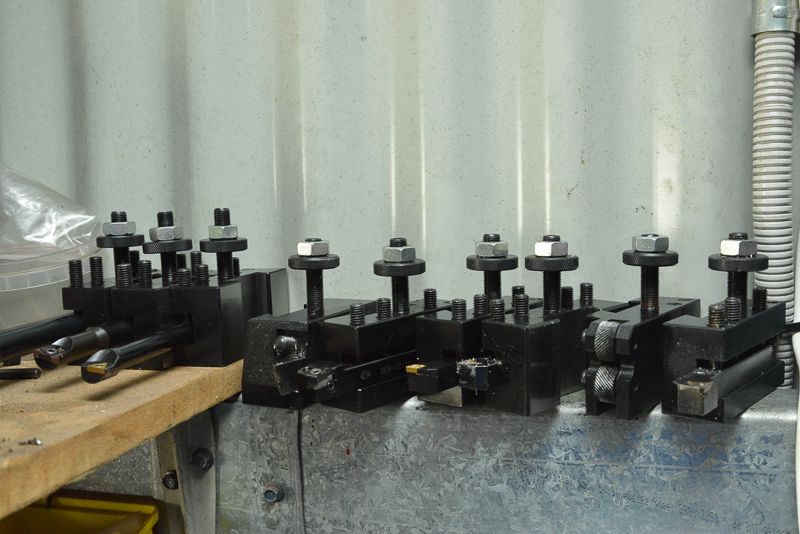
And before long I had a BXA tool post fitted


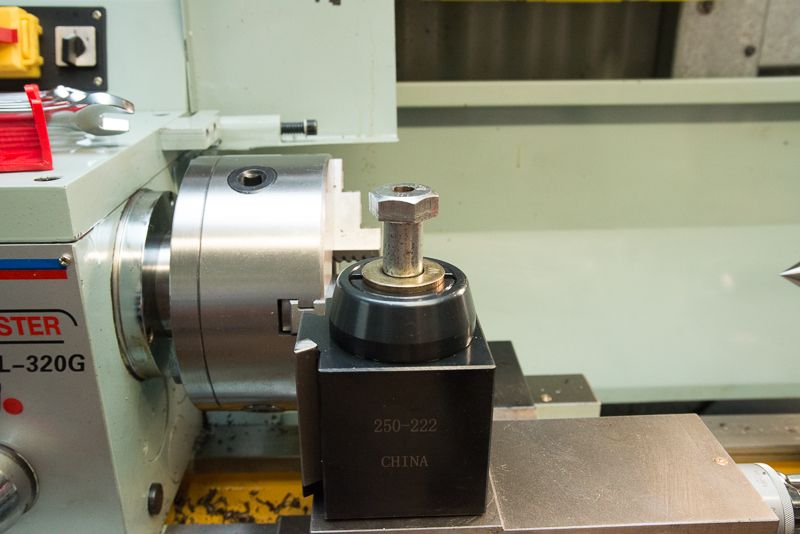
and a carriage lock which has saved me heaps of time. I have a straight shaft bare micrometer on order so I will probably redo this so I have precise control of the stop position.


I was a bit annoyed that the oil sight glass broke twice, once before I got the lathe installed


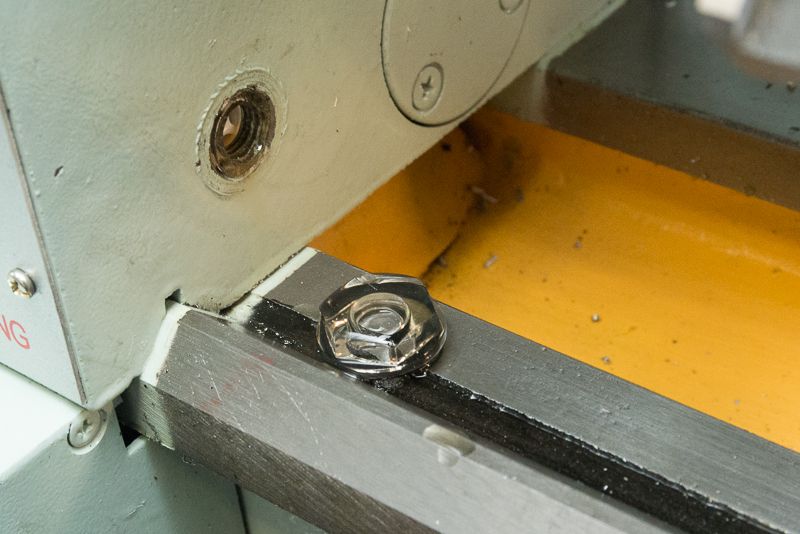
For starters, I swiped a bung out of the mill table for coolant return but I eventually tracked down a metal framed sight glass.

I also made up a dial indicator holder which has yet to be used as with the bigger lathe, I have not had to resort to the 4 jaw yet.


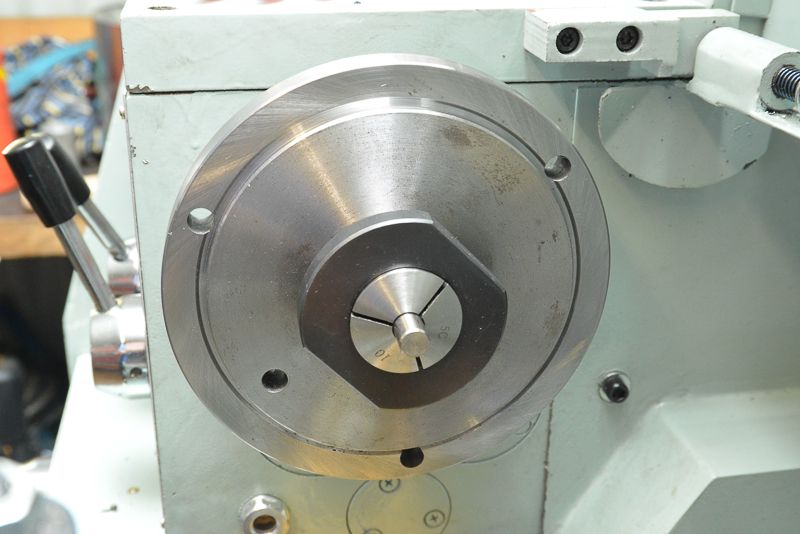
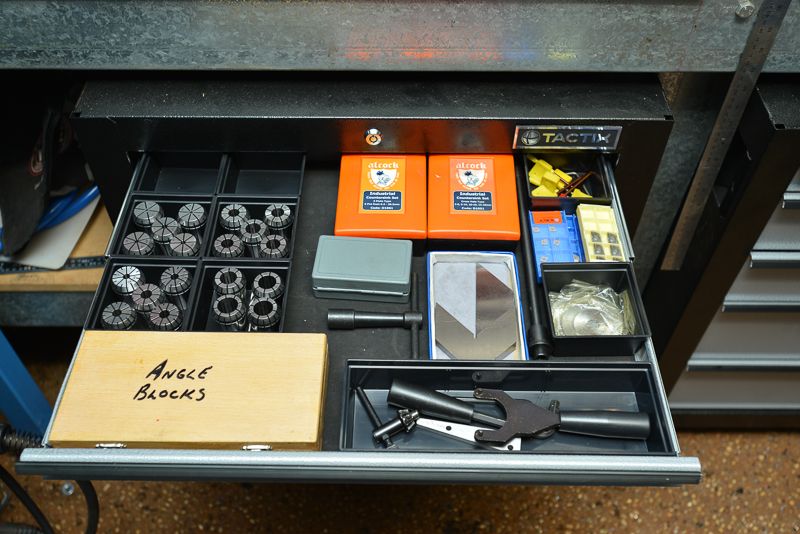
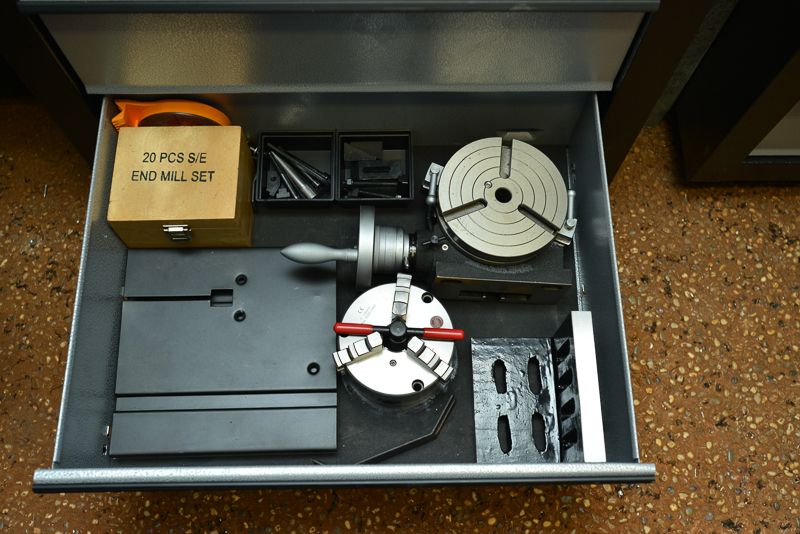
I then found out about 5C collets, so I grabbed a collet block and a collet chuck adapter for the lathe. Somebody gave me a few he had spare which I have yet to use but I have a full set of metric and imperial ones on order.


I wish I had them over the weekend for one job!

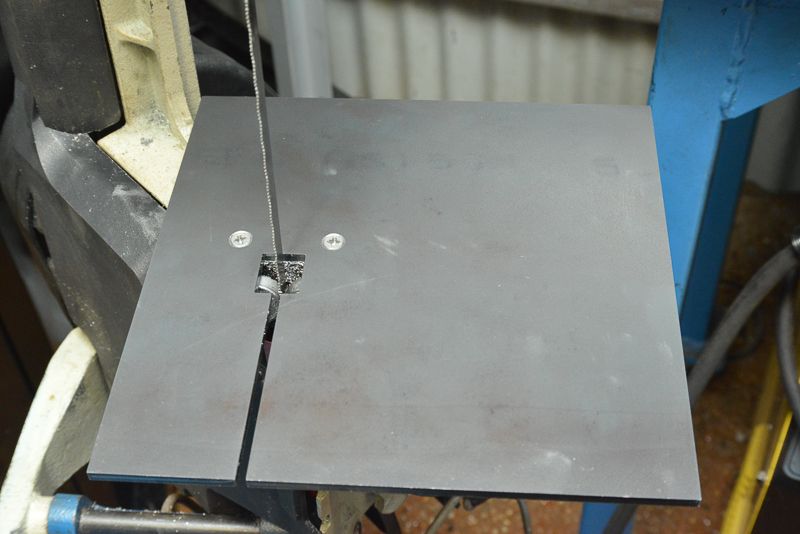
I was getting some laser cutting done and I did my first CAD job to get a couple of band saw tables made up out of 5mm plate, one for me and one for the generous collet donor. All I had to do was counter sink two holes


So by about now, I was running out of room, QCTP holder were breeding like flies


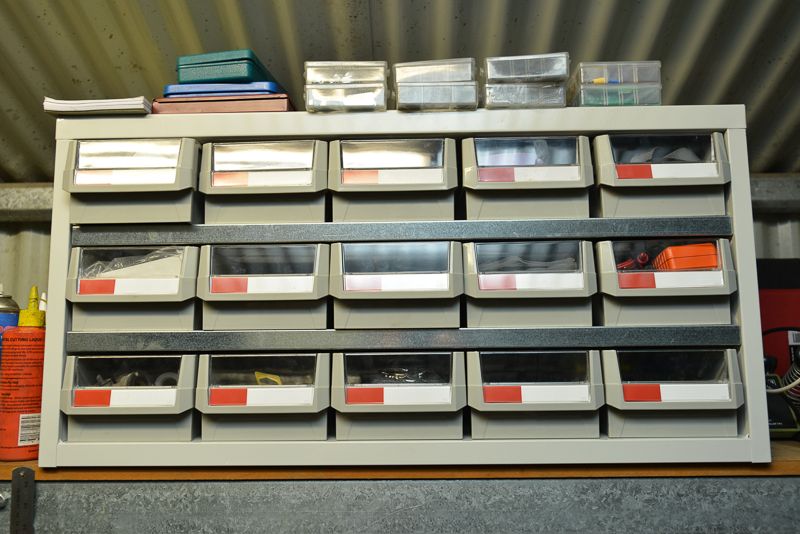
 and stuff was everywhere. I decided the tooling accumulation had to stop for a while while I addressed a storage makeover. I started off with buying some shelving units for the garden shed and after a big cleanup out there, I moved some stuff out of my shop into our shed. Then I grabbed a parts drawer which looked interesting


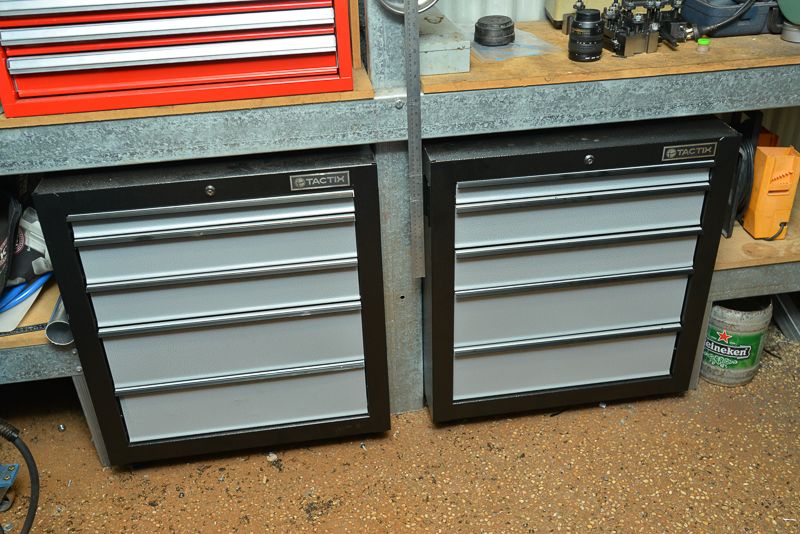
And someone told me about Raaco storage cabinets. I ordered 5, one got damaged in transit so they sent me a replacement, with a couple of pop rivets and some gentle panel beating, I repaired the bent one.


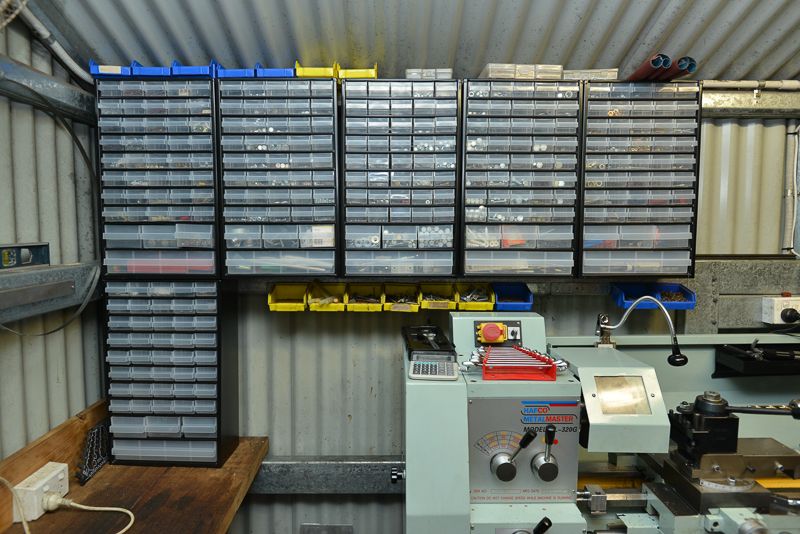
It looks like now I started the bottom row, I have room for one more. I deliberately left a bit of a gap at the tailstock end and have the material here to make a timber shelving unit for QCTP holders.


I also grabbed a couple of pretty cheap drawer units that were low enough to fit under the benches and I hacked out some of the bottom shelf and screwed them onto the shed frame so they won't tip. Now things are a bit more organised.


So we are nearly up to date with where I am in my shed project. But I got distracted and bought a compressor at an online auction based on this photo.


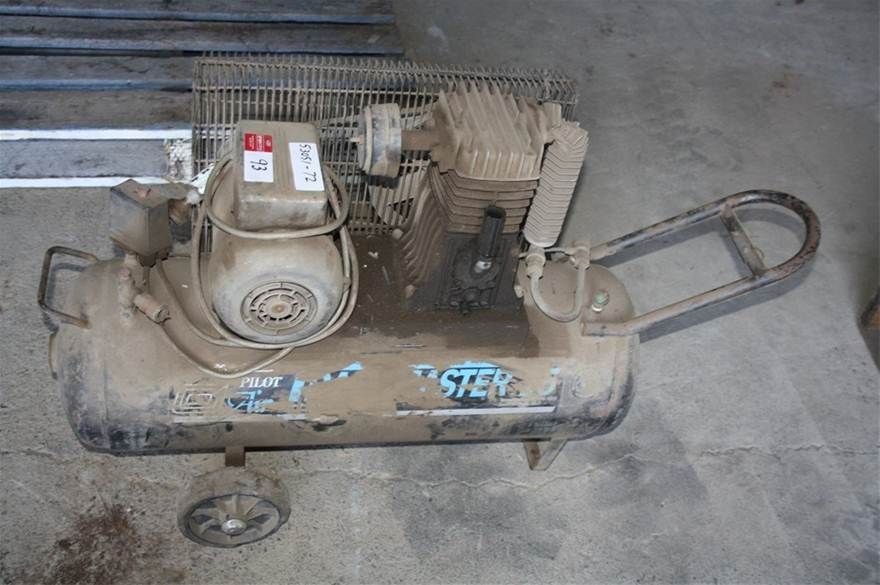
These are a very good Aussie brand with an Italian pump. Today's price is about $1100. I ended up winning it and took it home. I found it needed a new motor so I stripped the head off it to check it out. Somebody had been in there before me and had the pistons out, I assumed the rings had been done so did not dig any deeper.


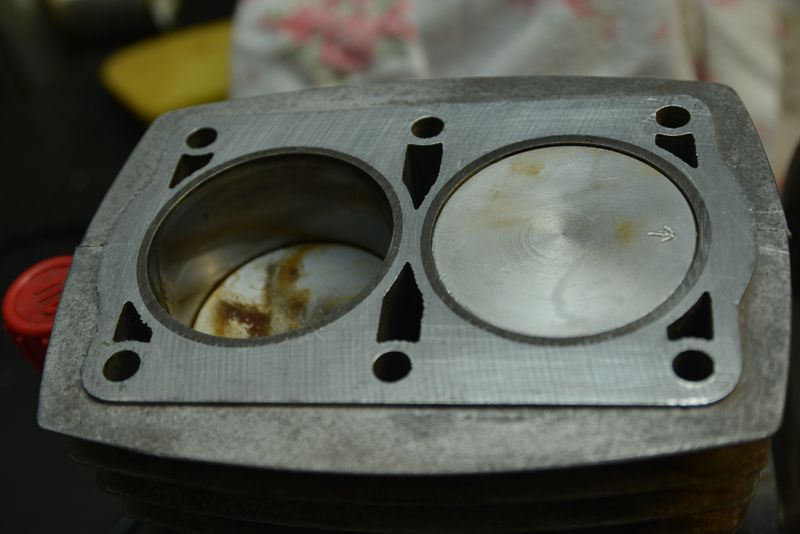
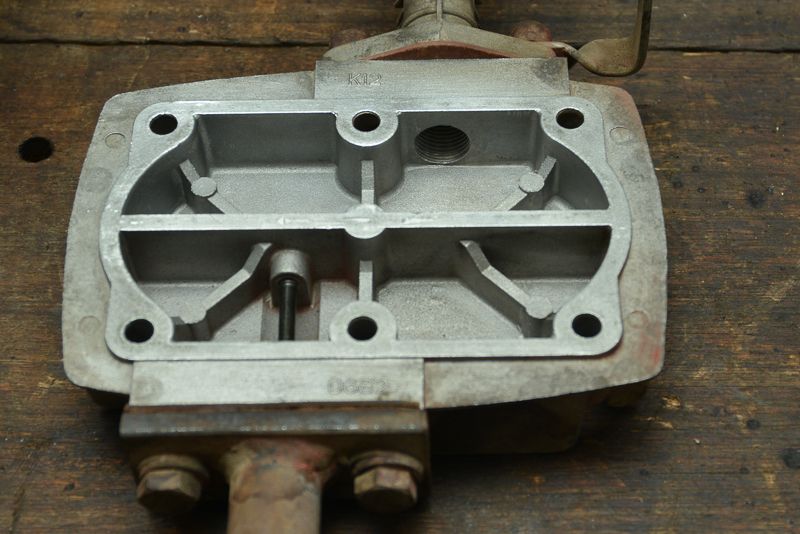
and checked the valves


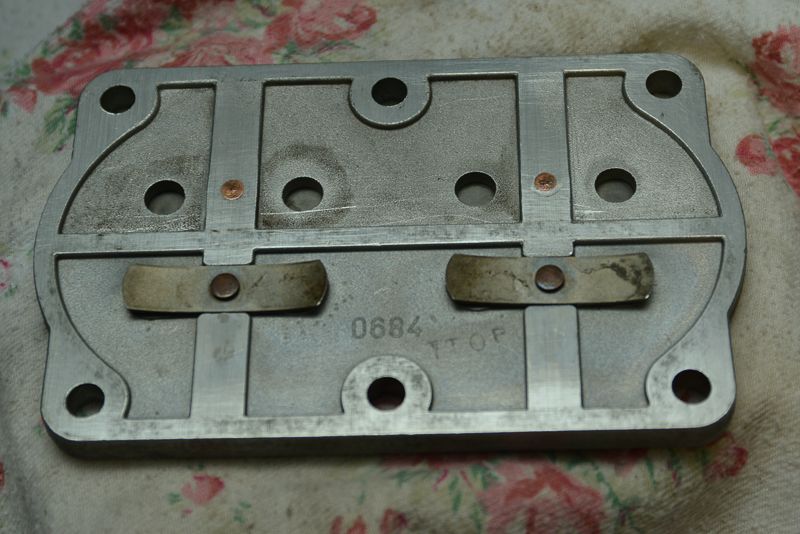
I cleaned it up, replaced the air filter, oil breather and head gaskets and gave it a coat of paint over the weekend and it is now as good as new sitting on that bare slab of concrete in the second photo. I took some pics but I have not had time to get them up on Photobucket.

So in amongst all of this activity I have spent about 8-10 days painting the house inside and out. It still not finished and I want to get it done so I can get rid of all the clutter and put things away where they belong.

Anyway, I will post an update once I get the photos off my camera.

Cheers

Rod
RodW
Brisbane, Australia

Rob.Wilson

  • Guest
Re: Rod's Aussie Shed
« Reply #1 on: May 06, 2013, 02:41:27 AM »
Hi and Welcome Rod

Very nice shop you have there  :bow: :bow: :bow:

I have a problem with tool holders breading LOL so I made a rack from a bit steel to store them .


Rob

Offline RodW

  • Full Member
  • ***
  • Posts: 120
  • Country: au
    • Vehicle Modifications Network
Re: Rod's Aussie Shed
« Reply #2 on: May 06, 2013, 04:15:21 AM »
Hi and Welcome Rod

Very nice shop you have there  :bow: :bow: :bow:

I have a problem with tool holders breading LOL so I made a rack from a bit steel to store them .

Rob

Rob, what a great idea. Thanks so much for sharing. I might just copy it. As a matter of fact, because I have less room, I might get it laser cut the next time I am getting some parts made so I can mount L shaped "hooks" that stick out perpendicular to the wall so the holders hang with the tools sticking out from the wall. That might me hang more. I'll have to do a bit of thinking now!

I have already bought the timber for the shelves so it looks like it will get used to fix my wonky, saggy  shelf!

The other thing I wanted to do is to make a collet rack that goes in the drawers as between 5C and ER32, I think I will have about 50 odd to store when a couple of orders turn up.
RodW
Brisbane, Australia

Offline RodW

  • Full Member
  • ***
  • Posts: 120
  • Country: au
    • Vehicle Modifications Network
Re: Rod's Aussie Shed
« Reply #3 on: May 06, 2013, 05:23:32 AM »
Well, I have unloaded my camera, so I thought I better continue with recent upgrades to the shed.

First off, I reassembled the compressor to make sure it was all working after mounting the new 2.2 kW (3.0 HP) motor.


I learnt quite a bit about electric motors sorting this out. I did not know that motor come in are standard frmae sizes and that compressor rated motors are quite expensive! This is an Australian made CMG motor taht is 0.2 kW bigger than what was on it.

Anyway, once it was confirmed it was all working properly, I moved onto the air installation in the shed. I drilled a hole with a step drill, added a plastic electrical gromet and fitted it all up so that there is a pressure gauge in plain sight, an isolation valve and the filter drier


Instead of using hose clamps, I decided to try the crimp on clamps which somebody told me once you could close with a bllunt pair of pincers.


The other thing I found out about air fittings the hard way last time I did soething like this is NOT to use plastic plumbers tape! ou have to use a liquid sealant. Locktite have two types. One rated for lower pressure which stays soft and another higher pressure one which sets hard. The stuff I use is a different brand as I had it on hand and it is rated for 200 kPA, about 3-4 times higher than the 120 psi in my setup


Anyway, the pincers worked a treat. I tried to cut them off after clamping them for testing and had to swipe them over the bench grinder.

Then it was time to run the hose outside so I drilled another hole with my step drill.


I like to paint the inside of freshly cut holes so I took to it on the inside with a spray can of undercoat which you can see dribbling here before I wiped it away with some thinners. Then I installed a rubber grommet so it could follow the contour of the corrugated iron wall and poked the hose through.


Here is another close up of the clamp on hose clamps. Initially, I thought about using hard airlines but decided that if I used the ordinary airline and Nitto fittings, I could wheel this around to do other jobs if I ever needed to.

I found an old can of Killrust gloss black enamel, so I decided it just had to be painted so I stripped it down again, removed all of the stickers with a hot air gun (be gentle with it is my only advice!) and it came up looking really good


So I put it back together for the last time and it looked like new!


I then rolled it onto the slab and connected it up.


I had bought some rubber feet but liked the ones on my old cheap and nasty compressor so I swapped them over. The feet I bought were quie big, so I got two more than I needed to put the compressor on given the state of the wheels on it. Somebody had welded a big nut on to retain a wheel so I decided because he obviously knew nothing about spot welding, not to bother doing something with them as no one will ever see it!

I still have to sort the power out and will fit a remote switch in beside the air outlet inside the shed but anyway after one day, it is great to have some air in my shop! A fully charged compressor tank goes a long way so I will get by until the electrical work done.

Well we are now up to date but still have so much to do before I can say it is finished
« Last Edit: May 06, 2013, 08:44:49 AM by RodW »
RodW
Brisbane, Australia

Offline John Rudd

  • Hero Member
  • *****
  • Posts: 2521
  • Country: gb
Re: Rod's Aussie Shed
« Reply #4 on: May 06, 2013, 06:12:35 AM »
Nice setup you got there......

Thing is with what we do....we never ever finish..
There's always something else to do or make/repair
eccentric millionaire financed by 'er indoors
Location:  Backworth Newcastle

Skype: chippiejnr

Offline Brass_Machine

  • Administrator
  • Hero Member
  • *****
  • Posts: 5504
  • Country: us
Re: Rod's Aussie Shed
« Reply #5 on: May 08, 2013, 12:14:32 PM »
That is a nice setup you have. Nice machines.

John is right... we are never truly done.

Eric
Science is fun.

We're all mad here. I'm mad. You're mad.