Author Topic: Mini Mill Drawbar Problems.  (Read 11195 times)

Offline Stilldrillin

  • Global Moderator
  • Hero Member
  • *****
  • Posts: 4972
  • Country: gb
  • Staveley, Derbyshire. England.
Mini Mill Drawbar Problems.
« on: March 10, 2009, 02:00:55 PM »
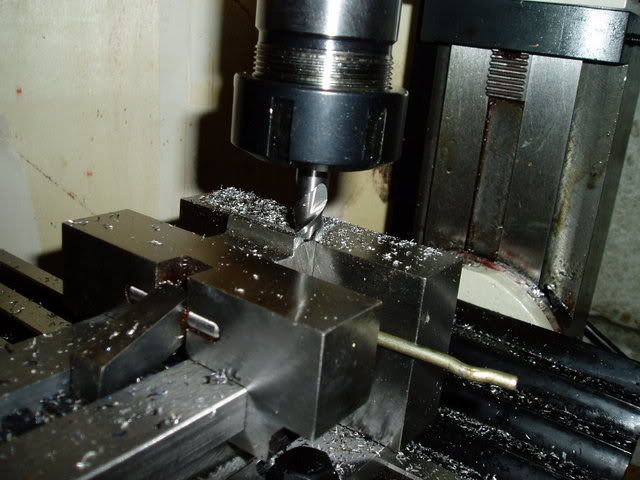
I`m now beginning to get the hang of this mini (tiny) milling lark.....  :thumbup:

It really doesn`t like small cutters, like this tipped 1 3/4" three leg.


It really sings with this 10mm carbide three leg.


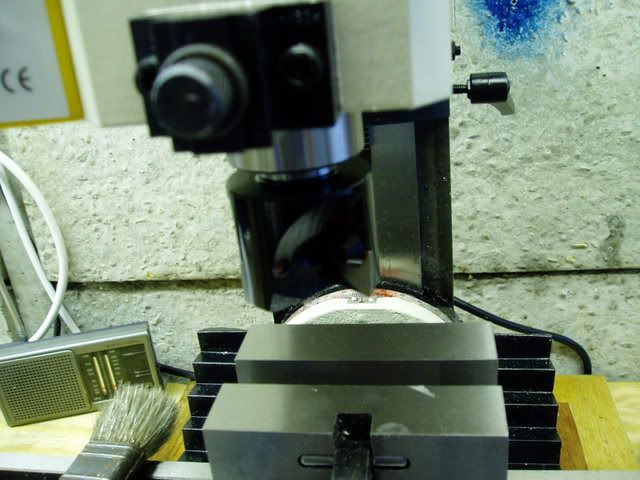
But my main problem at the moment is removing the tool from the morse taper spindle!

However gently I nip up the drawbar, I have to beat the tool from the taper socket.....  :bang:

I started with my 3" dia x 1/2" lead tup.

Thinking it needed more of a rap I tried this piece of bronze......
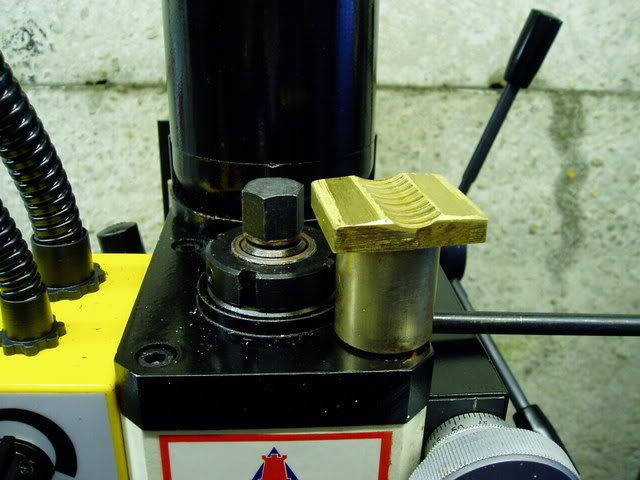


Hurts me hand......  ::)

Any ideas / opinions anyone?  :thumbup:

David.
David.

Still drilling holes... Sometimes, in the right place!

Still modifying bits of metal... Occasionally, making an improvement!

Offline sbwhart

  • Global Moderator
  • Hero Member
  • *****
  • Posts: 3530
  • Country: gb
  • Smile, Be Happy, Have Fun and Rock Until you Drop
Re: Mini Mill Drawbar Problems.
« Reply #1 on: March 10, 2009, 02:21:33 PM »
David

Try clamping the spindle before you give it a tap. Normally you shouldn't have to wack it too hard.

Cheers

Stew
A little bit of clearance never got in the road
 :wave:

Location:- Crewe Cheshire

Offline Darren

  • Madmodder Committee
  • Hero Member
  • *****
  • Posts: 3795
  • N/Wales
Re: Mini Mill Drawbar Problems.
« Reply #2 on: March 10, 2009, 02:44:55 PM »
Easy, don't take it out.

I put everything in my ER holder, drills, flycutter, heck even a milling bit sometimes as well.... :lol:

Since the holder has been in I've only taken it out once. That was after beating seven bells out of it mind. Now I just leave it there.


Why do you need to take it out?
You will find it a distinct help… if you know and look as if you know what you are doing. (IRS training manual)

Offline Stilldrillin

  • Global Moderator
  • Hero Member
  • *****
  • Posts: 4972
  • Country: gb
  • Staveley, Derbyshire. England.
Re: Mini Mill Drawbar Problems.
« Reply #3 on: March 11, 2009, 03:24:06 AM »
Try clamping the spindle before you give it a tap. Normally you shouldn't have to wack it too hard.

Sorry Stew..... How do I clamp it?

Quote
Easy, don't take it out.

I put everything in my ER holder, drills, flycutter, heck even a milling bit sometimes as well....

Since the holder has been in I've only taken it out once. That was after beating seven bells out of it mind. Now I just leave it there.


Why do you need to take it out?


Hmmmm.....
Yes, you`re right Darren!  :clap:


Putting everything possible in the ER holder does make sense!  ::)


BUT, I`ve got 3 tools, so far!
AND I come from a toolchanging background. Look at the 20 tool carousell I used to "own"......


My thoughts were.

Milling m/c`s were designed to hold many different tools.

Morse tapers were designed to drive only by the taper`s friction, and to be drifted apart.

This mini milling`s causing me many re thinks.......  :scratch: ::)

David.
David.

Still drilling holes... Sometimes, in the right place!

Still modifying bits of metal... Occasionally, making an improvement!

bogstandard

  • Guest
Re: Mini Mill Drawbar Problems.
« Reply #4 on: March 11, 2009, 03:47:06 AM »
David,

You're problem is an age old one, and the MT system is one of the worst. That is why even some of the medium sized benchtop mills now are going for the easier to release systems ie R8.

Maybe a reaction weight would solve your problem. Get a lump of soft metal (or cast in lead), shaped like a deep ring, say 3" long. The thru hole should just be able to get the chuck thru it. Push this against the bottom of the quill, while you tap on the drawbar. If you don't do this, you will be knocking crap out of the quill operating system, and you will eventually damage something.
Or for things like your face tool, make up a pair of fine wedges to go between the tool and quill bottom. Similar to these.

http://www.arceurotrade.co.uk/Catalogue/Chucks/Wedges-Drifts/Chuck-Removal-Wedges


John
« Last Edit: March 11, 2009, 03:55:29 AM by bogstandard »

Offline HS93

  • In Memoriam
  • Hero Member
  • *****
  • Posts: 788
  • Country: gb
Re: Mini Mill Drawbar Problems.
« Reply #5 on: March 11, 2009, 04:07:02 AM »
My X1 is the same I have to change between collets chuck and boring head so it is not an option for me Ill just make shure I have hold of the chuck when I remove it after last time when the chuck shot of its taper and got my foot, I find if I just unscrew  by about a mill or two and hit it with my steelmaster hammer 16oz it normally works, I asked Arc if they had another way and they said they just smack it as well I just have to rember to take the fine feed off first.

Peter  :hammer:
I am usless at metalwork, Oh and cannot spell either . failure

Offline sbwhart

  • Global Moderator
  • Hero Member
  • *****
  • Posts: 3530
  • Country: gb
  • Smile, Be Happy, Have Fun and Rock Until you Drop
Re: Mini Mill Drawbar Problems.
« Reply #6 on: March 11, 2009, 04:21:29 AM »
David,

If you don't do this, you will be knocking crap out of the quill operating system, and you will eventually damage something.


Hi David I've probably added to the confusion  :scratch:, what I ment was lock the vertical quill movement there should be a clamp to do this.

I've got M3 on my mill I chose this because I already had the tooling, when changing tools I just lightly stab the tool into the taper then nip the draw bar up finger tight, this works for most aplications, if I know I'm going to give it some welley I'll nip the draw bar up lightly with a spanner. To release I lock the vertical fead up, undo the draw bar a few turn and give it a light tap.

Hope this helps.

Stew
A little bit of clearance never got in the road
 :wave:

Location:- Crewe Cheshire

Offline Stilldrillin

  • Global Moderator
  • Hero Member
  • *****
  • Posts: 4972
  • Country: gb
  • Staveley, Derbyshire. England.
Re: Mini Mill Drawbar Problems.
« Reply #7 on: March 11, 2009, 04:47:09 AM »
John, Peter, Stew.

Very good advice from all of you.... Thank you!  :thumbup:

I wondered if a knurled 2" (?) dia hand driven, "socket spanner"  might give sufficient torque?

But, the spindle really needs supporting, during the tool ejection process.  :scratch:

There is a vertical stop clamp bracket...... Probably what it`s for, but not explained in instructions......  ::)

I really don`t like working with a lack of finesse.......

Thanks again for your ideas.  :clap:

David.
David.

Still drilling holes... Sometimes, in the right place!

Still modifying bits of metal... Occasionally, making an improvement!

Offline John Stevenson

  • In Memoriam
  • Hero Member
  • *****
  • Posts: 1643
  • Nottingham, England.
Re: Mini Mill Drawbar Problems.
« Reply #8 on: March 11, 2009, 05:16:30 AM »
Tap the top part of the spindle with a left hand thread.
Make a new drawbar where the bit under the nuts has the same LH thread

Screw new drawbar into spindle with about 1/2" of LH thread left.

Screw collet INTO drawbar NOT drawbar into collet, as far as you can, then tighten drawbar.

You need to initially play with the settings so that you still have some LH thread exposed when tightened, you don't want the head to bottom out.

That will hold the collet as tight as you need, when you come to extract it unscrewing it will eject the collet by the action of the LH working against the RH of the collet thread. Once free then unscrew the collet and don't disturb the position of the drawbar.

Sounds long winded but it's quick, it works and you don't heen to ever use a hammer.

JS.
John Stevenson

Offline sbwhart

  • Global Moderator
  • Hero Member
  • *****
  • Posts: 3530
  • Country: gb
  • Smile, Be Happy, Have Fun and Rock Until you Drop
Re: Mini Mill Drawbar Problems.
« Reply #9 on: March 11, 2009, 05:49:06 AM »
What a Good idea John  :thumbup:  :bow:

Yes I can see how that would work very neat and tidy and with some finesse  :headbang:

I'll try Tracey tools to see if they do a suitable left hand threaded tap, we can pass it rounds the lads.

Cheers

Stew


A little bit of clearance never got in the road
 :wave:

Location:- Crewe Cheshire

Offline Darren

  • Madmodder Committee
  • Hero Member
  • *****
  • Posts: 3795
  • N/Wales
Re: Mini Mill Drawbar Problems.
« Reply #10 on: March 11, 2009, 08:22:20 AM »
Sorry chaps, I'm having trouble picturing this idea..try as I might  :doh:

Any chance of a quick sketch?  :worthless:
You will find it a distinct help… if you know and look as if you know what you are doing. (IRS training manual)

Offline sbwhart

  • Global Moderator
  • Hero Member
  • *****
  • Posts: 3530
  • Country: gb
  • Smile, Be Happy, Have Fun and Rock Until you Drop
Re: Mini Mill Drawbar Problems.
« Reply #11 on: March 11, 2009, 09:08:42 AM »
Think of a turn buckle.
 :scratch:

Stew
A little bit of clearance never got in the road
 :wave:

Location:- Crewe Cheshire

Offline Darren

  • Madmodder Committee
  • Hero Member
  • *****
  • Posts: 3795
  • N/Wales
Re: Mini Mill Drawbar Problems.
« Reply #12 on: March 11, 2009, 09:11:00 AM »
Right.... :scratch:

I'll look it up and see if I can find anything...... :ddb:
You will find it a distinct help… if you know and look as if you know what you are doing. (IRS training manual)

Offline Darren

  • Madmodder Committee
  • Hero Member
  • *****
  • Posts: 3795
  • N/Wales
Re: Mini Mill Drawbar Problems.
« Reply #13 on: March 11, 2009, 09:14:02 AM »
OK, left / right hand threads,

I just can't picture how this helps? Call me simple, but the penny hasn't dropped

You will find it a distinct help… if you know and look as if you know what you are doing. (IRS training manual)

Offline sbwhart

  • Global Moderator
  • Hero Member
  • *****
  • Posts: 3530
  • Country: gb
  • Smile, Be Happy, Have Fun and Rock Until you Drop
Re: Mini Mill Drawbar Problems.
« Reply #14 on: March 11, 2009, 09:26:50 AM »
The threads work together making the rod longer or shorter:- shorter tightens the tool in the taper, longer will push the tool out:- ell-presto.  :ddb:

Stew
A little bit of clearance never got in the road
 :wave:

Location:- Crewe Cheshire

Offline Darren

  • Madmodder Committee
  • Hero Member
  • *****
  • Posts: 3795
  • N/Wales
Re: Mini Mill Drawbar Problems.
« Reply #15 on: March 11, 2009, 09:31:11 AM »
Yes, but what does it push against when lengthening the drawbar?  :scratch:
You will find it a distinct help… if you know and look as if you know what you are doing. (IRS training manual)

Offline Stilldrillin

  • Global Moderator
  • Hero Member
  • *****
  • Posts: 4972
  • Country: gb
  • Staveley, Derbyshire. England.
Re: Mini Mill Drawbar Problems.
« Reply #16 on: March 11, 2009, 09:46:11 AM »
Great idea John......    :clap:

Tap the top part of the spindle with a left hand thread.
Make a new drawbar where the bit under the nuts has the same LH thread

JS.

Darren,

I think John means to thread the existing bore at the top of the spindle, with whatever is appropriate, (probably 16mm).

This will then draw in / eject.......

I think!

David.
David.

Still drilling holes... Sometimes, in the right place!

Still modifying bits of metal... Occasionally, making an improvement!

Offline sbwhart

  • Global Moderator
  • Hero Member
  • *****
  • Posts: 3530
  • Country: gb
  • Smile, Be Happy, Have Fun and Rock Until you Drop
Re: Mini Mill Drawbar Problems.
« Reply #17 on: March 11, 2009, 09:49:29 AM »
Thats it David  :thumbup:

I think we need a crap o cad  :lol:

Stew
A little bit of clearance never got in the road
 :wave:

Location:- Crewe Cheshire

Offline Stilldrillin

  • Global Moderator
  • Hero Member
  • *****
  • Posts: 4972
  • Country: gb
  • Staveley, Derbyshire. England.
Re: Mini Mill Drawbar Problems.
« Reply #18 on: March 11, 2009, 10:29:17 AM »
Thats it David  :thumbup:
I think we need a crap o cad  :lol:
Stew

Talking of C o C.......

This was my idea.

A piece of steel bar milled away to clear the tool / arbor.

Standing on m/c table, with the spindle nose resting on top.

This will save the spindle bearings from any gbh......


David.
David.

Still drilling holes... Sometimes, in the right place!

Still modifying bits of metal... Occasionally, making an improvement!